Brined Smoked Turkey Legs
Smoking-Meat.com is supported by its readers. We may earn an affiliate commission at no extra cost to you if you buy through a link on this page.
Read this article without ads
Welcome to this edition of the Smoking Meat Newsletter where we will be discussing how to smoke turkey legs.
Every year I see these at the local fair and I cringe like a vampire at sunrise when I see the price since I know how easy it is to make a batch of these and how much better they can be when made at home.
I have a recipe that I've been using for a while and lots of other folks have used it as well and told me that it is the absolute BEST they've ever tasted and I plan to share this recipe in great detail right here in this newsletter.
I will admit that the ones I usually find locally in the grocery store and supermarkets are not as big as the big boys that have at the fair but then, I see a lot of those big ones in the trash only half eaten. I think the smaller ones are probably more tender and they are “better” sized for the average person.
I also did this batch at a higher temperature to try and get the skin more crisp which you can always do with poultry and it handles it perfectly.
Without further rambling.. let's get started!
Here's what you'll need
- 6 Turkey Legs (or more)
- Extra Virgin Olive Oil (EVOO)
- 1 batch of Jeff's original rub
- Foil
How to Prepare Turkey Legs for Smoking
I love to brine the turkey legs and if you've never done this, it's a simple process and I'll explain what it is and how to do it. Needless to say, the resulting product makes it worth the time and the effort. I recommend it for any poultry.
Brining is in it's most basic form just the act of soaking meat in a salt/water solution. In an effort to equalize, the salty water will be drawn into the meat. Thus you can add other flavors, spices, fruit juices, etc. into the water and it will be drawn into the meat as well.
But it's not just about flavor.. it's about the moisture content as well. During the cooking process in the smoker, you have to depend on the fact that there WILL be a certain amount of moisture loss. Less than there would be at higher temperatures but still a loss.
During brining, due to the water being drawn into the meat, this adds extra moisture to the meat and even though there is moisture loss, you are left with more moisture than you would have had if you did not brine.
For this reason, when the meat is brined, it tends to be a lot more juicy and more flavorful.
We could get all scientific about brining but you don't have to understand why it works so well to do it. Just do it!
Brining the Turkey Drumsticks
The Brine Solution
- 1 gallon of water
- 1 cup of Kosher salt
- 3/4 cup brown sugar (dark is better but light will work)
- 2 TBS garlic powder
- 2 TBS onion powder
- 2 TBS red pepper flakes
- 2 TBS Jeff's original rub
- 2 TBS hot sauce (I like Tabasco brand but you can use your favorite.. be sure to adjust amounts according to how hot it is)
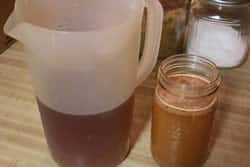
Fill a gallon sized pitcher with 1/2 gallon of water. Add the kosher salt and stir until salt is dissolved and water is clear. Add brown sugar and stir until it is dissolved.
Step 2 involves heating some of the ingredients of the brine to bring out the oils and help the flavors to meld together. You can do this using a saucepan or the microwave. I used the microwave this time.
Microwave: Put 1 quart of water into a quart jar or other microwave safe bowl or container and add the garlic/onion powder, red pepper flakes, jeff's rub, and Tabasco to the water. Stir to mix then heat until it is very hot (not necessarily boiling). The heat will bring the oils out of the pepper flakes and help to meld the other flavors together. Cover the top of the jar or container and allow the mixture to steep for about 10 minutes or so.
Stove top Method: Put 1 quart of water into a sauce pan and add the garlic/onion powder, red pepper flakes, Jeff's rub, and Tabasco to the water. Stir to mix then heat until it is very hot (not necessarily boiling). The heat will bring the oils out of the pepper flakes and help to meld the other flavors together. Allow the mixture to simmer just shy of boiling for about 15 minutes or so.
Add the heated mixture to the 1/2 gallon of brine that you already made.
Add 1 quart of ice cubes or just add ice until the water level is at the 1 gallon mark and stir gently until the ice is melted. The brine should be cold enough to use now.
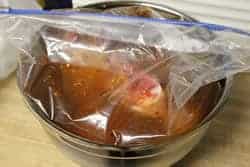
Place the turkey legs into a very large ziploc bag or a large bowl with a lid will also work. Pour the brine over the turkey legs making sure that they are completely covered.
Note: I use a 2.5 gallon ziploc down in a large mixing bowl. The bowl is a safety measure in case the ziploc leaks.
Press most of the air out of the top of the bag and zip it closed making sure that all of the turkey legs are submerged in the liquid brine.
Place the bowl/ziploc in the fridge for about 8-10 hours or overnight.
After brining, rinse the turkey legs well under cold water.
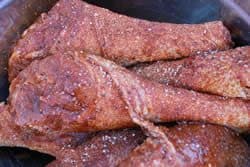
Preparing The Meat For Smoking
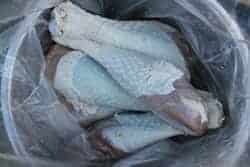
Place the brined and rinsed turkey legs down in a large ziploc bag (I use the same bag that I brined them in but I rinse it out a few times first).
Pour about 1/2 cup of extra virgin olive oil over the turkey drumsticks and shake/roll the bag around a bit to coat the legs with the oil.
Pour about 1/2 cup of Jeff's rub down in the bag and once again, shake or roll to coat the rub all over the turkey.
You can also just lay the turkey legs out into a pan or bowl and oil/coat with rub by hand if that is easier for you. The oil just helps the rub to stick better.
Once the drumsticks are coated with the rub leave them be or place them in a bowl and place them in the fridge if it's gonna be a little while before you smoke them. At any rate, they are now ready to be smoked into delicious goodness!
How to Smoke the Turkey Legs
You can make these in ANY smoker whether it's electric, charcoal, gas or wood. As long as you have heat and good smoke.. it will work. Rather than trying to tell everyone how to smoke these in every individual type of smoker, I am in the process of writing instructions for popular smoker models.
The following list should give you an idea:
- Bradley 4-Rack Digital Smoker – An electric smoker that is fully automated and keeps the temperature where you set it. It also keeps the smoke flowing via an automated mechanism that moves a new wood puck into the smoker every 20 minutes. See this smoker and read reviews on Amazon.com
- Weber Smokey Mountain 22.5 Smoker – the king of charcoal water smokers. Add charcoal, water and wood and you're good to go for several hours. 3 dampers on the fire bowl allow you to dial in the air perfectly for maintaining perfect smoking temperatures. See this smoker and read reviews on Amazon.com
- Big Green Egg – Ceramic cooker that uses charcoal. Add lump charcoal, light it and add some wood.. set the top and bottom vent and you're good to go for hours on end due to the thick walls that hold heat incredibly well.
- Great Outdoors Smoky Mountain Propane Smoker – A propane smoker that works exceptionally well. I have had mine for more than 8 years and it still works great. See this smoker and read reviews on Amazon.com
- More smokers on the way..
I wanted these to be super smoky so I used my new Meadow Creek reverse flow smoker. I really just wanted to spend the day out by the smoker tending the fire and enjoying the perfect weather so I set up my lawn chair by the smoker, hauled in pecan wood from the barn and I was set.
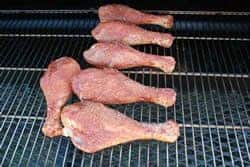
Get your smoker going and maintaining about 250-275 degrees before placing the turkey legs directly on the grate.
Note: These are a great candidate for the Bradley racks which are about 11×13 inches and work great as a way to place meat directly on the grate while still being on an “easy to transport” carrying device.
Once the smoker is holding steady and smoke is coming out of the top vent or chimney, place the turkey legs in the smoker right on the grate leaving a little space between each one to allow the smoke to completely envelope the meat.
At the higher smoker temperatures that I am recommending the turkey legs will only take about 2 to 2.5 hours to reach 165 degrees F. If you opt to cook them at normal smoking temperatures (225-240) or you are doing other things at the same time that cannot handle the higher temps then expect them to take 3.5 to 4 hours.
Be sure to use a digital probe meat thermometer such as the Maverick ET-732 or if you are a nerd/geek like me, you might enjoy the iGrill which monitors the temperature of the meat and/or the smoker and send the readings via long range bluetooth to your iPhone, iPad or Android devices.
Both of these devices are remote which means you leave the thermometer and the sending unit at the smoker and you can carry the receiver or IOS/Android device with you in the house or even when you are working around the yard. You'll know what the smoker temperature and meat temperature is at all times.
Finishing the Turkey Legs
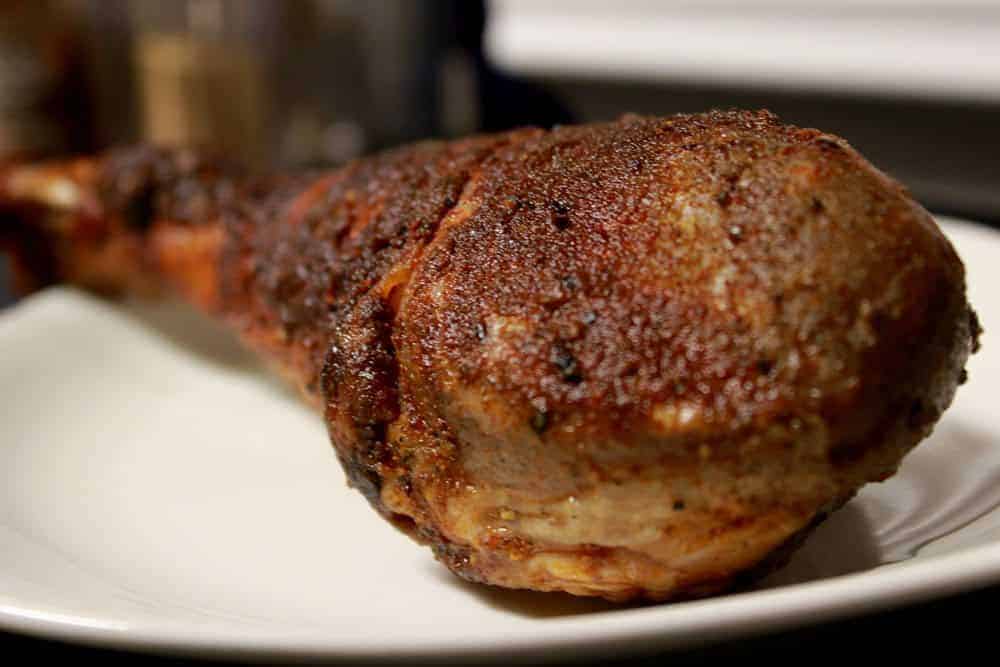
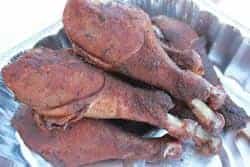
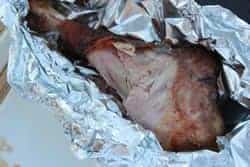
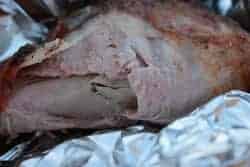
When the internal temperature of the meat reaches 165 degrees, they are done. Remove from the smoker right away and wrap in foil individually for that “state fair” experience at home.
Serve immediately or they can easily be reheated later.
How to Reheat
These will heat up really well.. put them in the oven wrapped in foil at 275 degrees F for 30 minutes or until they are as warm as you like them.
Summary
- Make brine according to directions above
- Brine turkey legs for 8-9 hours or overnight
- Rinse with cold water
- Season with Jeff's rub or Cajun seasoning
- Prepare smoker for cooking at 250-275 degrees F
- Smoke cook turkey legs for 2 to 2.5 hours or until they reach 165 degrees F
- Wrap finished legs individually in foil
- Serve immediately or hold in warm oven for a couple of hours (meat must maintain 141 degrees F or higher)


Have had good luck with your recipes until now. Tried these today and found they came out extremely salty even with rinsing before seasoning.
To salty. I brined for 15 hours, out of circumstance. Does five hours make that big of a difference?
8.Serve immediately or hold in warm oven for a couple of hours (meat must maintain 141 degrees F or higher)….. I’ve let these cool and refrigerated them, ate them the next day cold and still loved them. What are the risk when doing this, and would the addition of a teaspoon of Prague powder #1/ 5 lbs help?
Jeff,
i have followed your smoked turkey legs recipe a couple times this fall already with great results and rave reviews. For Thanksgiving, I plan on smoking 6 legs and a split breast. how will the turkey leg brine recipe work for the breast? Thank you.
th
Thank you Jeff for the BEST recipe ever!! I made these for our Father's Day celebration and every person said they were the best turkey legs they'd ever eaten. I also put a chicken in the brine and smoked it along with the turkey legs. It also turned out fantastic! Thanks so much!!
Jeff,
Thanks for your great website and recipes. Your rub has become our "go-to" rub for many of our smoked dishes.
I could use your advice on the following: Last year I purchased a fresh, free range turkey from a local farmer. I only smoked half of it since it was so big and froze the remainder. The breast came out very very good, but the drumstick was incredibly tough. I had to scrape it from the bones and eventually it became turkey soup.
In reviewing this with the farmer, he indicated that his birds have stronger leg muscles due to the fact that they run as they develop, unlike the mass produced birds from the grocery.
I am planning to smoke the other half this weekend and would like advice on how to make the drumstick tender. I've considered removing it from the rest of the bird and simply foiling it from the start, or shortly after it takes on some smoke.
Any thoughts?
Thanks Jeff,
Joe