Mango Habanero Smoked & Grilled Chicken
Smoking-Meat.com is supported by its readers. We may earn an affiliate commission at no extra cost to you if you buy through a link on this page.
Read this article without ads
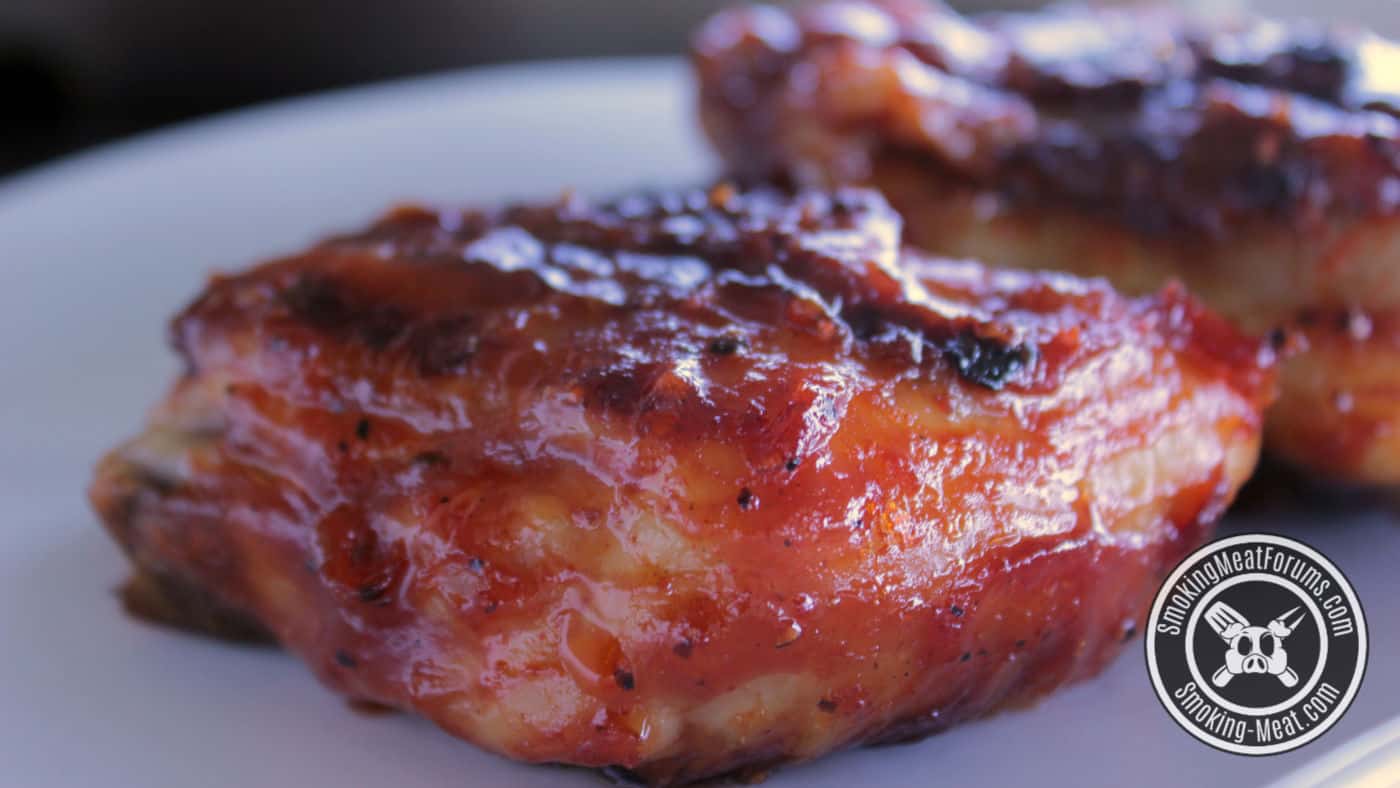
This mango habanero smoked and grilled chicken is a fine example of the best of these two worlds brought together in such a way so as to produce something quite spectacular.
I have also supplied direction below for smoking this a little lower and slower if that's what you want to do and/or if you don't have a grill.
- Prep Time: 2 hours 30 minutes including brining
- Cook Time: 3 hours 30 minutes
- Smoker Temp: 250°F
- Grill Temp: Medium High
- Meat Finish Temp: 175-180°F
- Recommended Wood: Hickory
- 12-14 chicken thighs and/or drumsticks (skin on)
- Jeff's original rub
- Jeff's barbecue sauce
- Large foil pan(s)
- 64 oz mango juice (or juice mixture containing mango)
- 1/2 cup kosher salt
- 1 or 2 habanero peppers
- 1 mango, diced
Wet brining in its most basic form is simply soaking meat in a water/salt solution for x number of hours in order to make it more juicy and/or flavorful.
Without getting into the science too much, when you mix 1 cup of coarse kosher salt per 1 gallon of water or other liquid together and then put poultry (or other meats) down in that mixture, the mixture ends up inside the meat. I call it magic but there is a lot of science that goes into exactly how that happens.
This makes the meat more flavorful depending on what you add to the brine and the salt that gets in, helps to bring out the natural flavors of the meat. It's a really good thing!
How does brining make the poultry more juicy you might ask.. well, poultry has a certain amount of moisture within the meat and when you cook it, some of the moisture remains but much of it cooks out.
Brining, via a process called denaturing, allows the protein strands to relax and unwind a little which helps moisture to get down into the chicken where it gets trapped. During the cooking process, even though a lot of the original moisture cooks out, since you added even more, you are left with a lot more moisture making the meat a lot more juicy.
And what about the “making it more flavorful” part? Well, same principle. If you use, say, Tabasco as some of your liquid then, you will notice after brining and cooking that you can taste the Tabasco deep within the meat. Some of the salt and whatever is in that brine gets pulled deep into the meat along with the flavors that are present.
It's outstanding and I rarely cook chicken, turkey, or any poultry for that matter, without brining it.
Brining is just too easy and the payoff is too big for me to skip it!
One last point to answer a question that I know all of you are wondering about.. how does it not end up too salty? This is where it's important to follow the recommended brine times because the brine mixture that I use is somewhere around 6% salinity and if that much salinity was inside the chicken, yes, it would be too salty.
Fortunately, osmosis happens over an extended period of time and we leave it in just long enough to do it's job but not get overly salty.
It will be slightly salty and I mean very slightly using the ratios that I recommend but not so much so that I change the salt content in the seasoning or in the gravy or any other part of the meal. It is simply not an issue if you do it the way I recommend and I've been brining poultry for many years now.
Mix 64 oz of the mango juice or juice mixture with 1/2 cup of coarse kosher salt in a plastic or glass pitcher.
Stir until the salt dissolves.

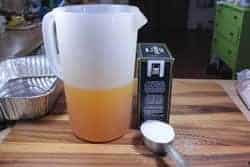
Place the chicken into a very large zip top bag and pour the brine over the chicken.
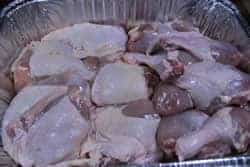
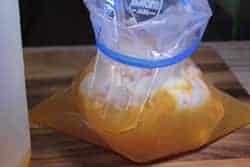
Seal the zip top bag while pressing out most of the air and place the bag in the fridge for about 2 hours.
Note: I recommend placing the bag of chicken/brine into a foil pan or large bowl to contain any possible leaks.
This is a great thing to do while the chicken is brining.
Ingredients
- 1 cup of my barbecue sauce
- 1 mango, cubed
- 1 habanero
- 3/4 cup of mango juice or juice mixture containing mango (I just stole this much from the 64 oz container used for brining and replaced what I took away with water to save having to buy an extra bottle of juice. You can cheat a little like I did or just buy an extra bottle of juice.
Mix 1 cup of the barbecue sauce, 1 mango (about 1 cup) and 3/4 cup of mango juice together.
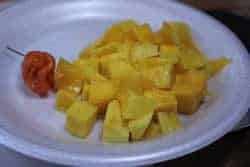
Simmer the sauce on low heat until the mango starts to soften and break up some.
This is where it gets fun!
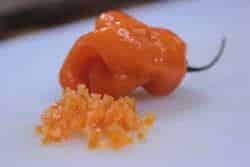
Add the mango sauce to a food processor with 1 habanero (seeds and veins removed) and pulse it until the mixture is fairly smooth.
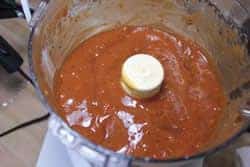
Caution: Habanero peppers are quite hot and what I like is not necessarily what you'll like so I highly recommend that you add the habanero into the mixture gradually and take small taste tests each time to ensure that you get it right for your taste buds.
Also be sure to wear gloves as you do not want to get the habanero on your hands, eyes, nose, etc. IT WILL BURN!
I only added 1 habanero since we had kids eating but I think 2 habaneros would have been perfect for me and I'm not even a chili head.
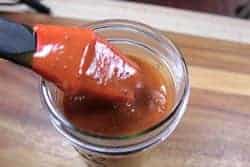
This will make somewhere around a pint of mango habanero sauce depending on how many times you taste it and how well you scrape out the food processor when you are done.
Once the chicken has brined for about 2 hours, remove the chicken from the fridge. No need to rinse but you can if you are so inclined.
Lay the chicken onto paper towels to drain and while they are laying there, pat the top and sides with a paper towel to help dry them.
Ultimately we want the chicken skin to have a good bite-through texture and drying them out some before you place them on the grates will help.
To REALLY dry the skin, you have to place it in the fridge uncovered, preferably on a rack that holds it up off the bottom, for 4+ hours to dry and tighten the skin before adding the seasoning. If you have the time, you should try it.

We want to place Jeff's original rub on the meat itself rather than on the chicken skin and in order to do that, we have to pull back the skin so we can get to the meat.
This is not difficult to do and it also gives you a chance to get rid of any extra fat that might be under or around the skin.
The thighs are a little easier but on drumsticks, you can simply pull the skin down away from the larger end.


Dry the underside of the skin as well as the meat with a paper towel once it's pulled back.
My original rub is so good on chicken.
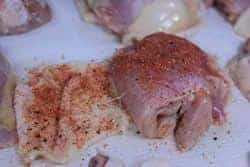
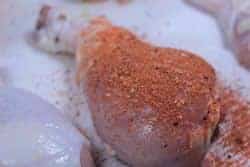
Once seasoned, pull the skin back up around the meat where it was originally.
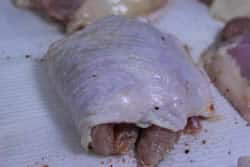
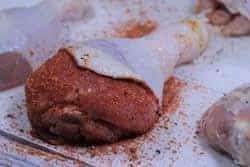
Yum!
We are now ready for the smokin' and the grillin'!
Note: You can cook these on whatever grill you have. This tutorial uses a gas grill but if you want to use a Weber charcoal grill or even a hibachi, you can make it work by placing the coals on one side and then placing the chicken on the side of the grate opposite the coals. You will have to experiment to figure out how many coals it takes to maintain 250°F with the lid closed.
To get any gas grill ready to cook, you simply:
- Light all of the burners
- Make sure the grates are clean using a wadded up piece of foil. (I do not recommend using a traditional wire grill brush as you can leave small pieces of the brush on the grates which can find their way into the food)
- Wipe some cooking oil onto the grates to control sticking.
Since we are wanting to SMOKE the chicken for a while at a low temperature on the grill, we will turn all of the burners off except for one. My grill has 4 burners so I left the one on the far right on low and turned all of the others OFF.
If you have 3 burners or only 2.. it's still the same thing. Leave one burner on the side ON and all of the others go OFF.
I clipped one of the probes from my digital probe meat thermometer to the bottom of the warming/overflow grate so I could get a good read on the actual temperatures. Grill thermometers are renown for being off by as much as 50 to 100 degrees so I just don't trust them.
If you have a way to verify the actual temperature, it's a great idea.
To get some smoke, you can use a wood chip pack like I've demonstrated HERE or you can use an Amazen pellet smoker.
The device, once filled up and lit, can produce smoke for up to 11 hours depending on the particular size that you are using.
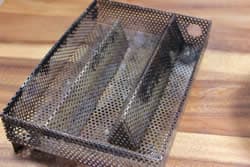
You simply fill it full (or partially full depending on how long you are needing smoke) of pellets.
I had a few hickory pellets in a bag and I finished them off by filling 1-1/4 rows.
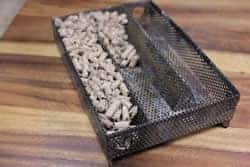
With a small butane torch, I held the flame to the pellets via the hole on one end until it became a bright red cherry and was flaming real good.
The flame went out a few minutes later.
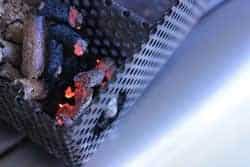
See the smoke coming out of that thing? Beautiful!
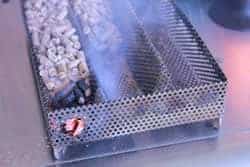
So why is this device so wonderful you might ask?
It is a great way to create smoke without creating a lot of heat. Perfect for cold smoking and perfect for adding some smoke to whatever you are grilling as well.
Oh.. and by the way, if you are interested in owning one of these, they are not expensive.
Check these out at https://www.smoking-meat.com/amnps
Just sit it right on the grate, the side that had the burners OFF and preferably next to some holes in the side of the grill where it can get a little air. Like any other burning thing, it has to have a little oxygen to keep it going.
They also have a tube smoker which works in the same way but takes up way less space and is perfect for using on the grill.
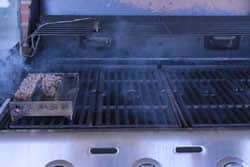
So now we have 250 degree heat on the grill, plenty of smoke so where is the meat?
Place the chicken on the side of the grill that has the burners OFF. You can put the chicken fairly close together to conserve space as long as there is just a little bit of air space between them to allow the smoke to get to everything.
You will notice that all of the seasoning is on the meat and under the skin. None is on the skin itself.
We will add some sauce to the outside later but this means the rub will add a lot of flavor but won't burn on the hot grill since it's UNDER the skin.
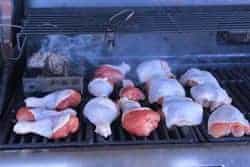
Let the chicken slow smoke for about 2 to 2.5 hours keeping the temperature at about 250 degrees.
Keep an eye on the internal temperature of the chicken as well.. once it gets to about 145°F, it is ready for the higher heat. This could happen sooner than mine did depending on weather, wind, and other variables.
Remove the Amazen Smoker from the grill grate.
Turn all of the burners on and all the way to HIGH for a few minutes to heat the grill up quickly.
Move the chicken to the side where the burner has been on since it will be the warmest starting out.
Give the chicken a few minutes to start sizzling then brush on your first coating of the mango habanero sauce.
Just a light coat will do.
Once the grill has heated up considerably, turn it down to a medium setting.
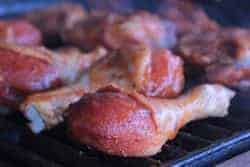
Keep a close eye on the chicken and when it starts to get some good marks on the bottom it is time to flip it over.
Note: Mine was ready to flip in about 15 minutes. Then another 15 minutes or so and they were done for a total grill time of 30 minutes
Once flipped, baste this side as well with the mango habanero sauce.
Once again, wait for some good grill marks, not too dark but just right.
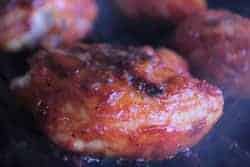
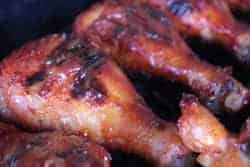
Flip the chicken once again and brush on more sauce for that final finish.
Check the chicken with a Thermapen if you have one and when they reach about 175-180°F or so, move them to the warming rack or put them in a pan covered with foil to keep them hot but to stop the cooking.
Note: normally chicken is cooked to about 165 degrees but I like to grill these thighs and legs to a little higher temperatures to bring in some extra tenderness and because they are brined and because they are thighs and legs (more fat in the meat) they can handle it without drying out.
Suppose you have a pellet grill/smoker like the Camp Chef Woodwind or even a charcoal grill like the Weber Smoky Mountain (WSM) and you want to smoke them on that instead of using your grill as a smoker.. well, here's how you modify this recipe for that:
Brine, dry and season as instructed and then setup your smoker for cooking at about 250°F with indirect heat. If your smoker uses a water pan, I recommend leaving it dry to promote a better texture on the skin.
When the smoker is ready to go, place the chicken on the smoker grate and close the door/lid.
You may want to monitor the chicken with a leave-in thermometer such as the ThermoWorks Signals or you can just check it periodically with a Thermapen.
Let the chicken cook until it reaches about 145°F and then you have a few options–
- Leave it on the smoker to finish
- Move it to a grill for a nice high heat finish
- Crank up the heat in your smoker to about 325°F
- Finish under the broiler of your oven
You'll want to start brushing on some of the mango habanero sauce at this point while the chicken continue to cook. Several thin layers are better than one thick layer.
When the chicken reaches 175-180°F it's finished and can be removed from the grill.
Be ready to serve the chicken just as soon as it gets finished.
One of my guests said, “Wow, how did you get the chicken so juicy!” I just smiled.
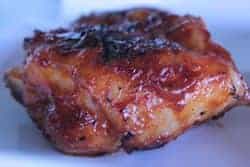
I love to layer on flavors and especially when I use components that compliment the meat without overpowering it. I could taste my original rub on the meat and I could taste the mango habanero sauce on the outside. I could also taste the mango juice on the inside of the chicken from the brining process.
All of these components worked flawlessly together to make a meal that still has me drooling just thinking about it.
I recommend you try this at your house.. and very soon!
Mango Habanero Smoked & Grilled Chicken
Ingredients
- 12-14 chicken thighs and/or drumsticks (skin on)
- Jeff's original rub
- Jeff's barbecue sauce
- Large foil pan
- 64 oz mango juice (or juice mixture containing mango)
- ½ cup kosher salt
- 1 Habanero pepper
- 1 Mango (diced)
Instructions
- Mix 64 ounces of mango juice with 1/2 cup of coarse kosher salt in a large plastic or glass container and stir until salt is dissolved.
- Place the chicken into a large zip top bag and pour the brine mixture over the chicken to cover and seal closed. Place in fridge for 2 hours.
- While the chicken is brining, make the mango habanero sauce by placing 1 cup of Jeff's barbecue sauce, 1 diced mango (about 1 cup), 1 habanero and 3/4 cup of mango juice into a sauce pan. Simmer over low heat until mango begins to soften and break up.
- Add the sauce mixture to a food processor and pulse until it is semi-smooth. Set aside.
- After brining, lay the chicken onto paper towels to drain. Pat with paper towels to dry completely then pull the skin back to season the meat. Replace the skin after seasoning.
- Set up gas or charcoal grill for indirect heat and cook chicken over the coolest area using hickory chips wrapped in foil for smoke.
- When chicken reaches approx. 145°F in the center, move the chicken directly over heat and begin mopping with the mango habanero sauce every few minutes until the chicken reaches about 175°F in the thickest part.
- Remove the chicken from the grill and serve immediately.


Smoked this in my WSM and finished on high heat on my gas grill. I was expecting the sauce to be much spicier but this recipe is very tasty and the entire family loved it. I’ll be making this one again.
Smoked this in my WSM and finished on high heat on my gas grill. I was expecting the sauce to be much spicier but this recipe is very tasty and the entire family loved it. I’ll be making this one again.
I prefer the breasts. Hints on the recipe to keep them moist
The trick to keeping chicken breast moist and tender is to brine in a solution of 1 gallon of water to 1 cup of coarse kosher salt. The salt is added to the water and stirred until it dissolves. The chicken breasts are submerged in the brine for about 2-4 hours where the salty brine finds it’s way into the meat of the chicken trapping water/moisture inside.
As a side note, the chicken does not end up overly salty.
When the meat is in the smoker or on the grill, it still cooks out some of that water but since we added more, it ends up juicier than it would otherwise.
Another way to end up with juicier chicken breast is to remove it earlier than the USDA recommends. I remove most of my own lean poultry from the heat at an internal temperature of 155°F (68°C). To make this safe, it must remain at this internal temperature for 3 minutes to kill off any bacteria. This method is just as safe as cooking it to 165°F (74°C) and removing it immediately.
Both brining and cooking to only 155°F (68°C) yields lean chicken that is super moist.
Hi Jeff … here’s a trick for you when grilling chicken. If you use cast iron grates oil them as usual but before putting the chicken on the grill rub it down completely with half a raw potato. It is amazing and the chicken will not stick at all.
hi i smoke alot at home where there is lots of apple wood, now im mostly in baja sur can i use mango or papaya wood has anyone tried thx smokin tony boulder creek ca
I am pretty new to smoking meats (bought an electric smoker at Home Depot at end of the season mark-down), but so far have had tastey results with ribs and chicken.
I am really curious why it would not work to smoke meats in a foil pan, thus not nearly the mess? Is this ever an acceptable way to smoke meats?
Thanks!
Please put a link on recipes to print just the recipes
Do you have a smoked-chili recipe?
Hi Jeff (or whomever is reading this)..
Just wanted to let you know that for some reason, when I open up and view your very enjoyable emails in my browser I can no longer save it for some reason.. I’m having to “save” the emails themselves………which works of course, just not quite the ideal set up. Were you aware of this and do you have idea why that’s happening? Thanks for a response on this..
Mike
Jeff, have you ever tried brining pork ribs? If you brine pork chops, you would think ribs would be applicable as well, but there seems to be a fairly common thought on the web that it is not necessary and if anything, could have an adverse effect on the ribs. Any thoughts?