Smoked Baby Back Ribs – Tender and Easy
Smoking-Meat.com is supported by its readers. We may earn an affiliate commission at no extra cost to you if you buy through a link on this page.
Read this article without ads
As you may know from reading my posts, I have a “thing” about ribs.. namely pork ribs and to get even more specific with it, smoked baby back ribs! There's a lot to love about these considering they usually have a good bit of meat on them, they cook up in around 5 hours and there's not a lot of fat to deal with once it's all said and done.
The only real complaint I ever get about baby backs is in removing the membrane or in trying to get them fall-apart tender. Well, it's nice to remove the membrane but it's not the end of the world if you don't and I'll show you how to get them as tender as what you find in the restaurant if that's what you're after.
- Prep Time: 15 minutes
- Cook Time: 5 hours
- Smoker Temp: 240°F
- Meat Finish Temp: 195°F
- Recommended Wood: Pecan
- 1 or more slabs of pork baby back ribs
- Jeff's original rub recipe
- Jeff's Barbecue Sauce Recipe (if you like them sticky)
- Heavy Duty Foil
- Thermapen Mk4 (it has a very thin probe that works perfectly on getting between the bones)
Give the ribs a good rinse to remove bone fragments and anything else that shouldn't be there. Pat them dry with a paper towel and lay on the cutting board.
You can also place them down in a deep pan or dish to contain the mess of prepping and seasoning them.
I have so many people that write to me and tell me they have problems removing the membrane and some of them even get so frustrated they are ready to give up on ribs altogether by the time it's all said and done.
I prefer to remove the membrane but it is certainly not worth a lot of time, effort and frustration. If you have trouble with it, just make some cuts across the membrane using a sharp knife. This allows some smoke to get through and is the next best option to removing it.
To remove it more easily, use a paper towel for grip or a pair of catfish skinning pliers works wonders!
Make it easy on yourself no matter what.
I have smoked ribs with the membrane and without the membrane and as far as tenderness, moisture and flavor, there's not a big difference in my opinion.
Worry a lot less about the membrane and worry a lot more about having a great time, enjoying the process and looking forward to eating some good ribs later!
Most baby backs will not have a lot of fat but if they do, spend a few minutes removing any of it that is easy to get to with a sharp knife. I had to remove a little bit on these but I did not obsess about it.
Any extra flaps of meat sticking out? Slice it off and set it aside. These can be seasoned and placed in the smoker with the ribs. The little scraps of meat are usually great snacks in 60-80 minutes.
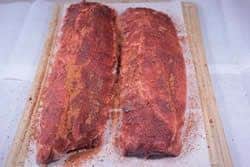
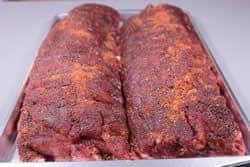
After you have spent some time doing a little prep work to the ribs, get that batch of my original rib rub that you mixed up earlier and sprinkle a good coating on the top of the ribs. Just enough so that you can no longer see the meat under the rub.
Go take a break for about 10 minutes and wait for the few little granules of salt in my rub to start pulling the juice to the surface.
Where's the yellow mustard? Well, I do usually use mustard but in this batch, I am just going to use the juices from the ribs to help the rub to stick. If you want to use mustard you certainly can and It's a great way to create a nice sticky surface for the rub to stick to.
After a few minutes, the top surface of the ribs will start to look wet. This is the moisture in the ribs being pulled to the surface where it will mix with the original rub and create a paste.
After about 15 minutes, I like to give it another good sprinkle of the original rub for good measure and because my rub recipe is high on flavor and LOW on salt, this is not a problem ;-)
After this second sprinkle, go get the smoker ready.. those ribs are ready for their destiny!
Note: I also normally put rub on the bone side of the ribs. This is what I recommend if you remove the membrane. If the membrane is staying on or getting slashed with a knife, just omit the rub on the bone side.
Set up your smoker for cooking at about 225-240°F.
I used pecan smoke for these but use whatever smoking wood that you like and have available.
Once your smoker is preheated and you have selected the wood you will use and it is producing a little smoke, you are ready to place the pork ribs in the smoker.
Place the rack(s) of ribs directly on the smoker grate bone side down, meat side up and quickly close the door or lid to your smoker.
You will leave them this way for about 2 hours.
After 2 hours, either wrap them in foil or place them into a very large foil pan covered with foil over the top. Both options work equally well but the foil pan is easier and a little more leak proof.
Leave them in this configuration for 2 hours in the smoker at 225-240°F.
Please note: This foil stage is where the ribs get super tender. If you do not like super tender ribs then you will need to adjust the amount of time the ribs are in the foil. Some folks only leave them in the foil for 1 hour to create ribs that are less tender.
The ribs have now been in the smoker for 4 hours (2 hours on the smoker grate and 2 hours inside of foil)
It is now time to unwrap the ribs from the foil or remove them from the foil pan and place them back on the smoker grate at 225-240°F for about 1 hour.
This is also a great time to start painting some of my original barbecue sauce on them if you are going for sticky ribs. If you are using my original rub, you won't necessarily need sauce but you may still want some and there ain't nothing wrong with that!
This 3-step method of cooking pork ribs is known as the 2-2-1 method for smoked baby backs. (for spare ribs it's 3-2-1 with an extra hour at the beginning)
For super-tender ribs:
- 2 hours on the grate
- 2 hours wrapped in foil or in a foil pan
- 1 hour unwrapped again and on the smoker grate
For tender ribs that are not quite falling off the bone:
- 3 hours on the grate
- 1 hour wrapped in foil or in a foil pan
- 1 hour unwrapped again and on the smoker grate
I have folks email me all the time, after trying this method of cooking ribs, saying that they will never again cook ribs any other way. It's a great method, it works, it's easy to do and you can even do the foiled part of the process in the house oven if you need/want to.
This method works almost without fail unless the baby backs are extra meaty, but if you need some metrics for making sure that the ribs are actually ready to eat:
- Pork is safe at 145°F internally but pork ribs are perfectly tender for me at 195°F. Feel free to check that with a Thermapen (my favorite hand held digital meat thermometer) in that meaty area right between the bones. This thermometer has a very thin probe that just gets right in there like some of the other thermometers can't do.
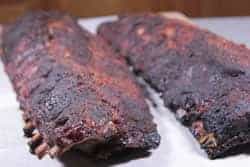
- The bones should be showing about ½ inch or more due to the meat pulling back.
- The rack of ribs should bend nearly in half when held up at one end with a pair of tongs.
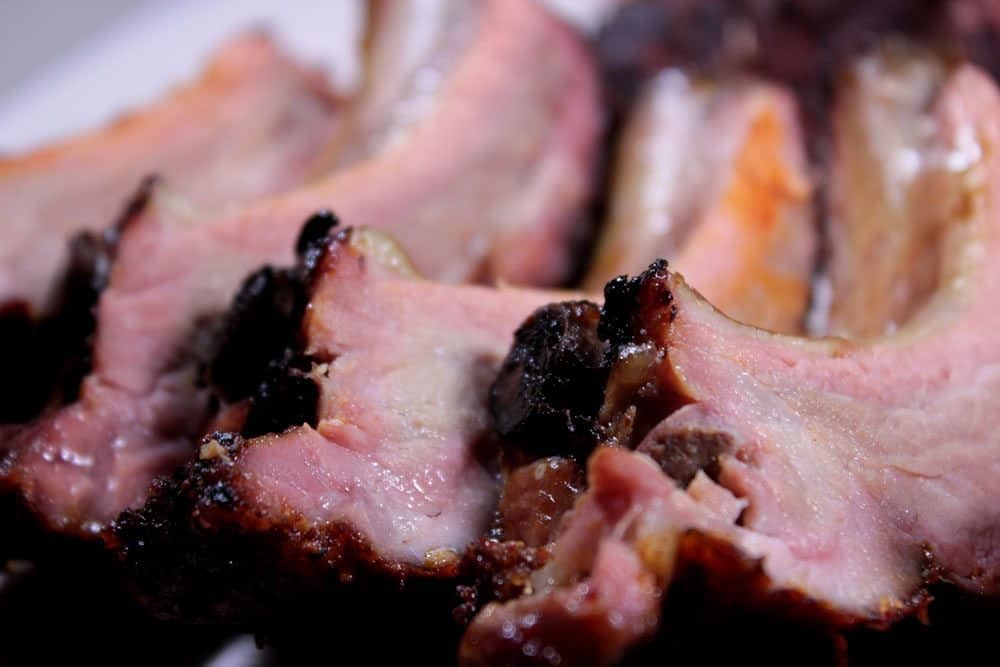
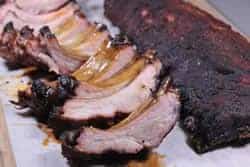
Here's the easy part.. remove the ribs from the smoker, turn the rack upside down on the cutting board and slice between the bones with a sharp knife.
What if my smoker will not cook within the range that you recommend?
If your smoker won't get higher than say 200 or 210°F, that is fine, just know that it will take a little longer. If your smoker won't cook lower than 250°F, well, that is fine also. You'll get your ribs done a little faster than me and that's ok. I do have to let you know that sugary rubs will burn in high heat so if your smoker does not know what low and slow is, you may have to get an hour or so of smoke on them and then finish in the oven at a low temperature rather than burn that lovely crust on the ribs and render them inedible.
Which wood works best for which meats?
Unlike the pairing of wines with meat, which wood works best for a certain type of meat is a very personal thing and will vary greatly from person to person. For smoked baby back ribs, I have used mesquite, cherry, apple, olive, maple, oak and there's probably more I'm not even thinking of at the moment. They were all good. Different but good. I recommend you try lots of different woods with different meats and come up with your own likes and dislikes instead of letting me or anyone else tell you what is best for you.
Oh.. and a word of advice, unless you have a better memory than I do, write down what you've tried and make some notes to help you remember what worked well and what did not.
Printable Recipe
Smoked Baby Back Ribs - Tender and Frustration-free
Ingredients
- 1 or more slabs of pork baby back ribs
- Jeff's original rub ((also called Jeff's Naked Rib Rub) )
- Jeff's Barbecue sauce ((if you like them sticky) )
- Heavy Duty Foil
- Thermapen Mk4 (it has a very thin probe that works perfectly on checking temp between the bones)
Instructions
Step 1: Rinse and Dry
- Give the ribs a good rinse to remove bone fragments and anything else that shouldn’t be there. Pat them dry with a paper towel and lay on the cutting board.
Step 2: Remove Fat/Clean ’em up
- I prefer to remove the membrane but it is certainly not worth a lot of time, effort and frustration. If you have trouble with it, you can skip this step and still have some of the best smoked ribs in town.
- I have smoked ribs with the membrane and without the membrane and as far as tenderness, moisture and flavor, there’s not a big difference in my opinion either way.
- Most baby backs will not have a lot of fat but if they do, spend a few minutes removing any of it that is easy to get to with a sharp knife. I had to remove a little bit on these but I did not obsess about it.
- Any extra flaps of meat sticking out? Slice it off and set it aside.
Step 3: Rub down
- After you have spend minimal time doing a little prep work to the ribs, sprinkle a good coating of my original rub on the top of the ribs. Just enough so that you can no longer see the meat under the rub.
- Go take a break for about 10 minutes and wait for the few little granules of salt in my rub to start pulling the juice to the surface.
- After a few minutes, the top surface of the ribs will start to look wet. This is the moisture in the ribs being pulled to the surface where it will mix with the rub and create a paste.
- After about 10-15 minutes of waiting, I like to give it another good sprinkle of the rub for good measure and because my rub is high on flavor and LOW on salt, this is not a problem ?
- After this second sprinkle, go get the smoker ready.. those ribs are ready for their destiny!
Step 4: Smoke and Heat
- Set up your smoker for cooking at about 225-240°F.
- I used pecan smoke for these but use whatever smoking wood that you like and have available.
- Once your smoker is preheated and you have selected the wood you will use and it is producing a little smoke, you are ready to place the pork ribs in the smoker.
- Place the rack(s) of ribs directly on the smoker grate boney side down, meaty side up and quickly close the door or lid to your smoker. Leave them this way for about 2 hours.
- After 2 hours, either wrap them in foil or place them into a very large foil pan covered with foil over the top. Both options work equally well but the foil pan is easier and a little more leak proof. Leave them in this configuration for 2 hours in the smoker at 225-240°F.
- Please note: This foil stage is where the ribs get super tender. If you do not like super tender ribs then you will need to adjust the amount of time the ribs are in the foil. Some folks only leave them in the foil for 1 hour to create ribs that are less tender.
- It is now time to unwrap the ribs from the foil or remove them from the foil pan and place them back on the smoker grate at 225-240°F for about 1 hour. This is also a great time to start painting some sauce on them if you are going for sticky ribs. If you are using my rub, you won’t need sauce but you may still want some and that is perfectly fine.
- This 3-step method of cooking pork ribs is known as the 2-2-1 method for smoked baby backs. (for spare ribs it’s 3-2-1 with an extra hour at the beginning)
- If you need some metrics for making sure that the ribs are actually ready to eat: Pork is safe at 145°F internally but pork ribs are perfectly tender at 195°F. Feel free to check that with a Thermapen or other digital meat thermometer in that meaty area right between the bones, The bones should be showing about ½ inch or more due to the meat pulling back, and the rack of ribs should bend nearly in half when held up at one end with a pair of tongs.
Step 5: Slice and Eat
- Here’s the easy part.. remove the ribs from the smoker, turn the rack upside down on the cutting board and slice between the bones with a sharp knife.


Well, this started well. I wanted to do 3/1/1. After three hours in the smoker the internal at the thickest part of the meat was about 145. I pulled it, covered the rack pan with foil, and into the oven at 240. After an hour or so, the internal temperature was about 180. I removed foil, brushed with BBQ sauce, and put it back in the oven. The internal temperature has been going down ever since! I will pull it after 1:30 regardless, but I don’t expect it to be as tender as it could be.
BTW, would it help to put a little apple juice in the pan when it goes under foil?
JW
It came out pretty good, probably because it made it to 180. Tender and juicy, but not at the almost fall off the bone level. The internal temperature leveled off at about 160, which tells me don’t pull foil until the meat is at the desired temperature!
JW
I’ve smoked ribs many times in my Traeger and they have come out pretty good but I followed your recipe last night and they were phenomenal! I followed the recipe except for using your rub and sauce (I did purchase your rub on line for my next smoke). The ribs came out juicy and tender, best ribs I’ve smoked so far! I will use this recipe from now on! I used spareribs, next time I’ll do baby backs.
Hi from another Jeff and fellow engineer!
I tried your 2-2-1 rib recipe using 3 lb baby back ribs (2 racks) using a pellet smoker set at 225F. The smoke temperature cycled from 225F to 255F. The ribs were very tasty, but were alittle dry. The final internal meat temp was 190F. I marinated one rack in apple juice overnight prior to smoking, but it didnt make a big difference as far as dryness.
What part of the 2-2-1 method would you change (cook time/temperature) to prevent dryness?
Really liked your Original rub and barbecue sauce!
Jeff, A lot of baby backs nowadays are labeled as “extra meaty” and while this initially sounds like a good thing, what they’ve done is left a lot of the lean loin meat attached. As you probably know, that lean loin meat dries out if you cook it past about 145°F.. this may have been the issue.
I recommend finding baby backs that are more on the thin side as those will turn out much better. In my opinion, St. Louis style ribs are a better option as they resemble the baby backs but have a lot more fat to keep them juicy while they cook.
Question Jeff,, does your book have the recipe for the rub ?
Eric, The recipes are not included in the book. We opted to keep them separate since so many people purchased them prior to the book being published.
I must endorse this recipe. A friends suggested it to me..I followed it and those smoked ribs were just amazing.
I’ve followed this recipe a half dozen times at least and I’m doing them again today for the football game party. I DON’T KNOW HOW YOU CAN GO WRONG WITH THIS RECIPE! They always turn out great. All I have is a beginner Mastercraft, 30″, $199 electric smoker from Amazon. I get the Swift three rack pack of back ribs from Costco. They remove the membrane at the packing plant. THANKS JEFF!!
Jeff…. You’re the best. You’re my go-to guy when I want to smoke…!…
For me, smoking meat is a new endeavor. I have done it well a few times and have struggled a few times. The biggest challenge, it seems for me, is maintaining the smoker temperature at the desired level. Is there trick? I have used two kinds of charcoal, the standard Kingsford brand and then I tried a high-dollar brand that I now believe might not have been worth the money….. Anyway, can you offer advice?
I think I have learned that waiting to add charcoal until the temperature is dropping is an exercise in frustration. By then, it takes a long time to regain the desired temp.
I also am not certain how to manage the air vent into the fire box and the chimney in the cooker…..Thanks, a bunch…!… Jim Wagner in Albuquerque
What changes should I expect if I use meat smoking paper instead of foil?
The ribs won’t “steam” the way they should…and that’s what makes them tender. They have literally fallen apart, on me, after completing this step.
i used this recipe the other day. best and easiest baby back rib I’ve tried.
i can only fit about 3-4 racks directly on the smoker rack in my egg. are you able to stack them? or does any have other options so that i can smoke more racks at the same time?
thanks
I always remove the membrane as I want maximum exposure for rub and smoke. It’s really very simple once you’ve gotten a method that works for you. I have a thin, cheap, flat kabob skewer that isn’t really good for anything else. I work it under the membrane over one of the middle ribs. Once it’s all the way in, work it side to side until you have enough loose to grab with a paper towel and pull. Works great and only takes a minute or two. Also, I never use mustard or any other wetting agent, I just apply my rub the night before and allow it to marinate in the fridge all night. I never foil and get fall off the bone tenderness AND good bark. Takes a little longer, but I always have pulled pork in the smoker as well, so it’s time I’m spending anyway! I notice in your list of woods, you didn’t mention Hickory, that’s my favorite for pork!
Just tried this recipe for the first time. After two hours I noticed dark green spots on the ribs that were on the lower rack. As I wrapped in foil it appeared the green goo was dripping from the edges of all racks thus more visible on the lower ones being dripped on. This must be marrow from the bones I am guessing. I am not sure if this is normal(Ihave never seen it before) but with 3 hours still to go I have lost my desire to eat them. Is what I am seeing normal? There was no discoloration or bad smell when cleaning them.
Just use a dry paper towel. Grab the membrane and pull. Gone….1,2,3….any pieces left, repeat.
I do 2-2-1 method on baby back ribs.I don’t have a problem with removing the membrane. A cut a slab of the ribs in half.where I cut the ribs at I take a paper towel dry and grab the membrane and pull back toward the small end of the rib.pulls right off with no problem.hope this will help out for those who have problems it.
In your recipe directions you state that the smoker should be between 225-240. I am using the Traeger smoker/grill which only increases in 25 degree increments. so would you set the smoker to 225 and use the same times or does the times change since I would be using a lower temperature?
Firm believer in your rub recipe! wonderful flavor and low on salt!
I am glad to hear that the rub is working great for you!
The time difference between 225-240 isn’t negligible but it’s not enough to make a huge difference on ribs cooked using this method. Stick with the prescribed time and if you find they need a little more or less time, you can make notes and adjust next time.
Why just your rub on the meat side? Your other baby back recipe has the same rub on both sides?
How long do you use pecan or mesquite wood when smoking baby back ribs. And what type of wood do you switch to so that the ribs are not to smokey?
As long as you have plenty of airflow into and out of the smoker via the vents, you will never experience over smoked food. If you are worried about it, you can use a milder tasting smoke wood like apple, alder or almost any fruit wood.
How much wood to use at one time varies based on what type of smoker you are using.
Just made your bbq sauce was amazing, will never buy store bought sauce again! Thanks
Hi there. I tried your 2-2-1 rib recipe today, with your rub recipe and your sauce recipe. Let’s just say you are a smoking genius!! I have done a lot of ribs in my Bradley, but those were in a league of their own!! Well worth the cost of the recipes!! Thanks
I made your bacon and Gouda stuffed pork chops. They were outstandingly good. Smoked them with pecan, used my electric smoker, they were done in 1 1/2 hours. Will definitely do them again.
I’ve used the 2-2-1 and 3-1-1 cook for baby backs before with success. However, what do you think of the train of thought that the “steaming” phase dilutes the bark and flavor you establish with the first couple hours? A big proponent of it is the Barbeque Bible guy. I won’t leave a link as I’m not trying to market him, but I’ve read both your stuff, and he is passionate on the no-boiling method. Essentially leaving the ribs to smoke for 4 hours and then sauce for the last. The one time I tested 1/2 my ribs with foil and 1/2 without, and people liked the without foil better. Can’t say it was the best test, but now it haunts me. Which method is better? How can I get it tender without boiling away the bark? I thought of steaming it first (pre-seasoning), then seasoning and smoking. Any other thoughts?
I just used a “variation” of this recipe yesterday on a couple of racks and they turned out great. I would also like to comment on foil. For years, I have used Reynolds “Heavy Duty” foil for my crutching. I would admonish my wife when she handed me the regular stuff. However, for the past two boxes, this foil has been weak and brittle. In the past, I NEVER tore holes in the foil without intent. The last two times I have used it, I tore holes with the corner of a rack of ribs, and punched a hole with my thumb? I sent an e-mail to Reynolds complaining about the poor quality. No response, yet. Just my two cents worth. I used a Bradley Digital 6 rack with an Auber single probes PID. First time with the PID and it sure takes the concern out of the worrisome controller on the base unit!