2-2-1 Ribs on the Big Green Egg Ceramic Cooker
Smoking-Meat.com is supported by its readers. We may earn an affiliate commission at no extra cost to you if you buy through a link on this page.
Read this article without ads
One of the most frequent questions that I get in my email inbox is how to achieve “fall off the bone” tender ribs and while some of our competition friends and judges frown on ribs that are that tender, this is what many rib lovers and barbecue enthusiasts are looking for.. and I'm here to show you how to make that happen using what we call 2-2-1 ribs using baby backs. The spare rib equivalent is called 3-2-1 ribs.
The trick is to get them extremely tender without drying them out and there is a method that we use to make that happen. I will show you how in this issue complete with plenty of pictures to show you how it's done.
I am going to show you how to get “fall off the bone” tender ribs on a ceramic cooker called the Big Green Egg but you can also use these same instructions in all other smokers as well including gas, electric, charcoal and wood smokers using the same temperatures and times.
I highly recommend that you play around with the times in each of the cooking steps below and take careful notes to develop the tenderness and crustiness that is perfect for your family's taste.
What You'll Need
- Baby Back Ribs (loin back ribs)
- French's spicy mustard or regular yellow mustard
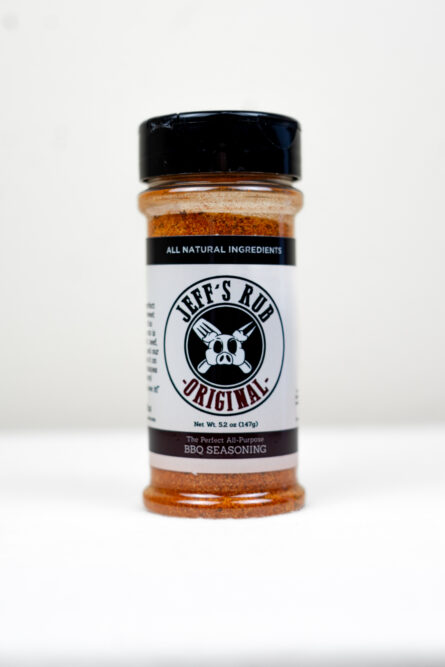
- Jeff's naked rib rub recipe
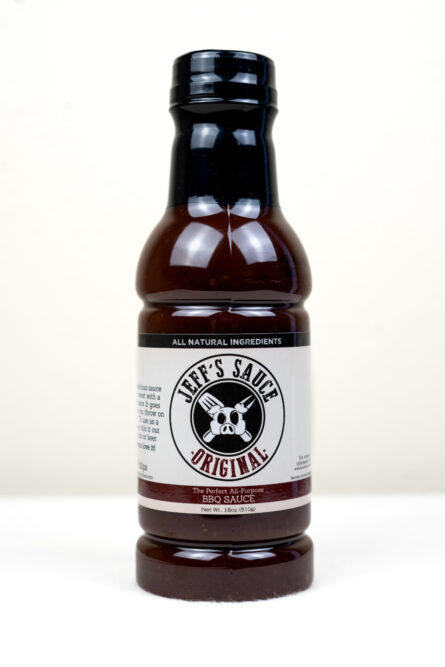
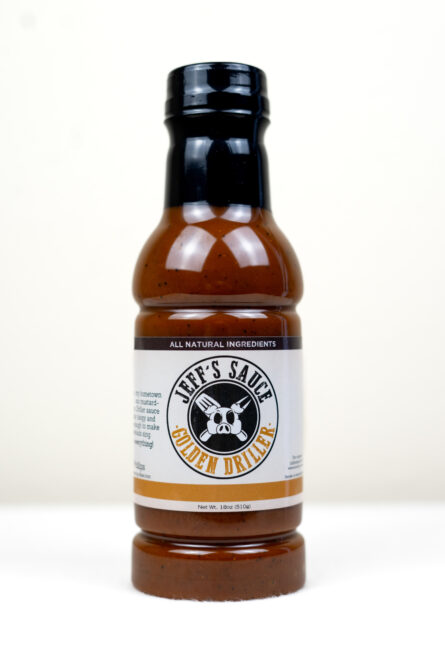
- Jeff's barbecue sauce recipe (optional)
- Heavy Duty foil or large foil pan
How to Prepare
Ribs are extremely easy to prepare making them a great “spur of the moment” thing to cook on the smoker if the mood strikes you.
If you're the kind of person who plans ahead, you can also do the prep ahead of time, wrap in saran wrap and place in the fridge overnight for cooking the next day.
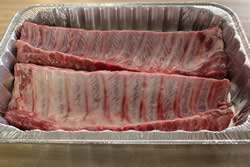
The first step is to remove them from the packaging and place them bone side up on the cutting board or in a pan as I did.
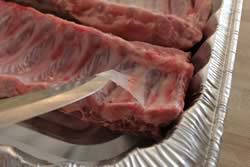
Remove the membrane which is a thick plastic-like skin over the boney part of the ribs. removing this allows the smoke to penetrate the meat better.
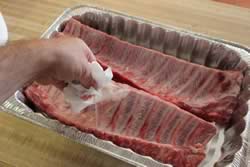
Pry up on the membrane using a knife or other sharp utensil. Then grab the membrane with a paper towel and pull it clean off.
You can also use a pair of catfish skinning pliers if you like.
Now the ribs are ready to season up using my rub.
Simply make up a batch of my original rub or if you're like me, I always have some made up in an air-tight bowl in the freezer. Then I apply a light coating of yellow hotdog mustard on the boney side of the ribs to help the rub to stick real good. This time I chose to use French's spicy mustard instead of the regular and it turned out very well.
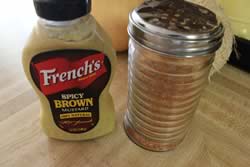
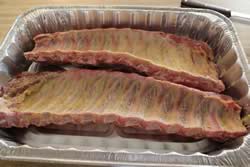
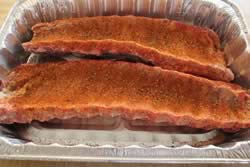
Once the boney or bottom side of the ribs are coated with mustard and rub, I flip them over and do the same with the top side.. light coat of mustard then sprinkle on the rub. Not too thick but enough to cover the ribs real good.
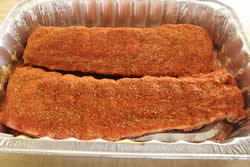
Note: I don't use quite as much of the rub on the boney side as I do on the meaty side but then that's up to you. My rub recipes calls for very little salt and allows you to add as much seasoning as you like for flavor without fear of it being overly salty.
Once the ribs are coated on both sides with rub and mustard, I leave them there to go get the smoker ready.
Preparing the Big Green Egg or Ceramic Cooker for Smoking
Make sure you have plenty of lump charcoal in the fire bowl. I like to have it up to the top of the bowl which is an inch or two above the air holes.

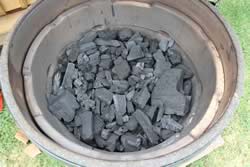
Make a slight impression in the center and place a fire starter. I don't use the Big Green Egg brand but you can use whatever you like. I buy an off-brand at my local department store and they work great. They're basically wax and sawdust and they light quickly and get the coals going within just a couple of minutes. Be sure to use the kind that are designed for barbecue.. some are not and say so on the warning label.
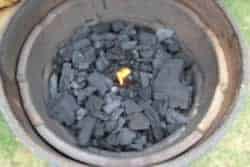
Note: You can also use an electric fire starter which is just a heating element that you bury into the coals and plug it in. It gets red hot and starts the coals within just a few minutes.
Once the fire starter is burning, pile a few larger pieces of charcoal on top of the flames making sure it can get a little air.

Most folks recommend placing soaked wood chips in a spiral pattern on top of the coals but that's just not enough smoke for me. I purchased a chip box casinoplay for this purpose which I place just off center a little and it provides much better smoke in my opinion. I leave the chips dry instead of soaking them. This is a mix of pear, cherry and sugar maple.
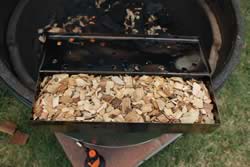
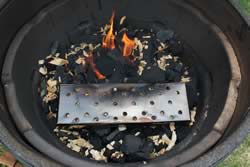
Place the plate setter in place with the legs facing up then place the food grate on top of that.
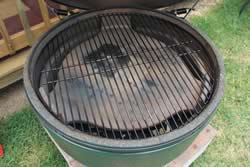
Tip: If you are worried about the drippings on your plate setter, you can place a drip pan on it or some foil which can be easily thrown away when you're finished cooking.
After the coals have been burning for about 7 minutes, close the lid on the ceramic cooker and leave the bottom and top vents all the way open until the smoker reaches about 230 degrees.
While the smoker is heating up, go ahead and get the ribs and place them on the grate bone side down.
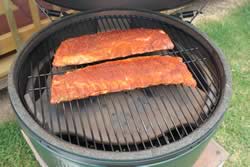
How to Smoke the Ribs Using the 2-2-1 Method
Once the smoker reaches 230 degrees, adjust the vent at the bottom and the top to hold this temperature. For me, that means the daisy wheel at the top is only slightly cracked open at about 20% open and the bottom vent is open about 3/4 of an inch or so as shown in the picture.
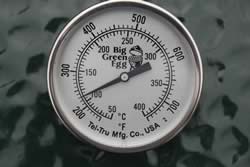
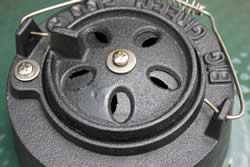
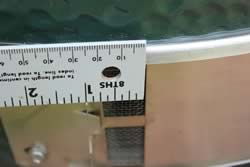
This is where the 2-2-1 method of making the ribs tender really starts. Start a timer or just make note of the time because the ribs will only stay in this current configuration for 2 hours.
Once 2 hours are up, the ribs should be wrapped in heavy duty foil or an easier method is to place them in a large foil pan with foil covering the top tightly. Some folks put apple juice down in the pan to create more steam and flavor but I have found lately that I much prefer to leave the pan or foil dry and let the natural juices do the job. It is this steaming action that super tenderizes the ribs.
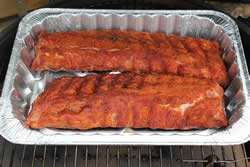
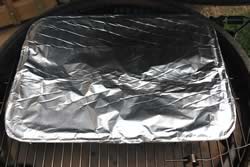
This is the 2nd step in the 2-2-1 method and lasts 2 hours just like the first step.
After 2 hours have expired with the ribs in foil or in the covered pan, remove them from the pan or foil and place them once again directly on the grates for 1 hour.
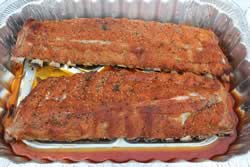
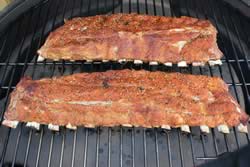
It's hard to see in the pictures but you will notice when they come out of the foil or pan that they look wet and there is no crust to speak of. The last hour on the grates, dries the top a little and develops the crust on the outside that is usually desired.
This is the last step and when the hour is up, the ribs are ready to slice and eat.
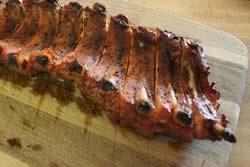
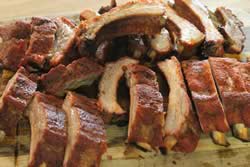
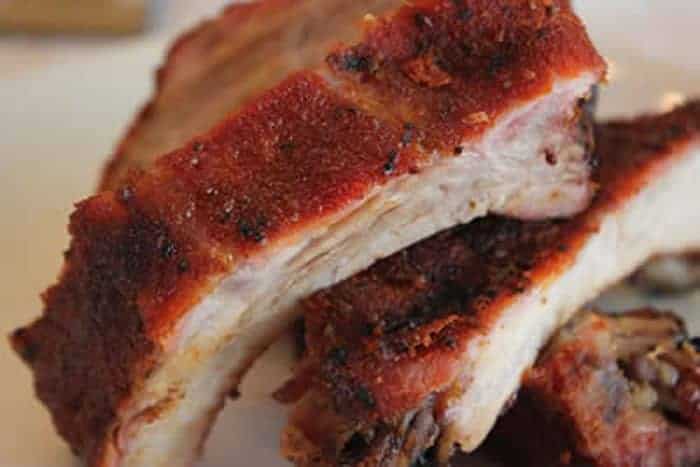
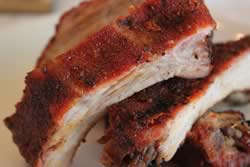
My original rub together with the smoke produces some of the best looking ribs most folks have ever seen!
A Few Words on The 2-2-1 Method
I recommend doing them exactly as I have done them above the first time you do them but if you find that they are too tender or more done than you desire, you can adjust the time in the pan or foil to compensate for this.
The initial 2 hour step is where the smoke flavor gets into the meat, the middle 2 hour step is where the super tenderizing takes place. The last 1 hour step is where the crust develops on the outside.
Reducing this middle step by about 30 minutes will do a lot of good if you find that you want them a little less tender. Also feel free to increase the last step to help the crust to develop better.
Wanna Do Spare Ribs Instead?
That's easy, just add an extra hour to the first step, making them 3-2-1. Once again, feel free to adjust the middle and last step if you want less tenderness or more crust.
Dome Temperature Vs. Grate Temperature on the Big Green Egg
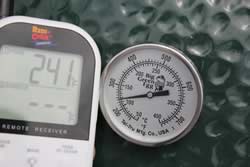
Usually, in most smokers, there is a difference between what the temperature reads in the lid and what it reads at food or grate level so just out of curiosity, I've been watching it. Surprisingly enough, the two temperatures are very, very close to the tune of +- 5 degrees once the temperatures settles out.
As you can see in my picture below, the digital was reading 241 and the dome lid thermometer was at about 243.. very close. I have been noticing this on mine and I have to say that I did not expect this. Both thermometers have been calibrated and are accurate.
Summary
- Remove ribs from packaging and lay bone side up
- Remove membrane
- Light coat of mustard then Jeff's original rub on both sides
- Get smoker ready to cook at 230 degrees
- Place ribs directly on grate boney side down for 2 hours
- Wrap ribs in foil or place them in foil pan and cook for 2 hours
- Remove ribs from foil and place bone side down on grate for 1 hour
- Slice and serve
Notes/Tips
- These can be done in exactly the same way on ANY smoker and even the grill if you like. Maintain 230 degrees or so over indirect heat and follow the 3 steps.
- If you want to decrease the tenderness, reduce the time in the pan or foil.
- Spare ribs are done in exactly the same way by adding 1 hour to the initial step making them 3-2-1 ribs.
- If you like sticky ribs as many folks do, brush my sauce onto the ribs a couple of times during the last hour depending on how “wet” you want them.


You have a lot of great tips in here. I did a big rack on BGE. Truthfully wasn’t sure if I had baby or spare. I did 2 2 1 at 235. I put a little beer in the foil steam with labatt I applied melted honey and butter for the bark hour. I put the rack in foil and then wrapped a towel for an hour in a lukewarm cooler. I made sure the racksat perfectly flat in the cooler to read orb the juices
Not bragging. Still have a lot to learn. But these were my best ever. Probably give credit to the big fat pig rack for starters.
I’ve been trying to get my ribs to “fall off the bone” using my BGE for a while and was never really successful. Until this past weekend. Reading the recipe and reviewing the comments I just tweaked it to my style. Temps for the open cook/smoking was 210-215 for 2 hours undisturbed, and I placed a tray with water on my plate setter.
After two hours I added about a TBSP of butter and a little apple juice and wrapped them tightly in aluminum foil. I placed them back on the BGE for another 3 hours at an increased temp of 250-275.
I removed them from the foil and opened the BGE wide open with the plate setter still installed of course and and cooked them at 420 ;) degrees after saucing them for about 20-30 min until it achieved the crust and caramelization I wanted.
Had to use two sets of large tongs to get them off without falling apart ( had to do this after removing the foil also!) and let them rest for 10 min. Another light saucing and two entire racks were gone in 10 min with folks coming to get seconds. Ribs were tender, juicy and falling off the bone clean.
So just tweak the temps a bit, lower is better in my opinion, and let em cook.
First try with 3-2-1 method on the BGE ended with meat like mush and bones literally falling out when removing from grill. 2nd try at 2.5-1.5-1hrs had the same outcome. Had to use spatulas to remove the rack off the grill. I monitored the temp as close to 230 as possible (great tip on vent openings for 230 degrees). Am I buying junk spare ribs or do I need keep experimenting?
Ted, keep experimenting to get them just the way you like them. try doing a 4-.5-.5 to reduce the foil time to only 30 minutes and if they are not as tender as you like after pulling them out of the foil, just make that last step however long it needs to be to finish them up.
I often cook them for about 6 hours at 220°F in my pellet smoker and get very tender, delicious results without even using foil. The foil is a helper but if you prefer them to be more like a good steak and not “falling from the bone”, you might be better off losing the foil and just cooking them open until they are perfect for you. Like pork butt, they continue to get more tender the longer you cook them. Contrary to popular belief, you can check the meat between the bones with a decent handheld thermometer and when it reaches about 195°F, they should be about perfectly done.
Hey dude awesome pointers and direction. I’m ready to try this but I am wondering about the mustard. Why mustard? Does this contribute to the tenderizing effect?
Thanks again and pumped to try this out.
The vinegar may have a little tenderizing effect however it’s main purpose is that it’s sticky and helps to hold the rub onto the meat. You an also use mayonnaise, honey, molasses, barbecue sauce, jam, jelly, oils, etc.
Thanks for posting the 2-2-1 recipe! This was the first time making back back ribs on my BGE, and I was disappointed in how dry they turned out. I followed the recipe cooking times accurately, but I think I may adjust the timing a bit as suggested by folks on here. The ribs seemed “done” after the 2 hour steam, and perhaps using apple juice will infuse more flavor in the meat. I will definitely try again! Thank you.
I like the idea of doing 2-2-1 but I have a family outing and the want my Ribs. I have an hour drive after I cook them and the grill that they a have is a gas grill. What suggestion does any one have on transporting
them.My first thought is do the 2-2 and then drive and put them on the Gas grill to get the crust. Please note I’ doing 6 slabs of baby back ,which I have done before. No problem with cooking that many with a rib rack. Any suggestions?
Well I am glad I ran into this well thought out article. Ribs have been my nemesis, I mean I have done them for years, but never well enough. I can do killer brisket though.
So I tried this in my Large BGE and it worked great. I am more about method than recipes, I have my own rub and sauce from over the years I love.
The ribs came out about as good (better) than I have ever done them. I followed the 3 steps but timed them a bit differently. It is a matter of preference as you say and the ribs themselves. I will experiment this summer and fine tune this.
As it is just my wife and I, we do not do much brisket or pork butt anymore, just too much meat and I hate to freeze leftovers. Just my 2 cents, thanks.
I recently purchased my medium green egg and was looking to be amazed. Well, everyone was blown away with my first try at the 3-2-1 rib recipe. I soaked the ribs in apple juice overnight and then applied a simple rub over yellow mustard. I modified the timing a bit to be a 3-1.5-0.5 instead of 3-2-1. I was just a bit paranoid about having the meat fall off and then I didn’t want to dry them out on the last step. Im sure they would have been perfect with the 3-2-1, but I didn’t want to dissapoint my guests :) They turned out fantastic and our guests couldn’t get enough of them. The medium egg is perfect for three racks of spare ribs with the meat rack from Lowes. It’s a bit tricky at first to get the temp to stay at 220, but I eventually got it dialed in. I can’t wait for the next rib event :) Thanks for the great tips everyone!! You made me look like a pro. Now what am I going to do with that built in gas grill that the Green Egg sits next to!! I guess I’ll save a bit on my gas bill (and spend it on lump charcoal).
ribs cooked from 3 to 445 @275 degrees .wrapped them up for another hour was done but not as tender as expected ,put them back on unwrapped for another hour
This is a tried and true method for great ribs. Best article I’ve seen on ribs. If you have a BGE, you may want to try chunks of smoking wood directly on the coals–works great. Also, the BGE maintains excellent moisture, so a mop isn’t critical. I mop for flavor. Add a little butter when you wrap your ribs for some incredible flavor. Thanks for the great read, Jeff!
Thank you Jeff , best illustration ever on ribs and the green , I just put my rib’s on and can’t wait for the end result .
I’ve been using a weber Smokey Mountain for 5 years or so but my amazing wife just bought me a Big Green Egg, XL. I’m going to use it for the first time this weekend using the 2-2-1 method described above. I’m so excited!!
Your wife is amazing! What a gift!
Jeff-
I followed the 2-2-1 steps above and ended up with some killer ribs tonight that the entire family enjoyed! Thank you.
Harris
Best ribs I ever made, thank you from my entire family!
I have tried the rub and sauce and they were great. Now I am looking for a great recipe for a brine for deer meat.
Today I tried your 2 2 1 method and I must say it turned out very well for the doneness, tenderness and moistness factors. I do not have a BGE, rather the less expensive egg smoker by AKORN called the King Griller. The only complaint I had was of my own making. I believe I added too many hickory wood chunks. The taste was very good, just a little heavy on the smoke flavor. Thank you so much for the method, I will use it from now on.
Outstanding!! cooked 3 slabs and 6 adults and 4 kids ate them all. Never have i had ribs that were falling off the bone as I moved them. your rubs, your guidance made my first BGE cooking experience a huge hit. Love your ideas and rub and I can’t wait till summer when smoking will be done multiple times a week. The kids normally eat 1 rib and they were eating 3-5 ribs. Thank you for making my life easy
2 2 1 ribs: way way way overcooked. Temps were on the button but timing was not. Ribs fell apart after step two. Were done, with the bend test, after step 1. Guess all eggs are not created equal. Try a total cooking time of around 2 1/2 hours and you won’t have to pick up your ribs with a fork! Competition ribs my ###.
Awesome recipe..Best ribs i ever ate.
You've left our what temps you cooked at. I don't think the temperature of the ribs sitting outside your refrigerator affected your outcome.
I usually do babybacks at 250° on my BGE for 4 hours, St. Louis-cut ribs at the same temp for about 5. After that I either give them a coat of sauce (Jeff's is outstanding) or coat them with some Parkay Squeezable "butter" and brown sugar and let 'em cook for another 20-30 minutes. I never wrap as Jeff suggests because I think it washes the rub off the ribs and gives them a "steamed" taste. Cook 'em low and slow and they'll pull off the bone perfectly, both in presentation and when eating.
In order to test for doneness, pick up the rack with some tongs and see if they bend easily and crack slightly when pushed against the grate. If they're too stiff, put them back on for another 30 minutes and then test again.
The biggest variable I've found for a successful cook with my BGE is the meat itself. I recently cooked up some baby backs I purchased at Costco, and they were dry because the meat was too lean. For BBQing, the meat has to have a good helping of fat on it to stand up to the long and dry cooking process and maintain its moisture. In South Florida, the less expensive stores like Western Beef seem to have better meat for BBQing because they're not as lean as what you'll find at a more upscale store, like Whole Foods. Publix also does pretty well in this department with both ribs and pork butt and I like the way my cooks turn out with their meats.
Good luck with your new BGE! I've had mine for 25 years and I'm still going strong with it. You might want to consider a BBQ Guru DigiQ 2 to help control the temperature in the pit. I bought one a few years ago and now would not cook without it. It makes long cooks for brisket and pork butts so-o much easier and the outcome more predictable. They're a bit of an investment, but imho, worth every dime!
I have had the BGE Large for about a week. Cooked a pork tenderloin first and it was amazing. Pulled it off when meat temp hit 145 and it was like buttah. I next tried the baby backs and cooked just a Jeff describes above including his rub. They turned out exactly as pictured and were great. I cooked using the 2-2-1 method, but found that the meat did not shrink, exposing the bone as much as I would like and I do like the meat to fall-off-the-bone a little more. Before anyone answers, let me say two things:
1. I only let the ribs sit outside the refrigerator about 20 minutes before cooking (so they may have been colder than ideal)
2. My Maverick digital thermometer and the BGE dome thermometer were off +- 20 degrees at times. I decided to use the Maverick's grill temp for cooking.
So, given these two above variables, should I cook more in the second 2-hour, covered time to give more of the fall off the bone rib or during the last hour to have the meat shrink up some more?
thanks for any help.
Scott
have made a lot of baby backs on the BGE and this is pretty close to the steps I follow. I typically only wrap for an hour or 1.5 hours though as I don’t like my ribs literally falling off the bones…..but if you do then thats cool. I also prefer to wrap individually rather than in a pan….I’ve tried both ways and for me it’s always harder to get the bark back after they have been in a pan….
I tried this last night, and the results were great. I was cooking for 2, so I only smoked one rack of spare ribs. No adjustment needed
I've owned a medium Big Green Egg (BGE) for almost 20 years. I just wanted to comment on a couple things Jeff said, particularly regarding generating smoke.
I prefer to scatter large chunks of mesquite (or whatever wood you choose) directly on the coals. With the BGE, I've found that the way to start the fire is to use the same method as Jeff describes above (a firestarter in the middle of the coals) and let the fire slowly expand outward over the length of the smoke. Therefore, I put several chunks right on top of the center and then more moving out to the sides. It's the same pattern as taking a shaker of salt and pouring it on the table. That way, as the fire expands out to the sides, more wood will ignite and release smoke. And I never soak the wood.
With the medium BGE, using a smoke box like Jeff describes above blocks too much of the fire as it expands and plays havoc with the temperatures. In addition, IMHO, this method doesn't release enough smoke to really flavor the meat, exactly what Jeff was trying to achieve.
I too use the Maverick digital thermometer and find the built-in dial gauge to be surprisingly accurate. The beauty of the digital thermometer is that it can be monitored remotely, so I would highly recommend it.
Lastly, anyone who hasn't tasted Jeff's BBQ sauce should ante up the money and get the recipe. It is simply delicious!