Smoked Ribs with Maple BBQ Glaze
Smoking-Meat.com is supported by its readers. We may earn an affiliate commission at no extra cost to you if you buy through a link on this page.
Read this article without ads
It is no secret that my maple barbecue glaze is amazingly good and has been featured on turkey and even chicken, but can it be used on things other than poultry?
In this recipe we are brushing it onto smoked baby back ribs while they cook and it has, once again, “hit it out of the ballpark!”
- Prep Time: 20 minutes
- Cook time: 5-6 hours
- Smoker Temp: 225°F (107°C)
- Meat Finish Temp: 195°F (91°C)
- Recommended wood: Pecan
- 2 or more racks of pork baby back ribs
- ¼ cup real maple syrup
- ¼ cup Jeff's original rub
Maple Barbecue Glaze
- ½ cup real maple syrup
- 2 tbsp Jeff's original rub
Some folks say remove the membrane on the bone side of the ribs, some say don't. I have tried it both ways and I can't tell a significant difference regarding moisture or flavor. For me it's all about not having to deal with the membrane while I am eating. I just think it's a nice touch to remove it.
To remove it, use a butter knife or similar to lift up one edge or corner then use a paper towel or catfish pliers for a better grip and pull it clean off.
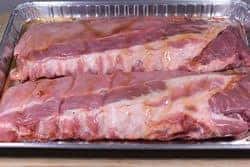
There is nothing better than mustard to help the rub to stick and that's normally what I love to use. Since these are going to be getting some maple barbecue glaze later, I opted to use maple syrup as my “sticky” component.
Starting with the side you are already on, the boney side with the membrane now gone..
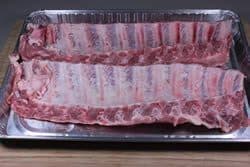
Pour it on and use a silicon brush to spread it all over the ribs and don't forget to get the sides and ends as well.
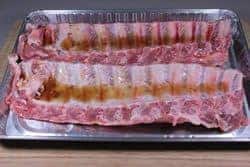
Sprinkle Jeff's original rub onto the ribs.
Be generous about it.
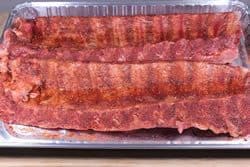
Let the ribs sit for a couple of minutes to absorb some of the moisture from the syrup. Giving this a little time prevents the rub from falling off when you move the ribs or flip them over.
Flip ribs to meaty side up and apply the maple syrup and rub just like you did on the other side remembering to be generous with the rub.
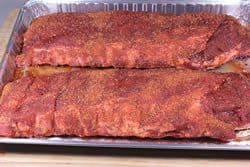
Let the ribs sit for a few more minutes while the rub and syrup combine.
I often put the ribs straight into the smoker at this point and there's nothing at all wrong with that but, let it be known, that you can enhance the flavor by placing them into a lidded container and then into the fridge overnight. You can also just wrap them in plastic wrap instead of using a lidded container.
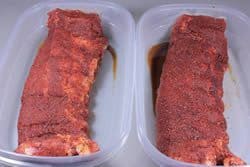
In the morning, take the ribs out of the fridge and place them on the cabinet for a few minutes while you go get the smoker ready.
Use whatever smoker you have and set it up for cooking with smoke at about 225°F.
I just received a brand new Traeger Lil' Tex from Traeger Grills and so obviously, I am going to break it in right with some smoked pork ribs.
Just an FYI: I've been using it for a couple of weeks now, running it through some paces and I have to say that I am very impressed with the ease of setup and operation and with the final product that it produces. Mind you, this is my first venture into cooking with pellets and therefore I cannot compare it with other pellet smokers. I am simply comparing the Traeger pellet smoking experience with my experiences using other types of smokers such as electric, propane and horizontal stick burners.
I filled the pellet hopper to the top, opened the smoker and set it to smoke. First there's smoke, then you hear the fire roaring and you close the lid and set it to your final temperature. It was that easy!
I am now ready to smoke some ribs.. easy peasy! Once your smoker is ready, you can proceed.
Often I will use racks to make it easy to carry the ribs out to the smoker. I decided to use the new Traeger in a more raw way and just place the ribs right on the grate.
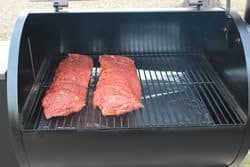
If you want to smoke multiple racks of ribs and you are short on space, it is perfectly ok to put them into one of those rib racks that holds them up vertically. This way you can get a lot more racks of ribs using minimal space.
Traeger says you can fit 5 racks of ribs on the grate.. I probably wouldn't do that since the drip tray is smaller than the actual grate and I'm a little finicky about keeping the smokers clean. I'm thinking 4 would fit over the drip tray if you pushed them right next to each other. Using rib racks, probably 8-10 racks.
Maintain 225-240°F with pecan smoke (other smoking woods will work fine) throughout the entire time. On the Traeger, I just set it to the 225°F marker and it averaged that temperature throughout with small fluctuations up and down.
Use a water pan filled with water if your smoker is designed for this. The Traeger does not use a water pan.
Please note: I did not use the 2-2-1 method for these as I sometimes do. I left these on the smoker grate for the entire time never moving them or flipping them over.
If you want to use the 2-2-1 method and you are not familiar with that, it's a 3 step process in succession as follows:
- 2 hours with heat and smoke on the smoker grate (unwrapped)
- 2 hours with heat on the smoker grate, wrapped in foil
- 1 hour with heat and smoke on the smoker grate unwrapped once again.
These times are flexible and can be adjusted to get the perfect rib custom designed to how much tenderness you want. The more time wrapped in foil, the more tender they will be. Total time will still be around 5 hours for baby backs so if you adjust time out of one step, it will just make the first or third step a little longer.
Extra meaty baby backs and spare ribs use a similar process called the 3-2-1 method adding an extra hour into the first step.
Make the maple barbecue glaze in a small bowl or sauce pan.
- ½ cup real maple syrup
- 2 tbsp Jeff's original rub
Mix the ingredients together and stir occasionally while you are using it. This recipe is enough for about 2 racks of ribs to be glazed twice during the cooking process.
Once the ribs have been cooking for about 3 hours, glaze them with the maple barbecue glaze.
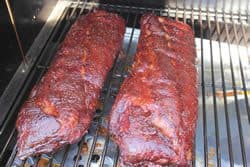
When the ribs are about 30 minutes from being done, glaze them again.
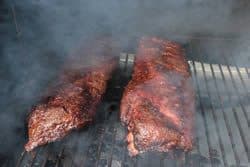
These 2 layers along with the initial layer of maple syrup and my rub gives you 3 layers of goodness and that's a very good thing.
When the ribs are so tender they are bending in half easily when you lift up one end, they are done and ready to slice and serve.
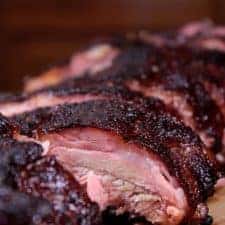
Lay the ribs bone side up and slice between the bones using a very sharp knife.
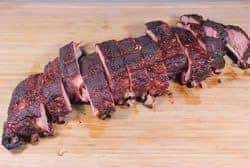
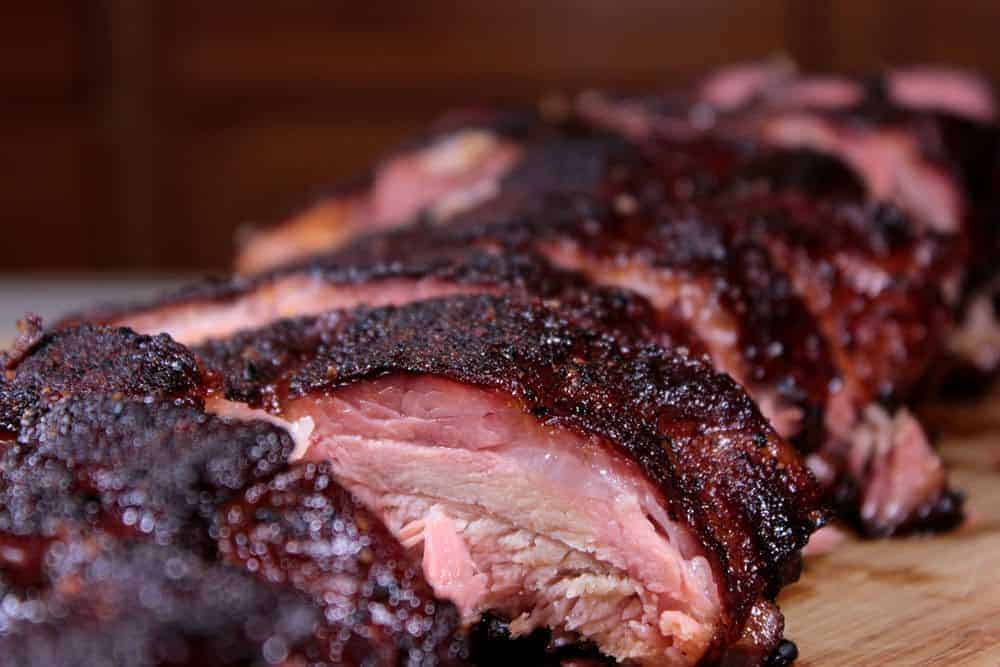
Who says you can't get a nice smoke ring using pellets?
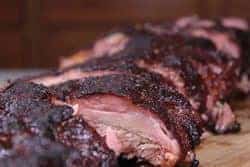
Finally getting a Traeger into my hands has been a wonderful thing. Over the years I have had hundreds of folks ask me about this type of smoker and now I'll be able to answer questions from a personal use standpoint.
It is clear that Traeger has a very large and loyal fanbase and it's no wonder due to how well the smoker works.
In my opinion, the pellet smoker brings together the (2) things that seem to be very important to a lot of smoker enthusiasts:
- The ability to cook with all wood as opposed to electric, propane or charcoal
- The ability to “set it and forget it” knowing that things will keep on cooking and smoking for hours on end while you sleep, go to work, play golf, etc.
Another great feature is the ability to cook at higher temperatures as well. For instance, chicken and most other poultry benefits from smoke flavor but not necessarily from prolonged periods of low heat.
The Traeger pellet smoker is flexible in this way and allows you to smoke low and slow for a few hours for that nice smoky flavor then crank it on up to say 375 or 400°F for that crispy, delicious finish that everyone wants.
I will be putting up a page soon, just as I have for various other smokers, showing operational techniques, tips, setup help, etc. so be watching for that.
If you are a Traeger user and have some special tips that might help others, feel free to pass those along to me.
For more information on Traeger Pellet Smokers go to http://traegergrills.com
Printable Recipe
Smoked Ribs with Maple BBQ Glaze
Ingredients
- 2 racks pork baby back ribs
- ¼ cup Real maple syrup (to help the rub stick better)
- ¼ cup Jeff's original rub
Maple Barbecue Glaze
- ½ cup real maple syrup
- 2 tbsp Jeff's original rub
Instructions
- Remove the membrane from the boney side of the ribs. Lift it up using a butter knife or similar then use a paper towel or catfish pliers to get a good grip and pull it clean off.
- Coat both sides of the ribs with maple syrup and Jeff's original rub. Brush on the maple syrup then sprinkle on the rub to cover well. Allow the rub to sit on the first side until it starts looking wet then flip it over and repeat on the other side.
- Place seasoned ribs into a lidded container or wrap them in plastic wrap and place into fridge overnight to enhance the flavor.
- Setup smoker for cooking at about 225°F (107°C) using indirect heat. If your smoker uses a water pan, fill it up.
- Once smoker is ready, place ribs directly on smoker grate and close door/lid of smoker.
- Make the maple barbecue glaze and mix the ingredients together well. Continue to stir during use.
- When the ribs have been cooking for about 3 hours, baste them with the maple barbecue glaze.
- Let the ribs continue to cook/smoke for about 1.5 hours then glaze them again with the maple barbecue glaze.
- Total time is about 5 hours. If the ribs are extra meaty, they may require additional cooking time.
- Place the ribs boney side up on the cutting board. Slice between the bones using a sharp knife.
- Serve the ribs immediately and enjoy!


Your explanation says 1/2 cup of maple syrup but your recipe says 1/4 cup of maple syrup? Which is correct?
Vicki, thank you for letting me know about this.
I have corrected this recipe to include the maple syrup for the initial step of helping the rub to stick and then a separate amount of maple syrup for the maple barbecue glaze. Let me know if you see anything else that needs to be corrected.
Jeff I have a Traeger and the one thing that I’m not to happy with it is that it doesn’t produce as much of a smoke flavor as I would like. To compensate for this I have a pellet tube to add more flavor to the meat. My son has the Traeger pro and he’s experienced the same problem. He likes the Traeger, it doesn’t just give enough of a smoke flavor.
I’ve done these ribs twice now and can’t imagine ever doing them any other way again. It’s now my go-to ribs recipe. Just the right balance of a little maple sweet and a little spicy hot. Thanks!
Hi,
Your maple barbecue glaze looks great. It takes a long time to be cooked, but even so I want to taste it! I’ll send this link to my husband to read, to try. Thank you
Yahoo! Mr. Jeff got a Traeger – As an Owner of 3 years and loving it I’m really excited to hear your suggestions and recommendations on the Traeger. The Customer Service people at Traeger are really good and they really help on the phone. I use my Traeger a lot to make Jerky and Avoid the use of Liquid Smoke. I lost your Original Rub Recipe so I’ll be requesting that again and your Jeff Sauce as well. Love your site and Yes the Original Rub is Fantastic!!
Just put 2 slabs on my treager using St. Louis instead of baby backs. Haven’t ever done ribs without steaming in foil but I’m going to give it a go and see how they turn out.
I have had a treager for about 2 or 3 years and its great, the only problem I seem to have is that I don’t seem to get a lot of smoke flavor, don’t get me wrong everything turns out great its just the smoke flavor seems to be a bit lacking. maybe its just me, I never seem to get any complaints about the food it put out especially when its something I have gotten off this site.
The only other thing about my treager is that the temps seem to fluctuate quite a bit when you first get it up and going. So I suggest getting up and going and running for a bit and let the temps level out before putting your meat on.
Glad you finally got treager Jeff look forward to hearing more about your experiences with it.
I always have a batch of your rub and sauce in the freezer and fridge, just some really good stuff! Id like to try to smoke your Maple BBQ ribs along with some beef ribs (your Texas rub on beef ribs is super) and maybe some burnt end country ribs. A Christmas rib feast!!! What do you think about Temps for something like that or is it just not possible.
Thank you for some great and yet easy recipes!
Glad to read you have added a traegar to your arsenal. After a year of owning one, I am still trying to figure mine out. I prefer the flavor from my log smoker, but you can’t argue the convienence.
The best site their is for us guys trying to learn . Thank you