The Best Pizza Dough Recipe
Smoking-Meat.com is supported by its readers. We may earn an affiliate commission at no extra cost to you if you buy through a link on this page.
Read this article without ads
I don't claim to be a professional pizza dough maker but this pizza dough recipe is one that I've been using for several years and it makes a fantastic New York style pizza.
I am a dedicated student of Viviane Bauquet Farre, at least where pizza dough is concerned, and this is the recipe that she came up with after spending untold hours modifying the amount of flour, water, yeast, etc. to come up with a dough that is about as perfect as you can get. I can't see any reason to re-invent the wheel.
I have spent enough time with this recipe to learn it by heart and have not found a single reason to modify anything in it.
For what it's worth, I use a propane pizza oven by Camp Chef and it's the next best thing to a real brick oven in my personal opinion. You can definitely use the home oven for this recipe but if you have the means, and you love pizza, I highly recommend this pizza oven. I'll talk more about that down below.
✅ Be sure to watch the accompanying video at the bottom of this page.
Now.. let's roll up our sleeves and get into it!
- Helpful Information
- What You'll Need
- Step 1: Yeast Loves Sugar
- Step 2: Make the Dough
- Step 3: Eight Minute Workout
- Step 4: Form Into a Ball and Let it Rise
- Step 5: Divide and Cool Rise
- Step 6: Stretch into Pizza
- Step 7: Make Your Pizza
- Using a Home Oven
- Using a Pizza Oven
- Pizza Peel Methodology
- Using a Pizza Pan Instead
- Recipe Card
- The Best Pizza Dough Recipe
Helpful Information
- Hands-on Time: 30 minutes
- Wait Time: 5 hours
- Cook Time: 10-12 minutes
- Oven Temp: 550°F
What You'll Need
- 1-¼ teaspoons active dry yeast
- ½ teaspoon sugar
- 1 cup warm water (~110°F)
- 1 teaspoon fine sea salt
- 1 tablespoon extra virgin olive oil
- 2-¼ cups unbleached bread flour (I use King Arthur)
- ½ cup extra flour for dusting the dough, pizza peel, work surface, etc.)
- Pizza peel
- Pizza oven or home oven
Step 1: Yeast Loves Sugar
Add 1-¼ teaspoon of active dry yeast to a large bowl then add ½ teaspoons of sugar because that's what causes the yeast to get excited and start working.
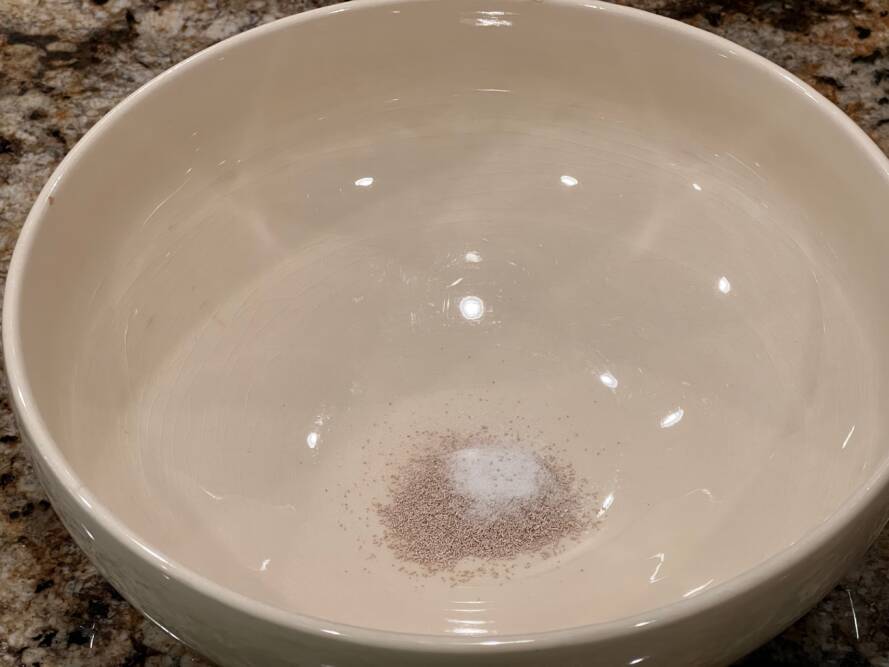
Add 1 cup of water to the bowl that has been warmed to about 110°F.
Note: Filtered or spring water will taste best if you have it.
Stir things around with a spoon or whisk to dissolve the yeast then set a timer for 10 minutes.
During this time the yeast will get to work, and after about 8 minutes you’ll see bubbles start to rise to the surface letting you know that it's almost time to move on.
Step 2: Make the Dough
Stir in 1 teaspoon of sea salt and 1 tablespoon of extra virgin olive oil to the yeast mixture then add 2-¼ cups of the bread flour.
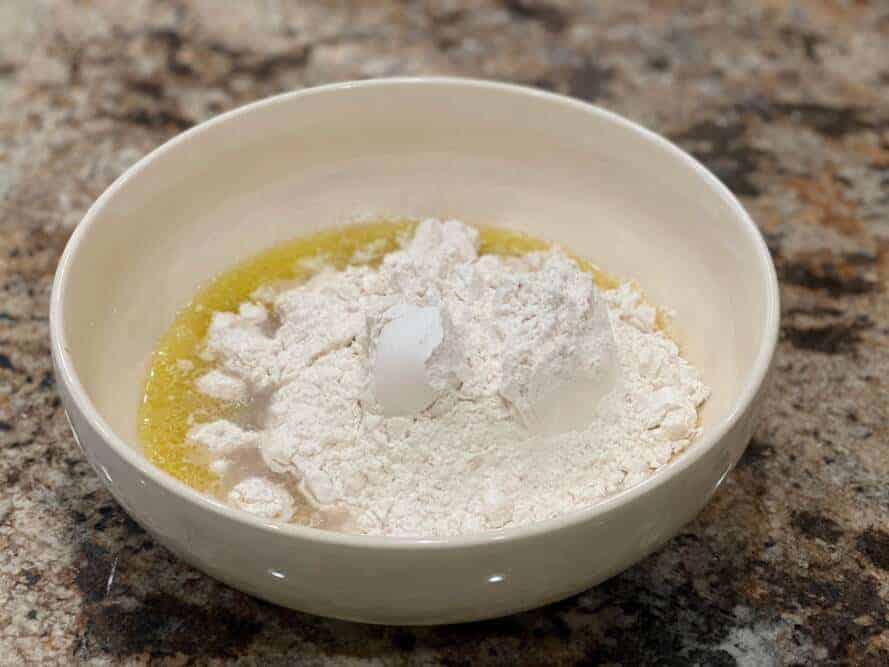
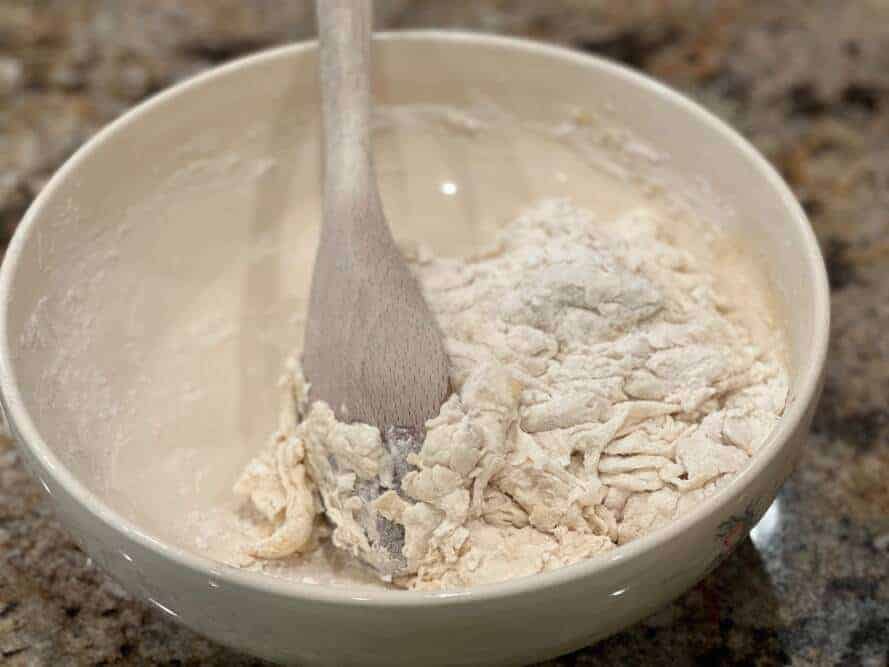
I use a wooden spoon or rubber spatula to combine everything and once it starts looking like dough, flour the work surface and your hands and it's time to start kneading it.
Step 3: Eight Minute Workout
I wear an Apple Watch and when I started kneading, it beeped and said, “it looks like you've started an elliptical workout, would you like me to record this workout” (something like that).
If you give me a choice to workout at the gym or workout by making dough, I'll choose the latter thank you very much!
Now, I must say that you can definitely do this in the mixer but I like to do it by hand. There's something very cathartic about kneading dough and I find it relaxing even if my watch does consider it a workout!
Here's how I knead and you may have your own method. You can also find dozens of methods online if you want to look it up.
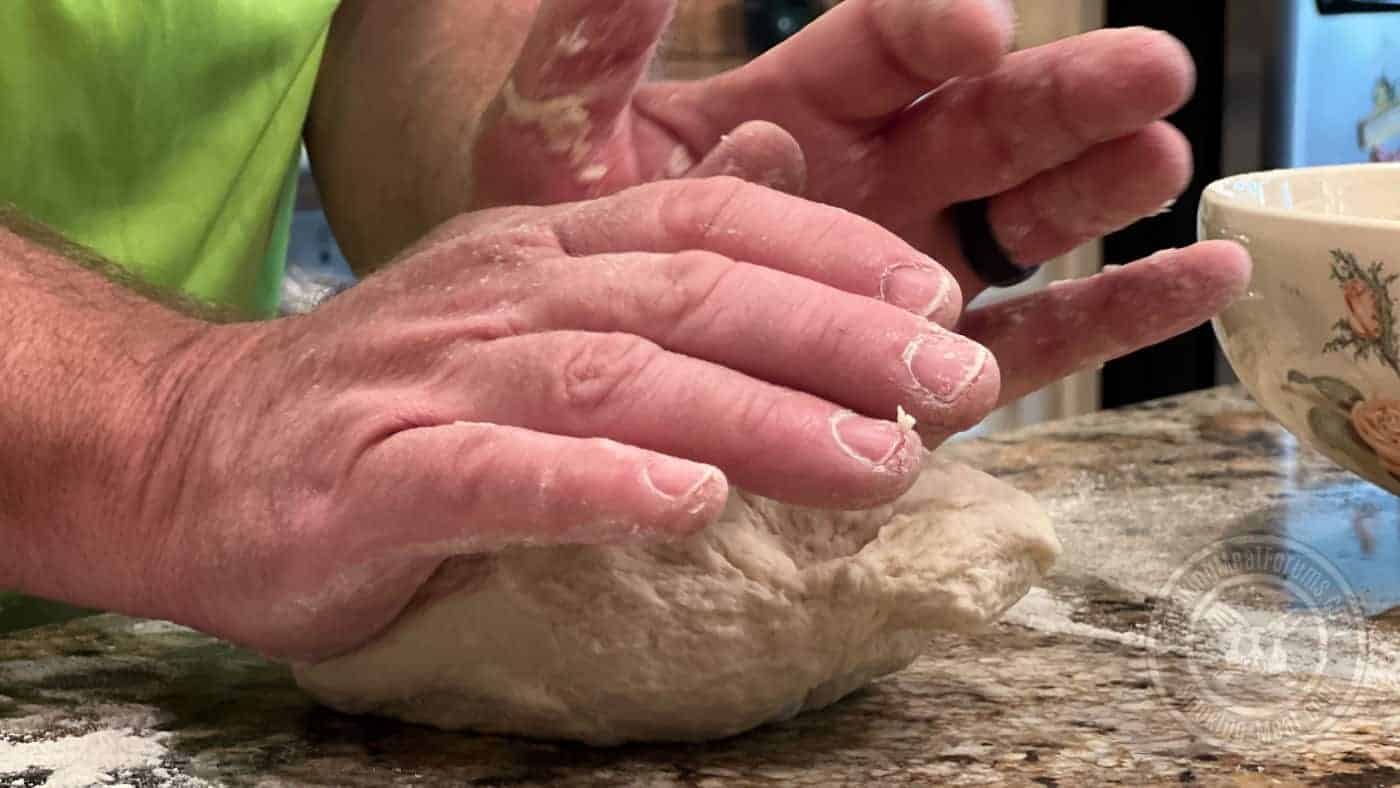
I place the heels of my palms on the dough with my fingers angled slightly upwards.
I roll or push the dough forward about 10-12 inches with the heels of my hands. Then I pick up the dough and move it back to the starting point and do it again.
Now I turn the dough 1/4 turn as I’m moving it back to start, and do the same roll/push maneuver another 2 times.
Push, push, rotate, push, push, rotate, you get the picture.
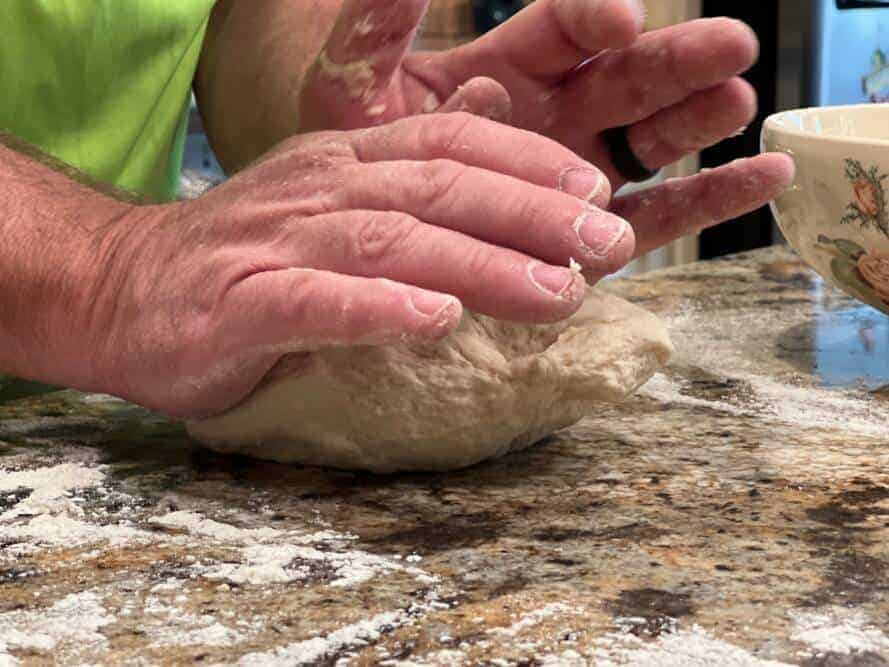
I do this over and over for about 8-10 minutes until the dough starts feeling very elastic.
I have found that the faster I knead, the less it sticks to my hands and the work surface.
Add flour if necessary to keep the dough from sticking too much but you don't want to add much.. just a small amount.
The dough should be just a tad sticky for it to turn into a good pizza.
Step 4: Form Into a Ball and Let it Rise
Form the finished dough into a ball then lightly flour it on all sides.
Place it back into the bowl and cover with plastic wrap. Place it in a warm place such as on top of the fridge or in the garage so it can rise for 1 hour.
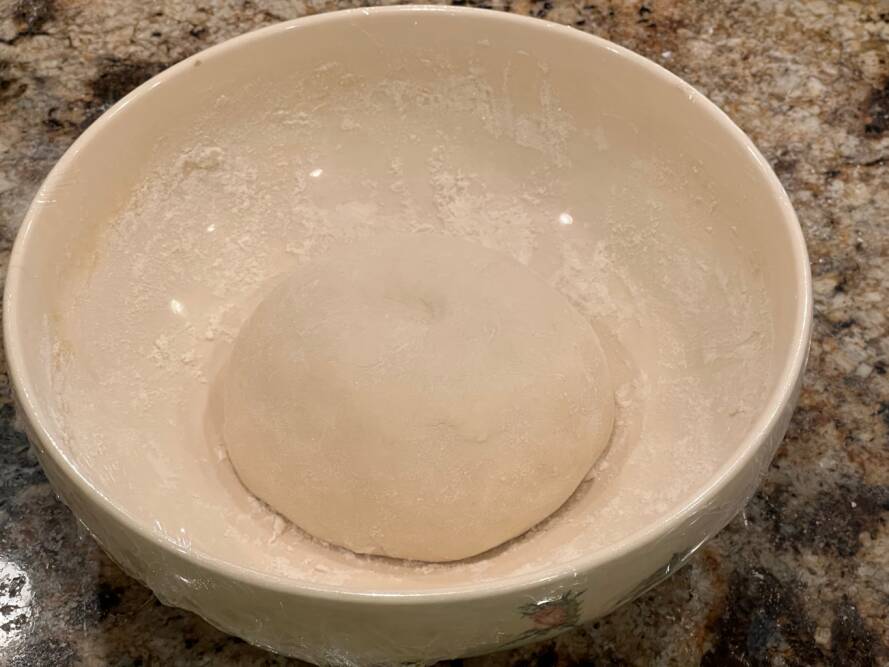
During this time the dough will double in size.
Step 5: Divide and Cool Rise
After the hour is up, you will see that it has gotten at least twice as big as it was.
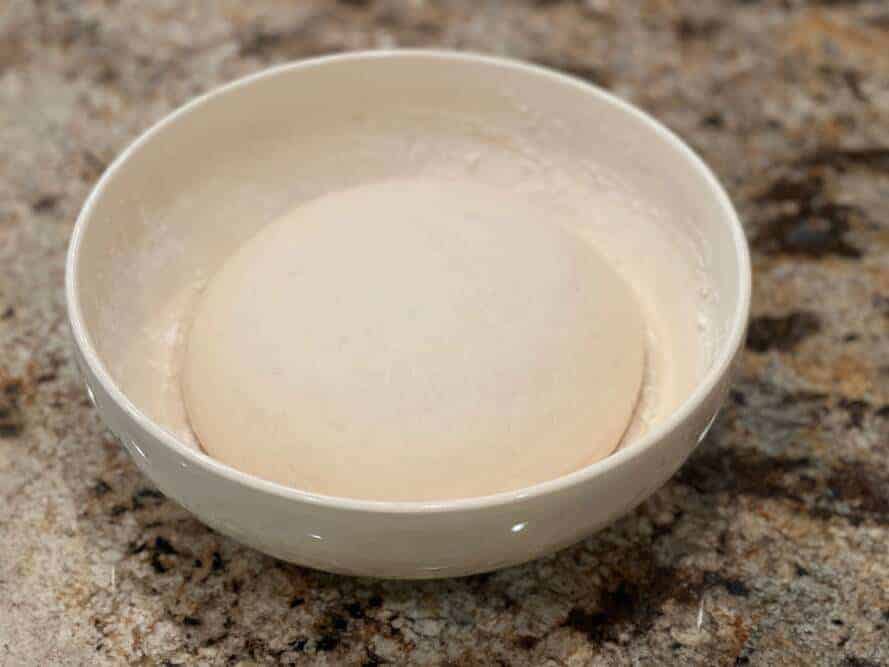
Remove the plastic wrap and punch it down with your fist.
Remove the ball from the bowl and lay it on the work surface. Use a knife to separate it into 2 equal pieces.
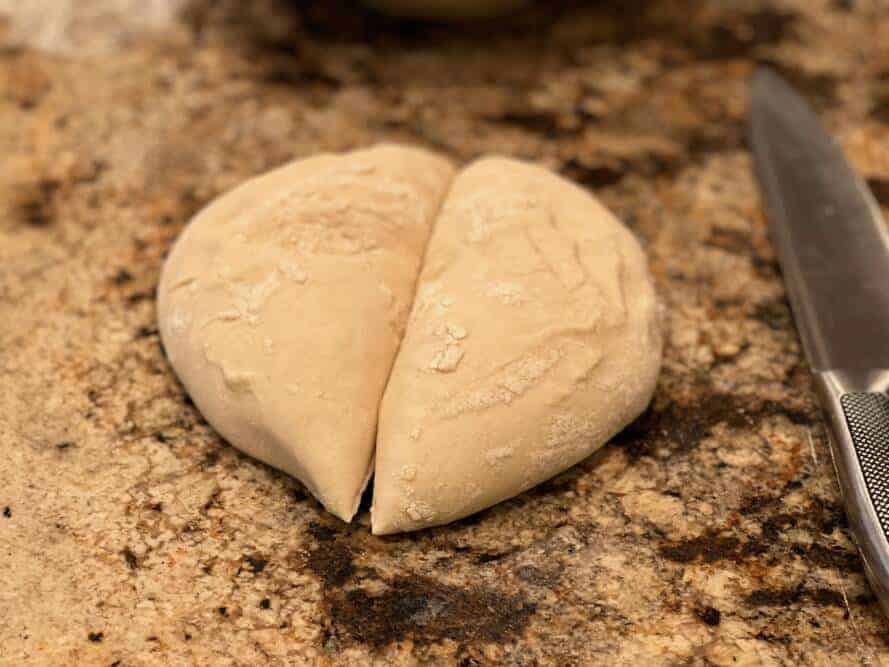
Place each of those 2 pieces into a large gallon-sized zip top bag and place into the fridge for at least 3 hours. I have had the best luck with dough that has been in the fridge for 12+ hours.
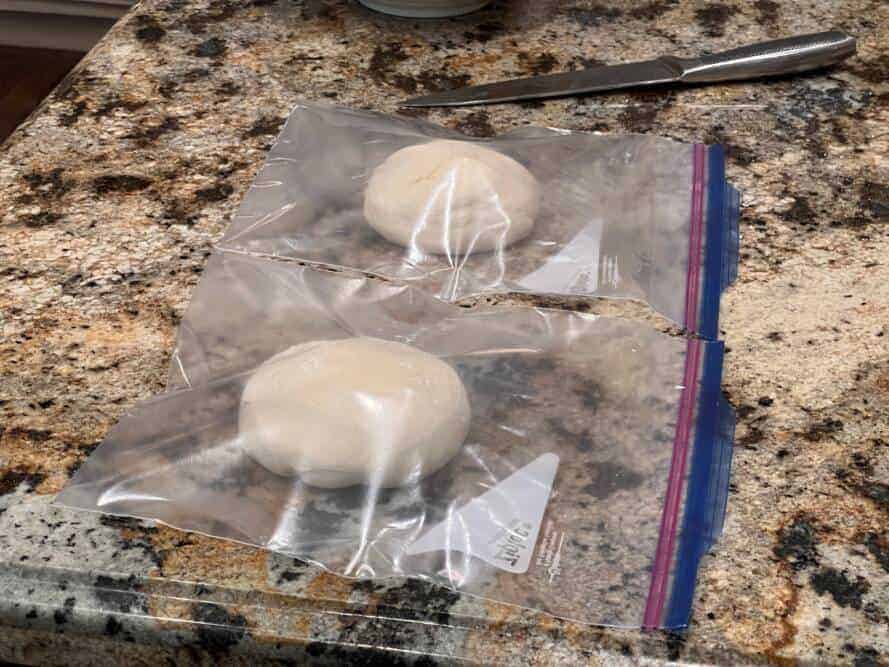
It continues to rise while it's in the fridge and this is known as the “cool rise”.
Leave in the fridge until you are ready to start making your pizzas.
Step 6: Stretch into Pizza
I have read a LOT of pizza dough recipes and almost every one of them says to let your dough come to room temperature before stretching it.
This recipe proves that it is best to stretch the dough while it is still cold. Your hands will warm it up as you stretch it and if you're careful, you'll be able to do a 16″ diameter pizza with each of these balls that is very thin like the New York style.
You can also stretch it less if you prefer a more traditional crust.
To stretch the dough, hold it on the sides sort of like you'd hold the steering wheel of your car with your hands only a few inches from each other.
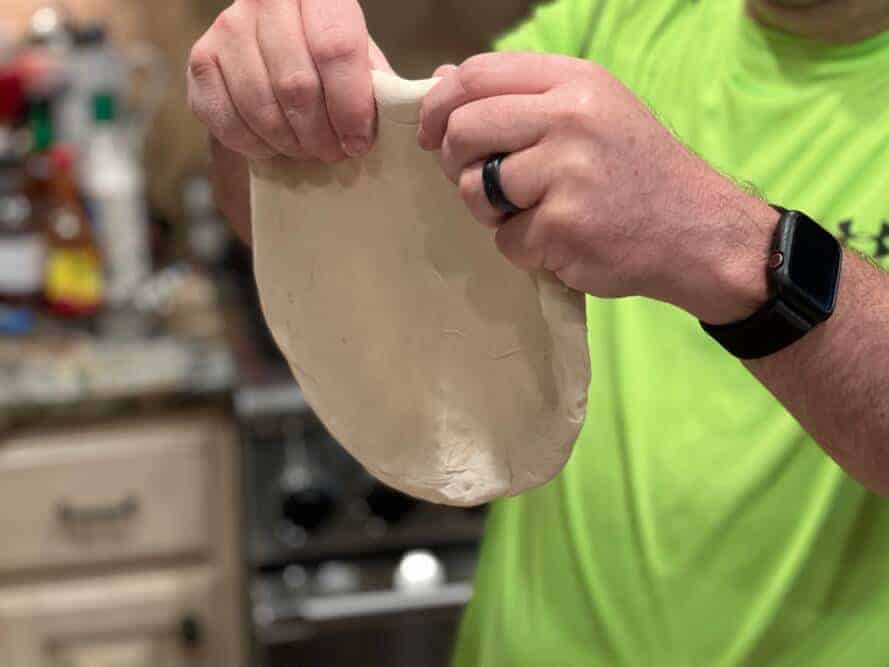
Let the weight of the dough stretch itself as you move your hands around the circle.
The more the dough is stretched the faster the process goes.
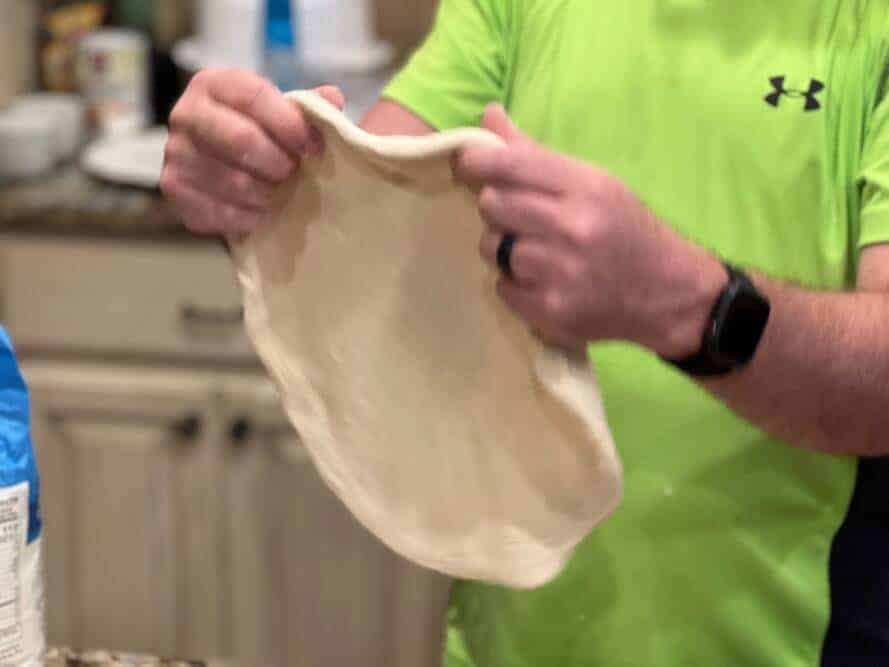
If it feels like it's going to tear, just rest it across your arm for a few seconds before continuing on.
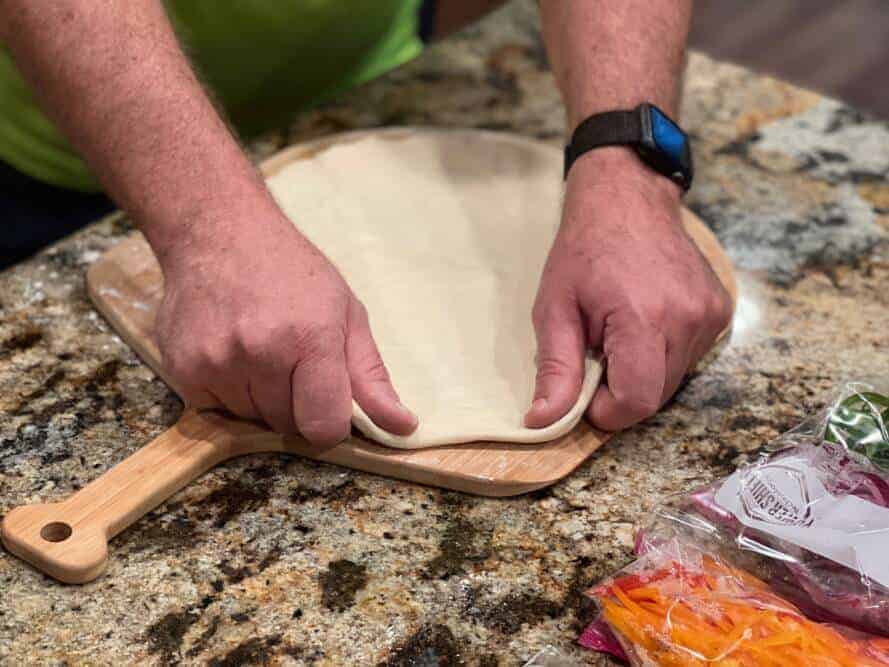
When it's about the right size, lay it on the floured pizza peel and shape it into a circle.
Step 7: Make Your Pizza
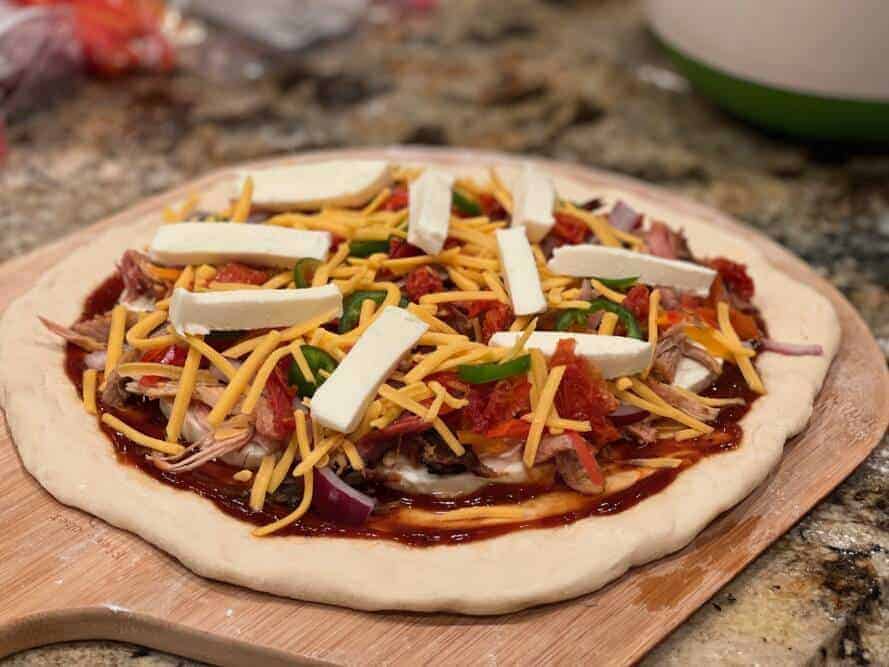
I love to make barbecue pizza which just means that I use barbecue sauce instead of pizza sauce and I use some leftover smoked meat such as pulled pork or pulled beef.
The other toppings can be whatever you like such as mozzarella cheese, cheddar, jalapeños, onions, etc.
Here's a typical layering:
- barbecue sauce
- fresh mozzarella
- meat
- onions
- peppers
- More mozzarella
- shredded cheddar
- Jalapenos
Here's one I made recently.. I like to load 'em up!
Using a Home Oven
If you're using a home oven, make sure your top oven rack is about 9-10 inches from the top of the oven. Place a pizza stone onto that rack and turn the oven on to 500°F.
Let it preheat for about 30 minutes then right before you are ready to cook your pizza, turn it to broil.
It will stay on broil throughout the cooking process.
At this point the pizza stone is around 500°F due to the preheat and this is to brown and crisp the bottom of the crust.
The ambient temperature in the oven is 500°F with direct heat from the heating elements at the top of the oven for browning the top of the crust and melting the cheese from the top down.
These 2 heat sources will do a great job of cooking your pizza perfectly in about 8-12 minutes but ultimately, you'll need to keep an eye on the pizza and when it's the right color, the bottom is crisp and brown, and the cheese is melted, the pizza is ready to remove and slice.
Using a Pizza Oven
I have a Camp Chef pizza oven that runs on propane and it's a joy to use. The home oven works well but the pizza oven is designed for pizza and if you love pizza, it's a great investment without spending a whole heckuva lot.
Light the pizza oven about 20 minutes before you're ready to bake your pizza.
The Camp Chef pizza oven that I use has a single burner and I have found that I can set it to just below medium to maintain a steady 550°F.
I also use an infrared thermometer to test the temperature of the stone but this is completely optional. If you preheat the oven for around 20 minutes, the stone will be about the same temperature as the ambient temperature.
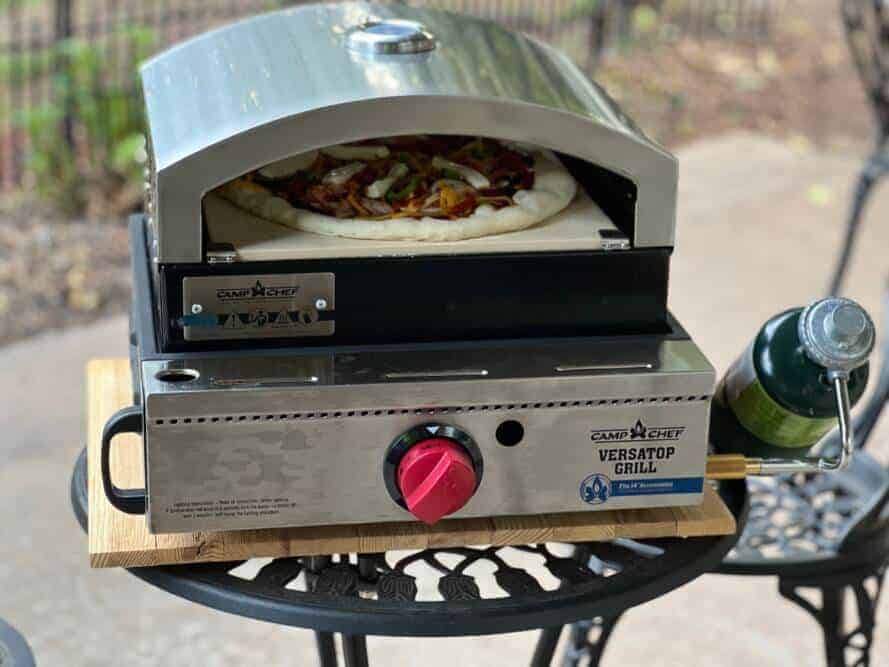
Here you can see the VersaTop burner on the bottom and the pizza oven that sits on top of that burner. The VersaTop is purchased separately and includes a flat top griddle.
You can then purchase accessories that can be used with the VersaTop including a barbecue box and the artisan pizza oven that I use.
The VersaTop uses 1 lb propane bottles but you can get a hose that converts it to use a larger 20 lb bottle.
Here's what you'll need to get started:
VersaTop Burner with Griddle Model FTG250
Pizza Oven Accessory Model PZ30
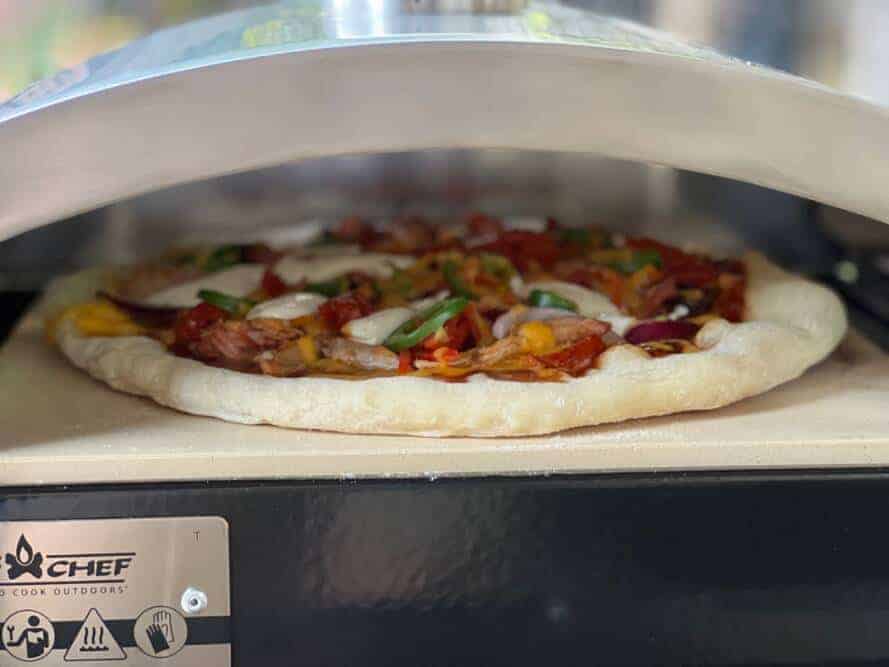
At this temperature, you can expect the pizza to get done in about 12 minutes but this will vary depending on your dough, amount of toppings, wind, etc.
Don't leave the pizza unattended and you'll be fine. Watch the pizza and when it's the right color, the bottom is brown and crisp and the cheese is bubbling, you can rest assured that it's about as perfect as can be.

Pizza Peel Methodology
Using a pizza peel gets easier with practice but I can tell you that I've used one quite a bit and I'm still not very good at it. I like to try, though!
Make sure you flour your pizza peel really good before you place the dough on it.
When you’re ready to move the crust from the peel into the oven, hold it at about a 30 degree angle with the leading edge of the peel touching the pizza stone. You want it to touch the stone in the location where you want the back side of the pizza to end up.
Give it a couple of good forward then back flicks. Once the dough touches the pizza stone, you should be able to slide the pizza peel out from under the dough completely.
TIP: I’ve found that I do a better job of not knocking off all of my ingredients if I press them down a little bit first and make sure they are well seated and ready for some forward/back movement. That may not be kosher but it's what I still have to do to keep them safe. One day I’ll be a pro, and until then, I do what I have to, and you should, too.
Using a Pizza Pan Instead
Using a pizza pan is a viable option for sure.. in fact, I have a whole box of the disposable kind that I purchased when I first started making pizza and they kept me sane when I just couldn't seem to get the pizza peel to work properly.
Your crust won't get quite as crispy that way but it's still crispy, still delicious and it's okay if that's what you need to do to make it happen.
Sometimes if we have a pizza party, I'll give everyone a pan and let them stretch and build their own pizza on that instead of using the pizza peel. It speeds things up and everyone is happy.
Recipe Card
The Best Pizza Dough Recipe
Ingredients
- 1-¼ teaspoons active dry yeast
- ½ teaspoon sugar
- 1 cup warm water (~110°F (43°C))
- 1 teaspoon sea salt
- 1 tablespoon extra virgin olive oil
- 2-¼ cups unbleached bread flour (I use King Arthur)
- ½ cup Extra bread flour for dusting the dough (pizza peel, work surface, etc.)
Instructions
- Add yeast and sugar to large bowl with warm water and whisk to dissolve the yeast. Allow to sit for about 10 minutes before continuing.
- Add oil, salt and flour using a wooden spoon to combine until there is a dough-like consistency.
- Knead the dough by hand for about 8 minutes until it is elastic (you can also use an electric mixer if desired). Form into a ball.
- Lightly flour the dough ball and place it back into the bowl covered with plastic wrap. Place in a warm place to rise for 1 hour.
- After 1 hour it should have doubled in size. Remove it from the bowl, divide in half with a knife to form 2 separate dough balls.
- Place each dough ball into a gallon-sized zip top bag and into fridge for at least 3 hours or up to 36 hours.
- Preheat home oven to 500°F while stretching the dough and loading the toppings. Just before placing the loaded pizza into the oven, turn the oven to broil where it will remain during the rest of the cooking process.
- When ready to make pizza, remove one of the dough balls from the fridge and quickly stretch it into a 12-16 inch pizza without allowing it to come to room temperature.
- Lay the stretched dough onto the floured pizza peel and adjust it further into desired size and shape. Lightly oil pizza dough before adding toppings.
- Load stretched pizza dough with sauce, cheese, meat and toppings.
- Place pizza onto pizza stone in oven using peel and let it cook for 8-12 minutes or until crust is crisp and brown on the bottom, crisp on the sides and cheese is melted in the center.
- Remove from oven using a pizza peel. Slice and serve immediately.


Last night I took a Red Baron Pizza that I had thawed and added lots of cheese and pepperoni to it and started at 200 on my Recteq 380 deluxe with 3 Grill Marks flat side up. 15-20 minutes for the smoke to work. Ran it up to 450 with the temp probe in. The temp is set on my phone at 165. Their app is awesome. About 10 minutes later I got the signal. The Ton of Pepperoni wasn’t as Crisp as I like it, so 750 was on. A couple of minutes later they were fine. A word to the wise the crust was Extra Crispy. But the taste was awesome and the Smoke Flavor was Outstanding. I’ve only had this grill for a couple of months. But I do have years of smoking in my background. Suggestings appreciated. I really like this Grill.
The Chef Store has Great Pizza Dough Balls for Cheap. That’s what I use. It cuts the time by a lot.
If you are going to use a pizza oven, why would you not bake at 700F, which is what pizza restaurants do? Takes only 90 sec. on average. Is it perhaps because of the type of dough?
Hey there Jeff. Why do you stretch the dough ball straight out of the fridge? Anything I have ever read directs you to let the dough come to room temp before attempting to stretch making it easier.
Skip the oven, put a pizza stone in your smoker at 450 for 45 minutes, then plop the constructed pizza on your stone. 8 to 10 minutes later you have a great pizza with a soft smokey flavor. Want the cheese to brown? Do a quick broil before your let it rest. We no longer use an oven for any pizza! This works for frozen, store made and homemade!
One more trick. To avoid bubbles in the dough, use a pizza roller docker – it looks like a roller, but has little spikes. These pop air pockets, reducing bubbles. You can also do this with a fork – I take 2 of them (1 in each hand) and tap the prongs all over.
Love to see a focus on pizza, but I do have a few tips. First, a pizza cooker won’t cut it for me – I’m generally feeding about 12 people, when I make pizza. So, I either cook them in the oven (I have 4 pizza stones) or on the smoker (Traeger Pro 22).
In the oven, I do everything like you said, but I use coarse ground cornmeal, instead of flour, on the paddle – it helps the dough slide easier and adds a little extra flavor.
On the Traeger (450º), I have 2 methods. Method 1 is to put the dough (with no toppings) directly on the grate. When the bottom is done, I pull it off, flip it over (onto my counter – cooked side up), add toppings, and put it back on the grate. This gives a crust with extra crispiness.
Method 2 is to use a pizza screen. The screens let the smoke & heat get through and make it very easy to transfer pizzas. I can get two 12″ or three 10″ on my smoker at once.
Can you freeze half of the dough?
Jeff, you can freeze the dough if you absolutely need to but it does mess with the texture a little bit. In my opinion, the dough has a better texture when it’s made as needed. You can make it up to 36 hours in advance if you need to.
The end result looks very inviting. Love the thin dough approach but we always seem to end up with the inside portion (towards the center) of the dough not fully cooking while the rest is nicely done. Leaving it in longer tends to over cook the outer portions. Can’t really tell from the video if the center section of the dough actually did get cooked or not.
Matt, my pizza crust tends to be pretty thin in the center and thicker on the edges. It usually gets nice and done on the bottom and not overly done on the edges but it’s not always perfect. Using a well pre-heated pizza stone or a pizza oven really helps.
You can also use the Camp Chef pellet smoker. Set it at 400 degrees with a pizza stone and heat about 30 minutes. While it is cooking, heat a flat top grill to medium low and using olive oil for release, take the finished pizza from the grill and toss it on the flat top for 2 to 3 minutes to give the crust a crisping and you will not be disappointed. The best pizza I have eaten!
Dan, thank you for this. I plan to put out a recipe soon for doing this pizza in a pellet smoker just as you described.
Will try your dough this weekend. I have been making my own dough for some time. I use a 2 Qt. scale every time and get the exact results every time. Scale was under 20 bucks.
I never thought about using your BBQ sauce for the pizza so that’s gonna get a try this weekend along with some pieces of coffee brined Tri Tip + all the other pizza topping stuff.
Chris
Should try 00 flour for pizza. Game changer and also generally available locally.
If you use some semolina on the peel, the pizza will slide right off when you’re putting it into the oven.
Use cornmeal on the surface of your pizza prep area and peel. This will allow the pizza to slide off with ease.
Did my first pizza on my new Camp Chef pizza oven. All I can say is fantastically easy, fun and very good. Thanks for your help!
Scott, I’m glad to hear the pizza turned out really good. I assume you’ll be using that pizza oven a lot!😋
I want to try this recipe….Could it be done in a Lone Star Pellet Smoker/Grill? Any issues?
Tried this out today, a bit time consuming, but WELL worth it!
I made this last night and my boys loved it. I used commercial BBQ sauce (lazy) and homemade kielbasa, mushrooms, mozz and cojita cheese. I had to add quite a bit more flour to get the dough where it was firm enough to work; I did not measure because I was adding a little at atime but I believe and additional 1/2 cup or so. I know this is supposed to be a wetter dough but it was too sticky with 2 1/4 cups. I am going to do this again with the rest of the family soon so I will verify that I followed recipe. We do a lot of artisan style pizzas and I am always experimenting. The BBQ style is a nice addition to my repertoire, thank you.
Nice video going to try it tomorrow just happen to have some P Pork left from Sunday and a mason jar of your sauce in the fridge.
Sounds like a plan! Let us know how it goes ;-)