Pre-slicing Ribs Before Smoking Them
Smoking-Meat.com is supported by its readers. We may earn an affiliate commission at no extra cost to you if you buy through a link on this page.
Read this article without ads
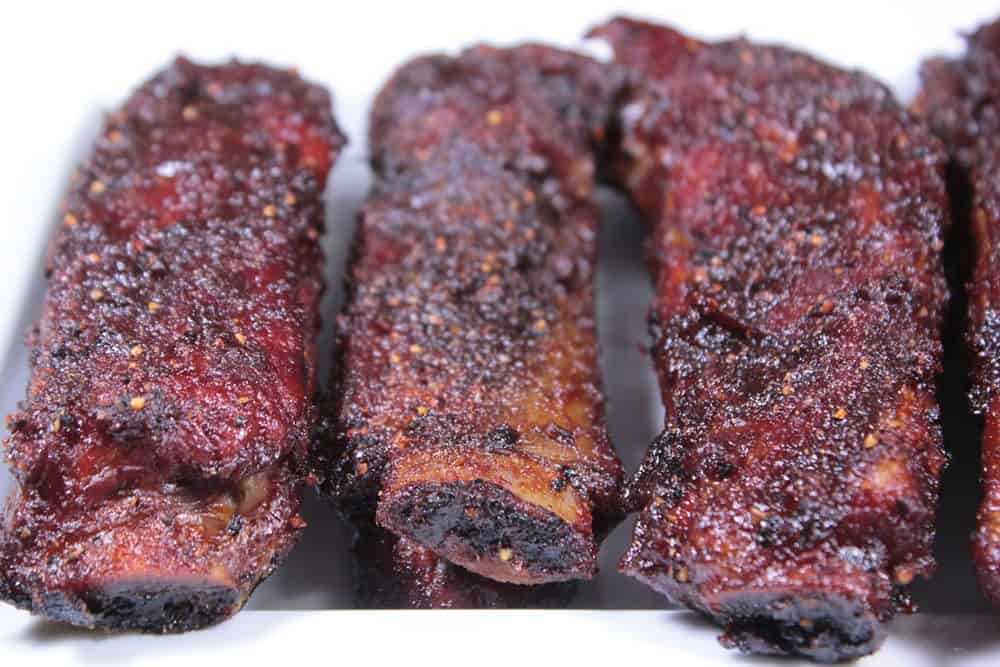
Rick Shaw, a newsletter subscriber, smoker enthusiast and one who is obviously not afraid to do things differently, emailed me several years ago mentioning that he slices ribs individually before smoking them. He included his own technique and method for doing this.
I know that people sometimes cut racks of ribs into halves or maybe into pieces that are 3 to 4 bones each but you just don't hear about folks cooking single bone pork ribs. Here's to a new and possibly better way to cook ribs!
- Preparation time: 25 minutes
- Cook time: 5-6 hours
- Smoker temperature: 240°F
- Meat Finish temperature: N/A
- Recommended wood: Pecan and/or Cherry
- 1-2 racks of baby backs, spare ribs or a mix of the two
- Foil pans
- Foil
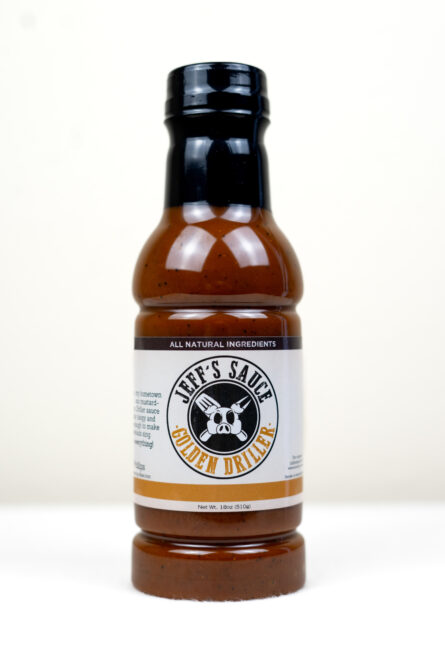
- Jeff's barbecue sauce
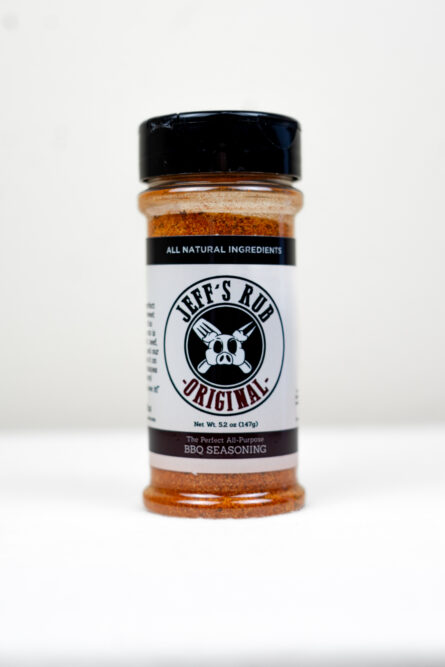
- Jeff's original rub
Remove ribs from package and rinse well under cold water.
Pat dry with paper towels and lay on cutting board.
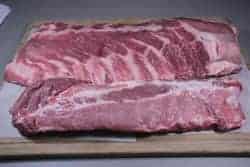
If the ribs have a membrane (thick plastic-like skin on bone side), it's a good idea to remove it if you can.
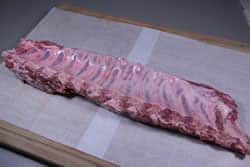
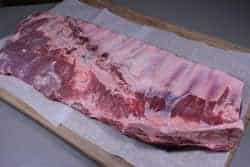
Loosen with your fingers, butter knife, spoon, etc.
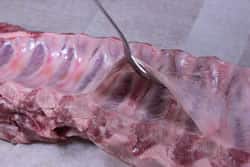
Grab with a paper towel (for better grip) or you can use catfish skinning pliers as well and pull clean off.
If you are having trouble with it, you can also score the skin with a sharp knife and leave it at that. Don't let it frustrate you.
This is where the normal methods of smoking ribs goes off the rails.
Usually, at this point, we'd add rub and be done with it.
Using this method, I highly recommend waiting until later to add the rub.
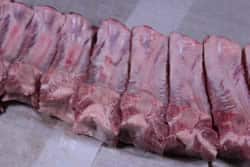
Baby backs:
Use a very sharp knife and slice right between the bones.
Spare ribs:
For best results, trim these up St. Louis style. This just means you remove the brisket bone that runs along the leading edge and square them up a little by removing the extra pieces of meat on the ends.
I also recommend that you remove that extra flap of meat on the boney side of the ribs. If there's no flap, it may have already been removed.
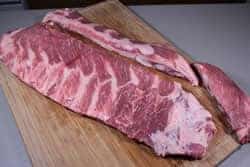
Once they are all trimmed up, place them with the bone side facing up and using a sharp knife, slice between the bones.
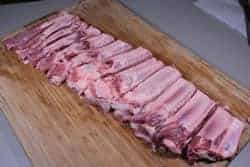
The extra pieces that were trimmed off earlier can also be cut into smaller pieces if you so desire.
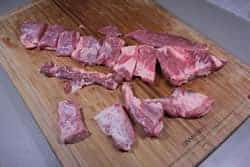
I like to arrange these onto a Bradley rack or a Weber grill pan so I can ensure that all of the pieces get full access to the smoke but it's not absolutely necessary. It is perfectly ok to just put the ribs and pieces into a large foil pan.
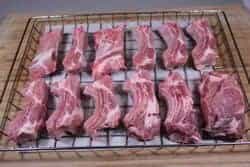
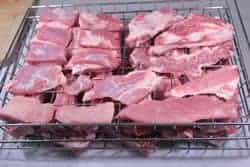
Note: If you do not have Bradley racks or these racks do not fit in your smoker, you can also place the ribs directly on the smoker grate with a little space between each one.
These will do well on any smoker or even a grill as long as you can maintain temperatures between 225-240°F using indirect heat.
Make sure you have enough smoking wood for about 3-4 hours of smoke. I used pecan with cherry, use the smoking wood that you like and what you have available to you.
If your smoker has a water pan, I recommend using it.
Once the smoker is set up and holding the proper temperature, you can proceed with cooking the ribs.
The first step in cooking these pre-sliced ribs is to smoke them for about 2 hours at 225-240°F. With no rub and no membrane, the smoke has absolute access to the meat and that's a good thing.
As mentioned earlier, this can be done on bradley racks, directly on the smoker grate or you can place the open foil pan of ribs (uncovered) onto the smoker grate.
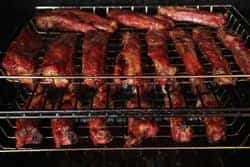
If using the pan method, you'll want to rearrange the ribs after an hour to make sure all of the ribs are getting plenty of smoke.
After 2 hours of cooking with smoke, the ribs will be looking and smelling really good but they still have a ways to go.
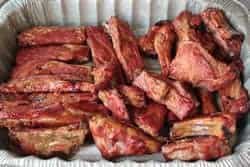
It's time to tenderize them with a little braising action.
If the ribs are on racks or directly on the smoker grate, it's time to toss them into a foil pan. Sprinkle a little of Jeff's original rub on them for the first layer of flavor. During the braising process, there will be a lot of steam inside the pan and the rub won't necessarily stick to the ribs but it will mix with the juices and do a great job of adding flavor to the ribs.
For clarity, I had a rack of baby backs and a rack of spare ribs in the pan. I used about ¼ cup of Jeff's original rub to just give the ribs a good dusting of flavor.
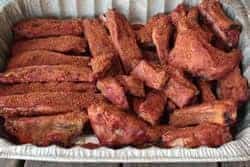
Cover the foil pan of rubbed ribs with foil. Make sure it's tight around the edges to keep the steam inside.
Put them back into the smoker at 225-240°F.
Leave them this way for about 1.5 hours depending on how tender you want them. It's ok to check them at the end of 1 hour and see how tender they are getting.
As ribs get more tender, the meat tends to pull back exposing the ends of the bones. You want to see the bones sticking out about ¼ in most cases.
When this step is finished, simply remove the foil cover from the top of the pan.
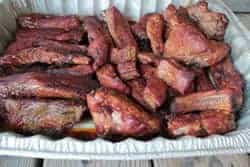
Now we arrive at the fun part of the process!
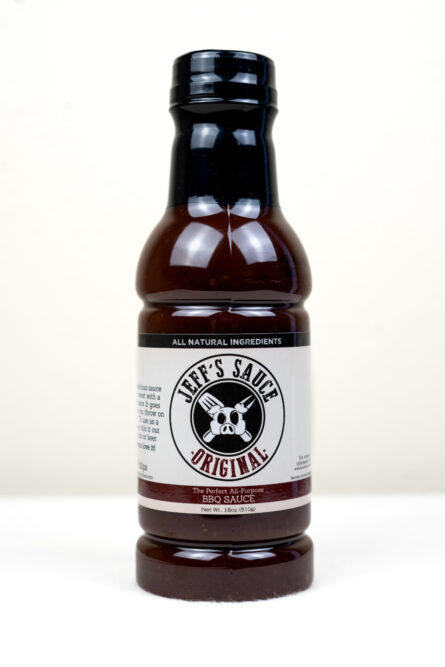
I hope you have some of my barbecue sauce (Purchase formula here | Purchase bottled sauce) ready. If you have the recipe and make it yourself, I recommend having it in a squeeze bottle with the end cut large enough so it's easy to squeeze it out.
Apply about a cup of Jeff's barbecue sauce all over the ribs. This not only adds flavor, it creates an excellent medium for helping the delicious rub to stick to the ribs.
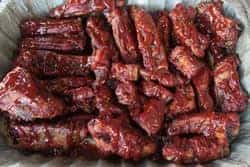
Toss the ribs around in the pan to make sure they are well coated with the sauce.
Now sprinkle Jeff's original rub all over the tops of the ribs (I used about ½ cup).
Toss the ribs around again to get the rub all over as evenly as possible.
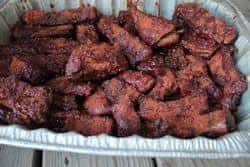
With the top left uncovered, continue to cook the ribs for an additional 2 hours or until they are at the consistency that you want.
I tested one at the 1.5 hour mark and decided they needed another 30 minutes. I recommend you test them in the same manner.
When they are done cooking, you can cover them with foil, and hold them on low heat for an hour or serve them right away.
Since they are already sliced up, Dump them into a serving container or let folks grab them right out of the pan.. your choice.
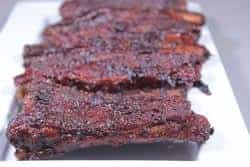
So what's so great about this new way of cooking ribs in the smoker?
First and foremost, you get more surface area to apply rub and sauce. I get lots of emails about how to make ribs more flavorful and some even ask if it helps to brine them.
I have not had a ton of luck brining ribs and I have played around with it.
By cutting the ribs into single pieces with a bone that runs through the center, you end up with more meat surface area for the smoke to get into and ultimately you can apply sauce and rub to the cut sides instead of just the top and bottom of the rib.
I would NOT go so far as to say it's any better than ribs that I cook without slicing them first but sometimes it's nice to do things in a new way just to change things up. Give it a try and I'd love to hear what you think about it in the comment section below.
Can you go ahead and apply mustard and rub like usual once you've sliced them up?
Sure! Slice them babies up, and apply yellow mustard and then rub. toss them all around to get a good even coating all over and you will have some really tasty ribs. Heck, you could even do this the night before if you wanted to.
You still might want to apply a little more rub after the braising process since the steaming tends to cause some of the rub to melt away. There's still a lot of flavor left there but I would definitely add another sprinkling and maybe even some barbecue sauce if you want to.
You should not be using aluminum as it's been linked to Alzheimers?
This is a controversial subject and while I have not decided, as of yet, to eliminate the use of aluminum for cooking in my home, if you have, then, you can certainly use a pan made from a food safe and heat safe material.
It seems that pre-slicing the ribs might make them dry out more?
It may seem that way but, in my own tests, they were just as tender and moist as any rib I've ever made as a whole slab.
Pre-slicing Ribs Before Smoking Them
Ingredients
- 1-2 racks of baby backs (spare ribs or a mix of the two)
- Foil pans
- Foil
- Jeff's barbecue sauce
- Jeff's original rub
Instructions
Step 1: Rinse and Pat Dry
- Remove ribs from package and rinse well under cold water
- Pat dry with paper towels and lay on cutting board
Step 2: Remove Membrane
- If the ribs have a membrane (thick plastic-like skin on bone side), it’s a good idea to remove it if you can.
Step 3: Slice
- Baby backs: Use a very sharp knife and slice right between the bones.
- Spare ribs: For best results, trim these up St. Louis style. This just means you remove the brisket bone that runs along the leading edge and square them up a little by removing the extra pieces of meat on the ends. Then slice them up.
Step 5: Get the Smoker Going
- These will do well on any smoker or even a grill as long as you can maintain temperatures between 225-240°F using indirect heat.
- Make sure you have enough smoking wood for about 3-4 hours of smoke.
- If your smoker has a water pan, I recommend using it.
- Once the smoker is set up and holding the proper temperature, you can proceed with cooking the ribs.
Step 6: Smoke for 2 hours
- Smoke them for about 2 hours at 225-240°F.
Step 7: Add Rub and Braise in Foil
- Toss them into a foil pan. Sprinkle 1/4 cup of my original rub on them for the first layer of flavor.
- Cover the foil pan of rubbed ribs with foil. Make sure it’s tight around the edges to keep the steam inside.
- Leave them this way for 1 to 1.5 hours depending on how tender you want them.
- When this step is finished, simply remove the foil cover from the top of the pan.
Step 8: Add the Main Layer of Rub and Sauce
- Apply about 1 cup of my barbecue sauce all over the ribs.
- Toss the ribs around in the pan to make sure they are well coated with the sauce.
- Now sprinkle about 1/2 cup of rub all over the tops of the ribs then shake the pan lightly to coat.
Step 9: Finish Smoke Cooking
- With the top left uncovered, continue to cook the ribs for an additional 1.5 to 2 hours or until they are at the consistency that you want.
Step 10: Serve Up
- When they are done cooking, you can cover them with foil, and hold them on low heat for an hour or serve them right away.
- Dump into a serving container or let folks grab them right out of the pan.. your choice.


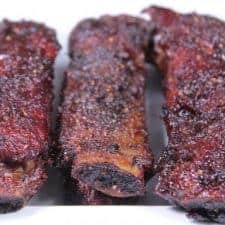
This recipe is fantastic! Finally ribs the way you want them. With four sides with sauce and rub, there is an abundance of flavor in every bite. Also, with four sides of each rib exposed, a higher degree of fat melts away out of the ribs and it makes for a very tasty bite every time. This my only way to prepare ribs and have shared with all the cooks I know. Thanks for the recipe!
My go to recipe every time. Top notch and family fave.
Fantastic recipe and I imagine it would be very difficult to mess it up. Doing my third run with this recipe and cannot wait to tear into this batch during the NFL Playoffs. Thanks Jeff for an excellent recipe and idea.
Tried these today. Simple and extremely good. Much easier to handle and eat,
I love pre-slicing…I first tried your pre-slicing method a couple of years ago and this is the first time I saw the comments. You can be much more accurate with your slicing when they are not hot and it is not as messy. Afterwards, I can serve immediately or wrap the pan up in a couple of towels and stick them in my insulated shopping bag to take to our family get togethers. I have tried all kinds of different temps and times with this recipe and haven’t had a screw up yet. To Leanne above, the best way I have discovered to re-heat or fix somebody else’s undercooked ribs is in my Instant Pot. Just put in a cup of water, put the ribs on a trivet or steamer, set it to normal, high pressure for 5 or 10 minutes and either quick or natural release depending on what you need (5 – quick for re-heat and 10 – natural for undercooked). Thanks Jeff!
Any suggestions on how to cook baby backs a little more the next day after, when you feel they were a tad under-cooked? Thanks Jeff!
Leanne, The only thing I can think of is to wrap them in foil with a little apple juice or some sort of liquid.. even a little water would be fine. (you could also place them in a foil pan covered with foil. Put them in the oven or back on the smoker at around 250°F for about an hour or two to see if that helps. It’s really difficult to re-cook things and have it turn out right simply because it usually does more drying out of the meat than cooking it. The added moisture will help some in this case and may actually work.
I was playing around one fine day and did the same thing with the some ribs. I cut them in individual ribs marinate them dry rub them smoke them and been doing it every time. Still get get a good bite every time. Glad I’m not the only guy that does this.
I’ll be those appetizers went fast. I could eat a whole tray of them.
Jeff,
Awesome site, ideas, and most importantly the recipes!!!!!
Question: Can you, would you, or recommend pre-slicing beef ribs?
Thanks and keep up the GREAT SITE!!
Where i’m from – cutting up a rack of ribs is a big no no! However, this article has persuaded me to give it a try, at least once!
Hi Jeff, I tried your pre-sliced ribs recipe today. Flavor was great, but the meat turn out a little too dry for my taste. Any advice? I used St Louis ribs from costco that I previously sliced, froze and unfroze. Smoked at 235F for 2 hours, brazed for 1 hour and uncovered for 1 hour 40 minutes. Got done early, so I recovered pan and let them rest in oven at 135F for an hour.
Thanks!
I made these tonight and mostly followed your recipe.
I bought your rub and sauce, a while ago, and the sauce is one of my 3 Go-To sauces.
I had a little ooops this time with your sauce. I didn’t make enough and didn’t realize it until I was getting ready to pull the ribs for the first basting. What I ended up doing was I added 1/4 cup water and 1/2 cup apple cider vinegar. What it did was cut the heat a little, and added another layer of yum.
This is my Birthday weekend, and this was my birthday gift to myself. Great recipe.
Joe
I cooked a slab of St Louis ribs using this method yesterday. They are FANTASTIC. And your rub recipe is awesome.
I made two racks of baby backs using this recipe yesterday for our annual fantasy football draft. I host each year, and smoke ribs and another meat each time. This time I smoked italian sausage and brats to go with the ribs.
I loved this method of smoking the ribs – especially when it came to serving. No slicing hot ribs, no transferring to a platter – just pulled them off the smoker already in the pan, threw some foil over it, faux cambro’d ’em, and pulled them out once it was time to eat.
They were excellent, and the texture with a bit of crisp on the edges, and the extra rub flavor was amazing. Everyone thought they were great. I think this will be my goto method for smaller get-togethers – the one downside is that I can only fit two racks of ribs on the two grates of my ECB sliced, where as with rib racks I can fit 4.
Thanks for the great idea!
These turned out great better than the 3-2-1 method. Great bark and chew of course using Jeff’s rub and sauce you cant go wrong.
Okay. I am totally impressed. I followed the instructions for Pre-slicing Ribs before smoking them and the results were nothing short of fantastic. Even my wife, who could take or leave smoked meats, loved them. I give this recipe five stars and kudos to Rick Shaw for stepping out and trying something new and sharing his results with us.
Hey Jeff! Looking forward to doing this. Question on the braising part – do you place the ribs back into the smoker for that or just leave them out and enclosed?
Thanks!
The braising is done in the smoker at the same temperature throughout.