Smoked Corned Beef Brisket (The Making of Pastrami)
Smoking-Meat.com is supported by its readers. We may earn an affiliate commission at no extra cost to you if you buy through a link on this page.
Read this article without ads
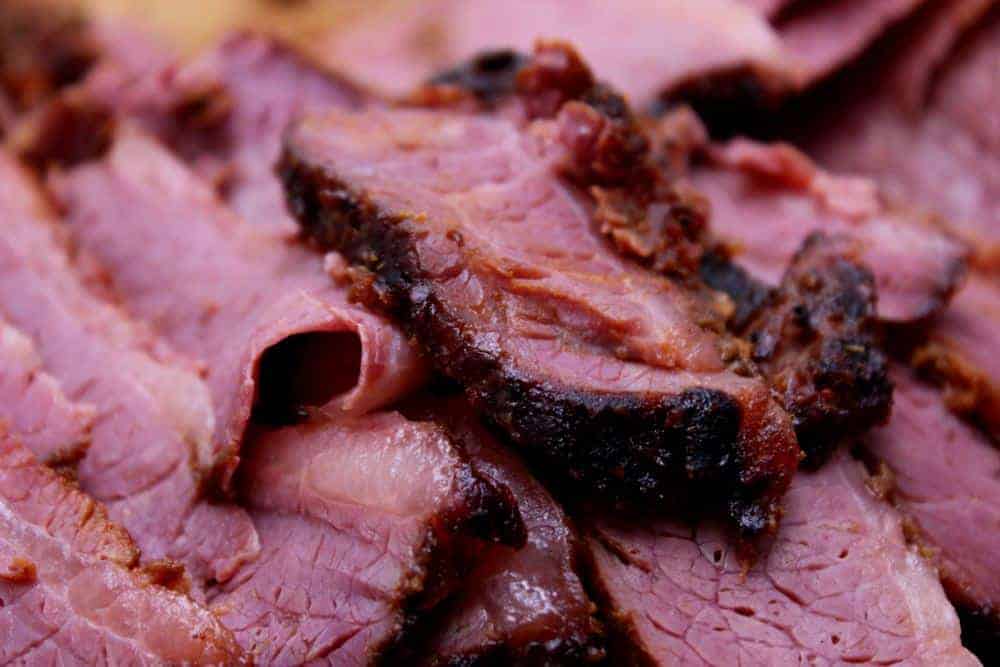
Whether it's New Years Day or St. Patrick's Day, there's no better way to celebrate than by making a couple of smoked corned beef briskets in your backyard but don't you go and forget about this great hunk of meat for the next 365 days.. it's too darn good to only eat it once or twice a year!
If you want to cure your own corned beef, you can do that by following these instructions (assuming you start at a minimum of 6 days prior to when you need it).
Here's a link to more corned beef brisket recipes for you to peruse ;-)
- Prep Time: 10 minutes
- Cook Time: 8-10 hours
- Smoker Temp: 240°F (116°C)
- Meat Finish Temp: 200°F (93°C)
- Recommended Wood: Hickory, Cherry or Maple (a mixture of these is great)
- 3-4 lb corned beef brisket
- Dijon Mustard or spicy brown mustard
- Jeff's original rub
- Foil pan
- Foil
You'll probably see these everywhere now that we are this close to New Years Day and St. Patricks day and they usually run in the 3-4 lb size. You are looking for one that feels tender, has about a quarter inch fat cap and has a fairly even thickness.
Other than that, there's not much to it.
If you are interested in wet curing your own corned beef briskets, check out this post.
The long, drawn out portion of making pastrami is in the curing of the brisket. Since we are purchasing the meat already ready to go, the final steps in preparing and smoking it is very easy to do and other than taking a little time in the smoker, it is hard to get wrong.
Optional Test/Remove Some of the Salt
Cut off a very small slice of the beef and do a quick fry on it using a skillet. If it's perfect, then continue but if you find that it is saltier than you like (common problem), you can do something about that at this stage in the game.
- Place the brisket in a pan of water in the fridge for 2 hours.
- Test again
- If it's good now, then proceed, otherwise, change the water and soak it for 2 more hours
- Test again, hopefully it's good now so you can proceed to the mustard and seasoning
Place the meat down in a pan to keep things less messy.
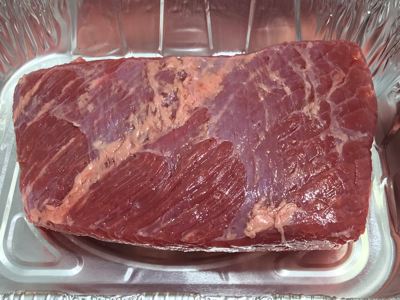
I recommend using some brown spicy mustard or your favorite Dijon mustard to help my original rub stick to the top and sides of the brisket.
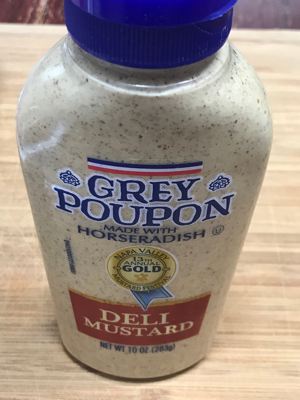
Slather on a thin coat.
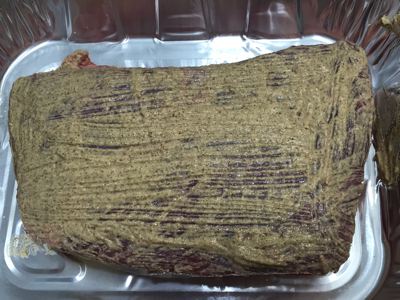
My original rub is the cat's meow and the bees knees on a whole lot of things including this corned beef brisket.
Be generous with it!
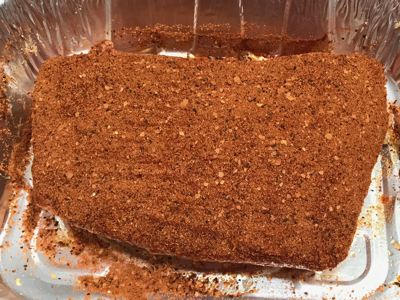
After a few minutes, the tiny bit of salt in my rub pulls some of the juices to the surface and makes the rub look wet.
That's exactly what you want.
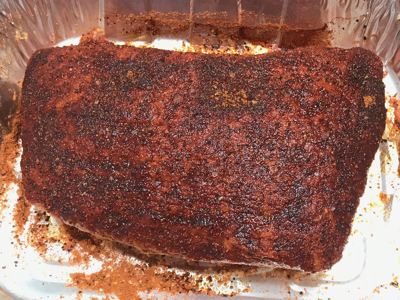
Flip it over to fat side up and do the same thing again with the mustard and more of my original rub . Be sure to get the sides with mustard and rub as well.
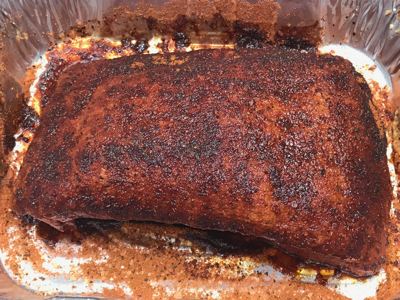
Believe it or not, the corned beef brisket is now ready for the smoker.. see how easy that was?
Let the brisket sit there in the pan while you go get the smoker ready.
Any smoker will work as long as you can maintain a temperature of 240°F (116°C) with indirect heat and provide smoke for about 4-5 hours.
I used a pellet smoker, the Camp Chef Woodwind, one of my favorite types of smokers right now. I love cooking with real wood and having this kind of flexibility and ease of use!
If you use a smoker that has a water pan, fill it up as well.
When the smoker is ready to go, it's time to get cooking!
You can place the meat directly on the smoker grate if you like but it's also completely ok to leave it in the pan. Just place the pan on the smoker grate and leave it there while it cooks.
This also makes it easier when we cover it later with foil.
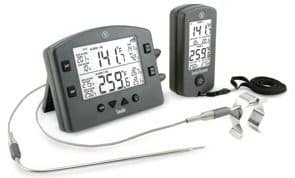
I highly recommend using a thermometer to monitor the temperature of the meat while it cooks. My thermometer of choice was the Thermoworks “Smoke” but if you have something different that's ok too as long as it's accurate.
The “Smoke” is a dual probe, remote meat thermometer and connects to an app on my phone via an optional Wifi gateway. This allows me to go about my day, even go to the store or anywhere else I please and still know exactly what's going on with the temperature of my smoker and the meat.
You can also use a handheld thermometer such as the Thermapen or ThermoPop to check it now and then and see where the temperature is.
If you can feel of the brisket with your fingers and guess the temperature AND actually get it dead-on every time, then you may not need a thermometer. The rest of us, need a little technology to get it right and there's nothing like getting it perfect every time with no guess work.
Once the brisket reaches 160°F (71°C) , it's a good idea to wrap or cover the meat with foil to allow a little braising. This will tenderize the meat even further.
My brisket was in a pan so it was really easy to throw a piece of foil over it for a while.
Once the brisket hit about 185°F (85°C), I removed the foil to help the crust to firm back up.
Corned beef briskets are often tenderized with papain and other ingredients from the factory to help make them end up more tender so the finish temperature is sort of dependent on the tenderness factor.
I sometimes use a long skewer to check the tenderness once the meat hits about 190°F (88°C) and I don't call it done until I can push the skewer in with very little resistance. This is usually around 200°F (93°C).
That's a lot of internal meat temperatures so let's review:
- 160°F (71°C) – wrap it up with foil or unlined/uncoated butcher paper
- 185°F (85°C) – unwrap again to firm it up
- 190°F (88°C) – start checking for “no resistance”
- 200°F (93°C) – likely done temperature unless it's super tender before this temperature and/or you like it less tender.
When the pastrami is finished, remove it from the heat and keep foil tented over it for at least 30 minutes before slicing into it.
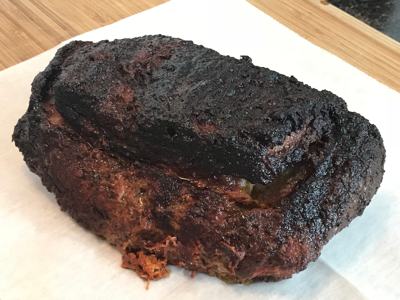
Smoking a Corned Beef Brisket (The making of Pastrami)
Ingredients
- 3-4 lb corned beef brisket
- Dijon Mustard or spicy brown mustard
- Jeff's original rub
- Foil pan
- Foil
Instructions
- Place the corned beef brisket into a pan, fat side down, for ease of cleanup.
- Slather a thin coat of Dijon mustard on the top and sides of the brisket.
- Apply Jeff's original rub generously all over the top and sides of the brisket and let it continue to sit until it get's a "wet" look. (about 10-15 minutes)
- Flip the brisket over to fat cap up and repeat the mustard and rub on the fatty side of the brisket.
- Let the brisket sit while you go get the smoker ready for cooking at 240°F (116°C) using indirect heat.
- Place the pan of brisket on the smoker grate and let it cook until it reaches about 160°F (71°C).
- Cover the top of the pan with a piece of foil and let it continue cooking with just heat until the meat reaches a temperature of 200°F (93°C).
- Use a skewer or toothpick to check for tenderness. It should have little to no resistance when inserted.
- Let the meat rest with a piece of foil loosely tented over the top for approximately 30 minutes before slicing.


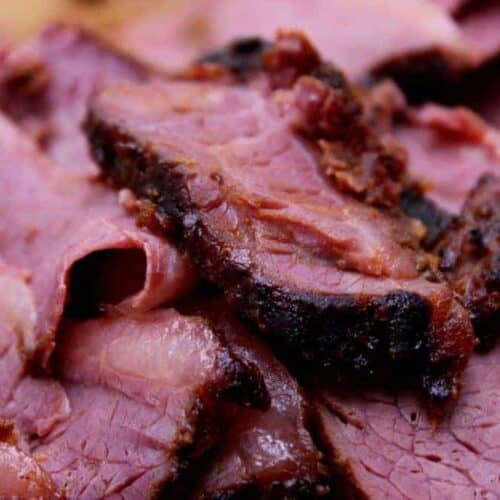
I have done this recipe. It is so close to the Montreal Smoke meat flavor profile it is amazing.
Followed the recipe to the word turned out very very dry
Louis, just like with briskets, steaks, etc. the end product is dependent upon the quality of the meat you started with, the process in which it was prepared and several other related factors. When I put a set of instructions together, it’s based on a well-documented process that turned out an excellent product.
I am happy to help you figure out what caused it to turn out dry if you want to give me some details about what brand, type, cut of corned beef you started out with, what you smoked it on, what the temperature was when it came off the smoker, etc. and we can go from there.
This is a great recipe I have done it a couple times different adding broth to the pan at 160 and covering until 200 degrees comes out tender but I like yours because we tend to make Ruben sandwiches so it isn’t as beefy thank you
Maybe I missed this but can I substitute canning/pickling salt or Himalayan sea salt in place of the coarse Kosher salt?
If so, does the amount stay the same or do I need to add more or less?
Hi. I prefer Prague powder.
I followed this recipe to a T. But the meat was done in almost half the time the recipe said, internal temp of the smoker was checked with a separate stand alone thermometer and stayed nicely at 240 but the meat hit 200 internal temp at like 4.5 hours. Should do some sort of newsletter on what to do if meat is done WAY to soon and how to salvage it to keep it good for supper time
I use butcher paper, but if you’re looking for a long rest, it is fairly common to line the bottom of a cooler with foil, place your smoked meat (any) on top, and loosely lay another piece of foil on top. I’ve kept a brisket HOT for over 6 hours this way.
I’m of the mindset that it’s better to be done a few hours earlier, thank to keep the family/guests waiting.
This was outstanding. Thanks so much for the inspiration to even do this. I would have never thought to do corned beef on the smoker, but my wife wanted me to make something to honor our Irish heritage for this St. Patrick’s Day (or thereabouts!).
Also thanks to Jeff and commenters for the advice to soak in water (did so overnight and it was not too salty, but I can tell it WOULD have been). And agree with some comments that featuring pepper and coriander really brings it home.
My store had flats and points, and I tortured over it a bit, but went with a point. REALLY glad I did. Never even knew that moist corned beef could be a thing.
Uncovering at 185 (after wrapping at 160) also resulted in a perfect bark when done.
Jeff – I really appreciate the digital recipes each week, all of which are savable on Pinterest. The videos are great and very easy to follow. I’m just beginning to enjoy this type of cooking and am very glad I came across your web site. My question for you, how would you describe the difference and uses of your original rub and the Texas rub. And will I be able to find the exact ingredients for your two rubs? I read rave reviews on your rubs and guess I should try each before purchasing the recipe but it seems more economical to go with mixing my own.
Thanks for all you make available for us “beginners” as well as the seasoned cooks!
Best
Scott
Scott, The ingredients aren’t listed anywhere for the recipes but they are very common ones that you’re likely going to already have in your pantry. Shoot an email request to [email protected] and the ingredients list can be sent back to you.
The original rub has a lot of brown sugar..that is for forming bark on the outside of the meats that you cook. It also has enough black pepper and cayenne to bring just a touch of heat to offset the sweetness. Salt is added very carefully to just bring out the natural flavor of the other ingredients and the meat. It does not taste salty and you can add a lot of this to meats if you like without making it salty.
This rub is great on almost everything but I prefer it on pork and poultry.
The Texas style rub is what you’d expect from Texas with the traditional salt, pepper garlic and onion powder and a little cayenne for heat. The salt is still minimal but more than what you’ll find in the original rub. You’ll notice there is no sugar or sweetness of any kind in the Texas style rub.
This rub also works great on almost everything but it goes especially well on beef and vegetables.
Two things to note. 1- I have a version of Jeff’s rub that was made without salt. No matter how long you soak it, it will still be salty. 2- Amazon has some home slicers for under $70 that is a must for proper slicing. Refrigerate the meat overnight and slice super thin the next day, then you can drop some in a steam basket to reheat when the sandwiches are being made.
David, Soaking definitely leaches salt out of the corned beef and my rub has very little salt so in the end, you end up with a lot less salt. I may have missed your point altogether and if so, you can straighten me out on that ;-)
A slicer is a great tool to have. I have a similar cheapo slicer that I paid around $100 and it does a pretty good job when I need to do some thin precise slicing.
This is not Pastrami!! Two entirely different things. Corned beef is wet cured, pastrami is dry cured! Don’t forget to steam the pastrami.
Appropriate name for the comment.
Lol
Hi. I’ve been making pastrami for years. Smoked first for 4/5 hours then steamed for another 4. Sometimes longer, dependent upon size of brisket. Tender & juicy!
Pastrami is made from beef, usually brisket, that is wet-cured in a brine, then highly seasoned with a rub consisting mainly of black pepper and coriander, then smoked for flavor, and steamed to finish. It is often sliced hot and served as a sandwich, though it can also be chilled and sliced as a cold-cut meat.
Jeff i use your rub regularly and like it BUT it is not going to produce Pastrami.
Pastrami to taste like pastrami must have heavy cracked pepper and coriander seed. some add dry mustard and a bit of brown sugar. Also perhaps some garlic and onion powder.
Your smoking directions are ok but copious black pepper and coriander is what makes corned beef into pastrami.
Thanks for a fine site!
dick
Fortunately, my rub contains a lot of coarse ground black pepper. I love black pepper and it would only make sense that I would incorporate a lot of that stuff into my products. Like you say, “true” pastrami usually has coriander which you can easily add if you like depending on your taste. I’m a big fan of traditional recipes.. I also like to color outside of the lines and encourage others to do the same.
Core out a head of cabbage and throw a beef bullion cube and some butter in it wrap loosely in foil it tastes fantastic smoked also
I need to prepare this the day before serving, but I am not sure when to slice it, and how to re-heat it. I’m assuming I should put it in the fridge while it is still whole (once it cools down a little). Should I slice it before re-heating it or after? How should I re-heat it?
So…. I ended up putting it in the fridge whole, which worked out well, as I was able to skim off the fat when I took it out of the fridge the next day. Then I heated it for about an house in a covered dish at 275 degrees for about 1 hour. Then I removed it from the oven, sliced it, put the meat back in the liquid, and put it back in the oven at 275 degrees for another hour or so. I served it with slider buns, and it quickly vanished. It was amazing!
My only disappointment was that there were no leftovers. :(
When using a prepackaged cb (that comes w the little cellophane package of pickling spices) do you need to do anything with those pickling spices? Just finished my pastrami, had a bite but it seemed like I missed something with the pickling spices.
The “Printable Recipe” shows both prep time and cook time of 23 hours and 54 minutes.
Thank you for letting me know.. this has been corrected.
Never heard of Pastrami w/out a blanket of cracked pepper!
Ron, you can definitely add more cracked pepper if you like. My original rub has a lot of coarse black pepper and that’s what I use.
My wife does not like corn beef, at all. However, when I fired up my Bradley 4 rack, electric and smoke one, she loved it.
I followed the directions, for the most part. It was slathered with a stone ground mustard and a variation of Jeff’s rub. The meat was full of flavor and did taste like pastrami. And it was so tender.
Thanks for the recipe. I just put another cb in about an hour ago and look forward to sharing it with her.
I slow cooked 3 cb briskets and smoked one for a St Paddy party. The general consensus was I should have done it the other way! Big hit!
What are your thoughts on the vent on the top of the smoker – open or closed? Using an electric smoker and they say to have it open for jerky and fish as it removes moisture. I have keeping it open about a quarter to try to build the bark up.
On most electric smokers like the Masterbuilt, I recommend the top vent be left full open at all times.
As noted, soaking in water cuts the salt and I did that twice. I would make at least twice as much as you think you’d need due to shrinkage. I also steamed the meat for an hour before serving and then put in the over on high to try and crisp the coating, but the aroma and taste was AWESOME! I had slow cooked a corned beef in crock pot (water, vinegar, onion and garlic powder) and sliced reuben and pastrami sandwiches in half and everybody got some of both.. ZERO left overs.
Jeff, I have used this recipe before but I think I didnt put any salt into the rub. Have you ever done that? Thanks
I have not tried leaving the salt out of the rub but it sounds like it work really well since these corned beef briskets do tend to be on the salty side. You can also soak them for 2-12 hours changing the water every 2 hours to remove a lot of that salt.
I have done this a lot. The resulting pastrami is very tasty and tender.
One issue I have run into is that the commercial corned beef winds up getting reduced in volume by at least 1/3
This can result in a very salty end product.
You can soak it in clear water for a day before smoking or parboil is for 15 minutes and that can reduce the saltiness.
Concur on both the size reduction and the need to soak in water. I swapped the water out once. But, the only thing left after my church small group met was some beef juice on the plate.
The CB needs to be soaked in several changes of water or it will be to salty.