The “Wooster” Brisket – The Best Smoked Brisket
Smoking-Meat.com is supported by its readers. We may earn an affiliate commission at no extra cost to you if you buy through a link on this page.
Read this article without ads
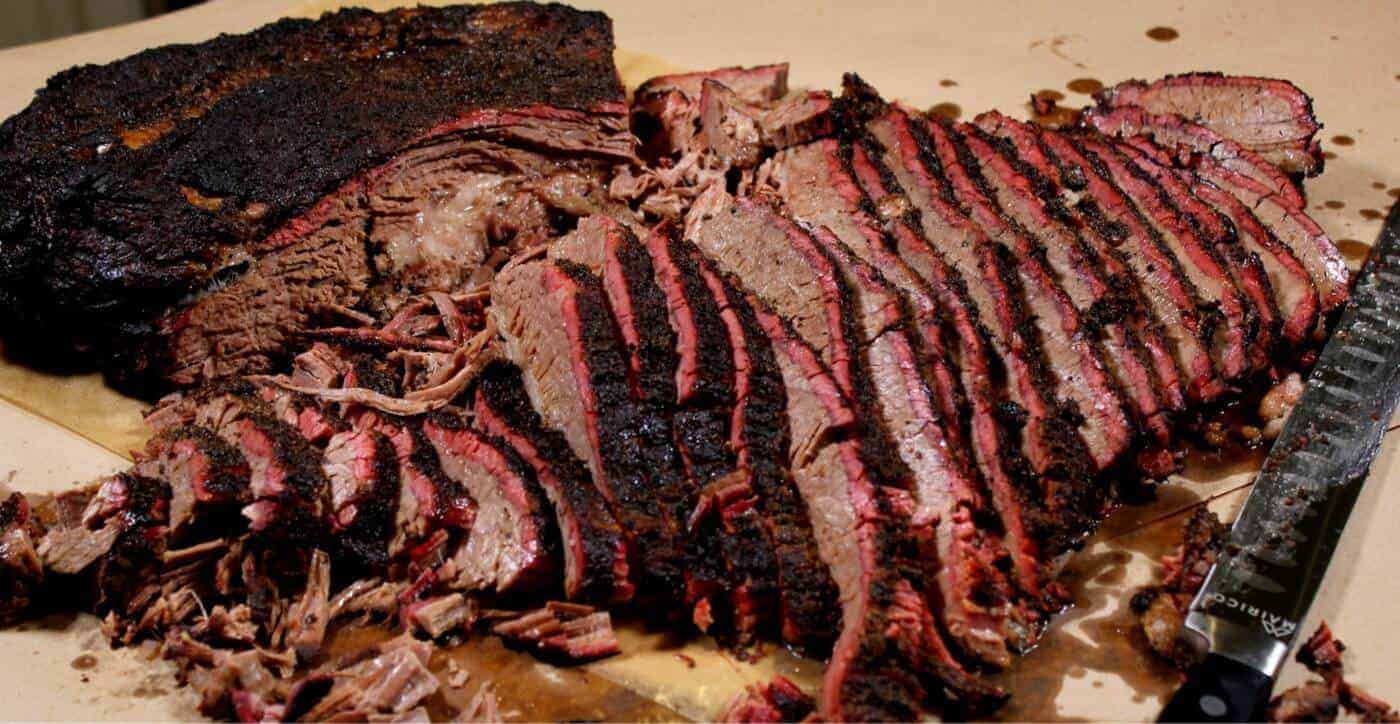
The “Wooster” brisket is a smoked brisket recipe that I worked on for a while. I've done it fat side up, fat side down, wrapped, unwrapped, rested for 2 hours, rested for 4 hours, not rested at all.. well, you get the picture.
Brisket is something that not only “seems” difficult, it CAN be difficult if you don't follow some tried and true methods. My job in this endeavor has been to try and make it as easy as possible for you to follow a clearly written set of instructions and get it right every time.
In case you're wondering about the name, well, I douse this brisket with “Wooster” sauce (Worcestershire) every couple of hours during the initial phase of the cook to keep it moist on top. The flavor is on point and the liquid does a great job of working with the Texas style rub to create a perfect crust.
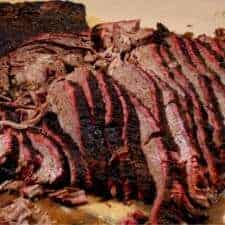
Are you liking the looks of that 11-inch brisket knife in the image above? I love it and you can check it out HERE.
- Prep Time: 45 minutes
- Cook Time: ~15 hours
- Smoker Temp: 225°F (107°C)
- Meat Finish Temp: ~200°F (93°C)
- Recommended Wood: Oak or pecan
- Whole packer brisket
- 2 large bottles of Worcestershire sauce
- Jeff's Texas style rub
- 2 large foil pans
- Brown or pink butcher paper, unlined/uncoated
- Heavy duty foil
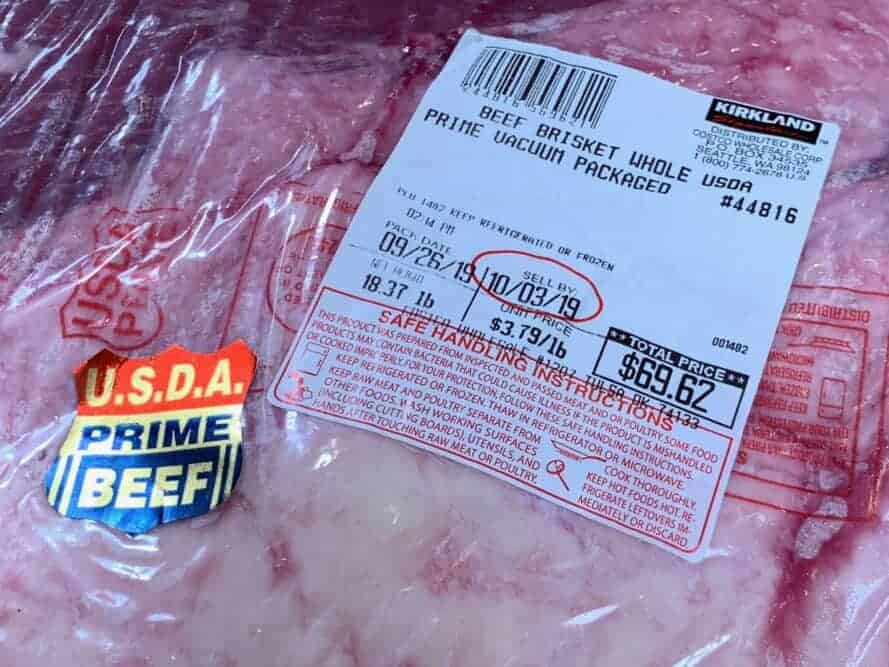
If you have a Costco in your area and you're not taking advantage of their great prices on USDA prime grade briskets, then you should be. I don't get anything from Costco for saying that, it's just a good deal that you need to be aware of. Maybe other warehouse type stores have deals like this too?
My recommendation is to purchase the absolute best brisket you can afford and go from there.
Look for briskets labeled as whole packer and you should be able to see at least ¼ inch fat cap on one side. I usually shoot for pieces that are in the 12 to 14 lb range but not always if I can find a nice big one.
The one I cooked for this recipe weights in at 18 lbs.
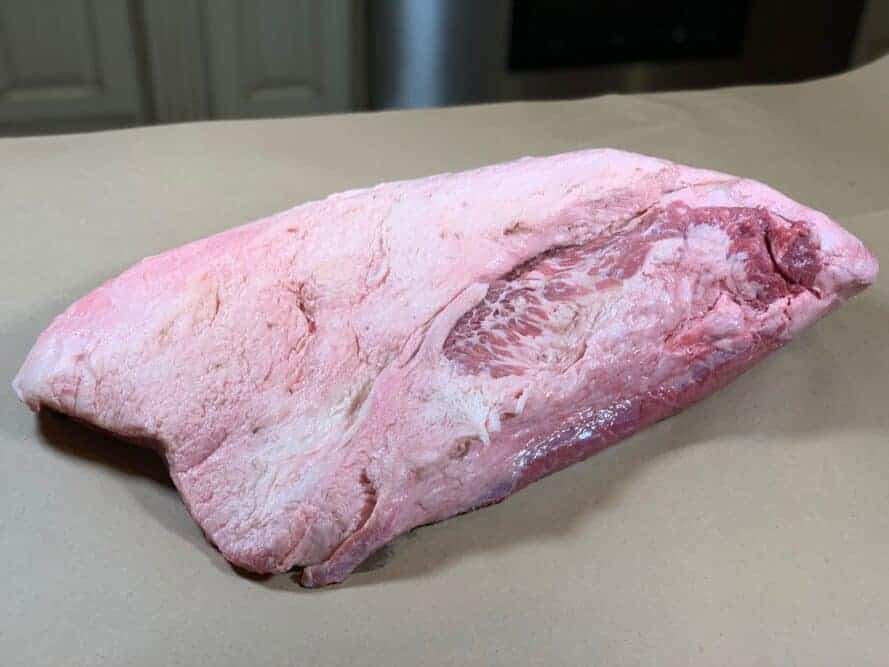
Trim the fat cap down to ¼ inch and get rid of any large pockets of hard fat.
Here's a big chunk I removed from the side.
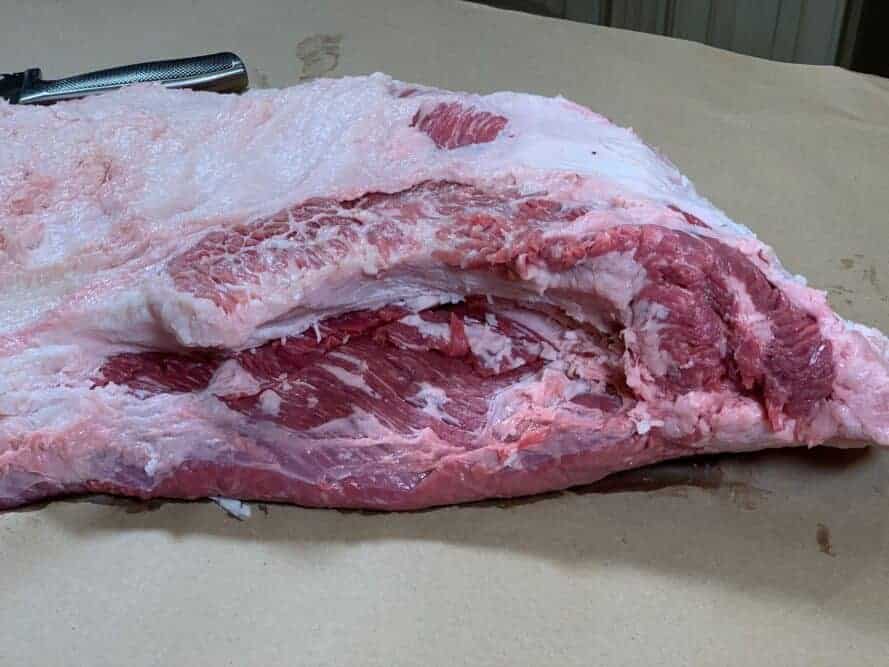
No sense cooking a big ol' piece of something that's never going to render and just gets in the way of the good stuff.
Once you are satisfied with the way it looks, turn it to fat side up if it's not already.
On this side, score the fat in a crosshatch pattern at about 1-inch intervals. This is to give the Worcestershire and the seasoning a place to grab on to.
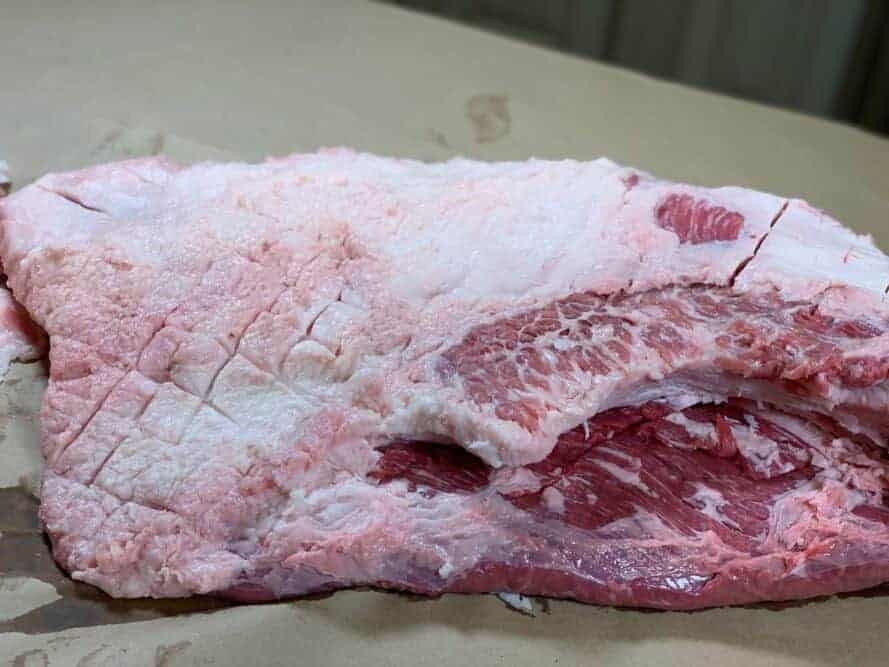
At this point, place the brisket fat side up, just like it is down into a large, full size foil pan and pour Worcestershire all over the fat cap to create a wet surface.
I use about a third of the big bottle of Worcestershire on the fat cap.
Then apply a liberal amount of Jeff's Texas style rub.
Leave this sitting for a few minutes.
Flip the brisket over to fat side down, in the pan.
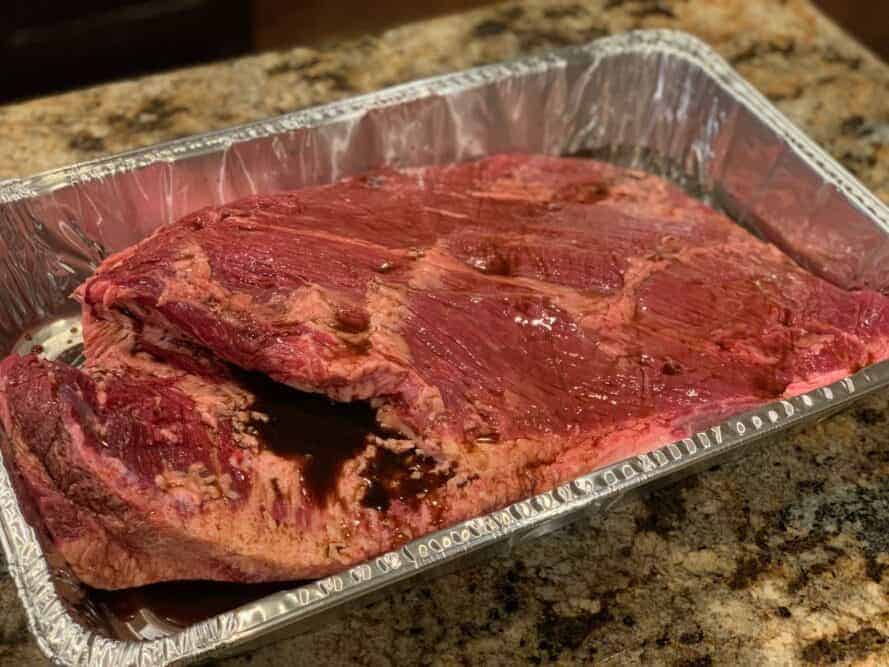
Pour the rest of the large bottle of Worcestershire all over this side of the brisket to create a wet surface and apply a liberal amount of Jeff's Texas style rub.
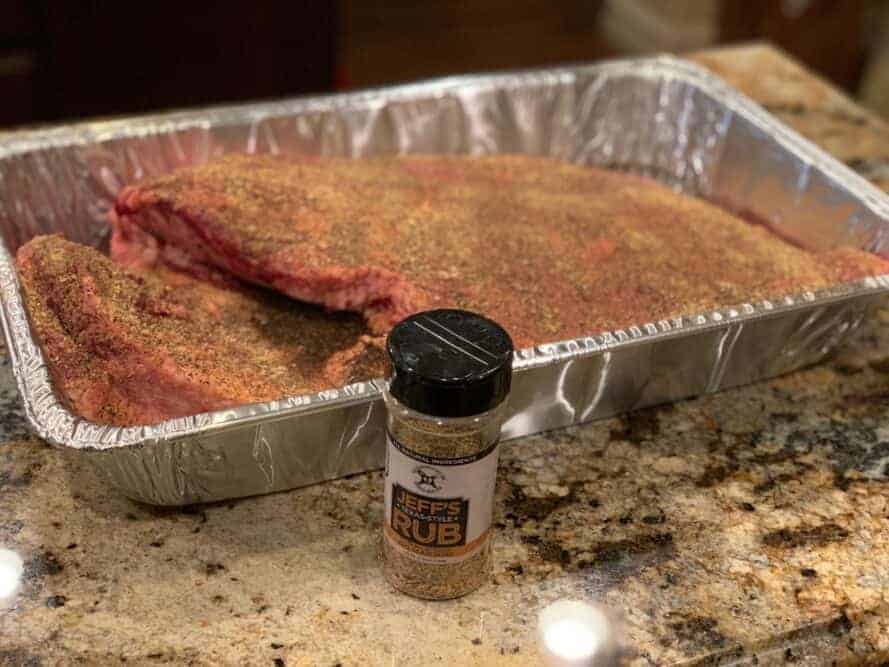
Place foil over the top of the pan with the brisket and place it in the fridge overnight or for at least 10 hours.
Remove the brisket from the fridge and set it on the cabinet about 1 hour before you are ready to start cooking it in the smoker.
There's a lot of opinions where this is concerned and that doesn't necessarily mean any of them are correct or incorrect just that whatever works for a person, that method is going to be “right” for that person since it yields great results.
The prevailing school of thought is that the fat cap melts while the brisket cooks and this keeps the brisket moist however, in my experience, the fat doesn't melt all that much until it reaches a fairly high temperature (180°F or so) and therefore, if I place the fat down and out of the way so I can focus on keeping the actual meat moist, that's better for me.
In my experience, it's the fat INSIDE the brisket that does the most good. The fat on the outside maybe not so much. Feel free to impart your wisdom on this subject in the comments below.
Set up your smoker for cooking at about 225°F (107°C) with indirect heat. If your smoker uses a water pan, fill it up.
For smoking wood, use oak or pecan if you have it, otherwise, use whatever smoking wood you have available.
Once the smoker is ready, place the pan of brisket on the smoker grate and let the magic begin. I went ahead and added a temperature probe so I could watch the temperature but you really don't have to do that until later as I'll point out.
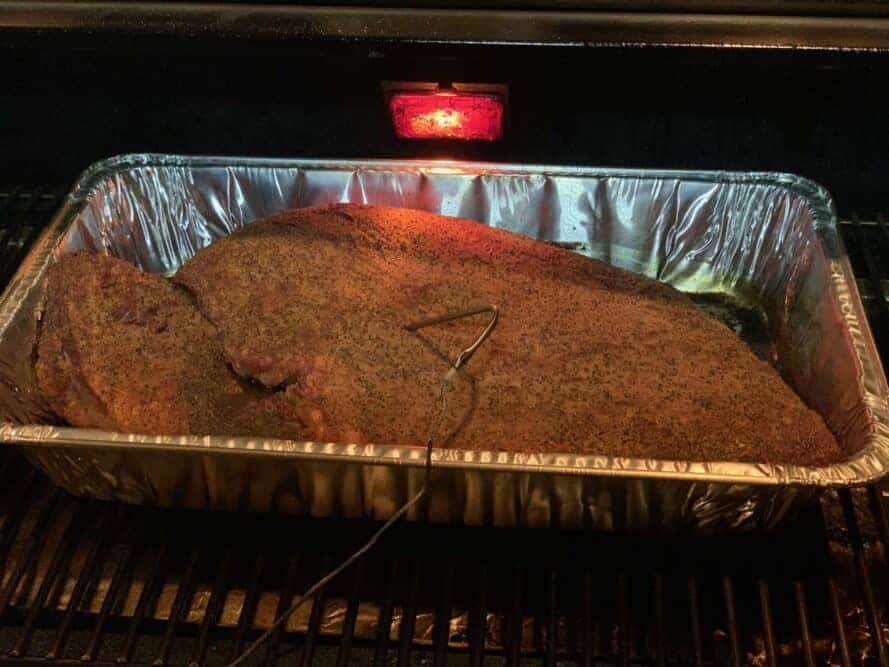
Let the brisket cook and all you have to do is raise the lid every 90 minutes and douse the top of the brisket with Worcestershire sauce. Make sure you have plenty of this on hand.
I tend to use an entire large bottle of Worcestershire sauce during the first 6 hours or so to keep the top of the brisket nice and moist.
Once the brisket reaches 165°F (74°C) and the color is a beautiful brownish red (usually about 6-7 hours into the cook time), it's time to cover the brisket to slow down the browning process, power through the stall and tenderize the brisket.
Give it one last dousing of Worcestershire sauce before covering.
Beautiful!
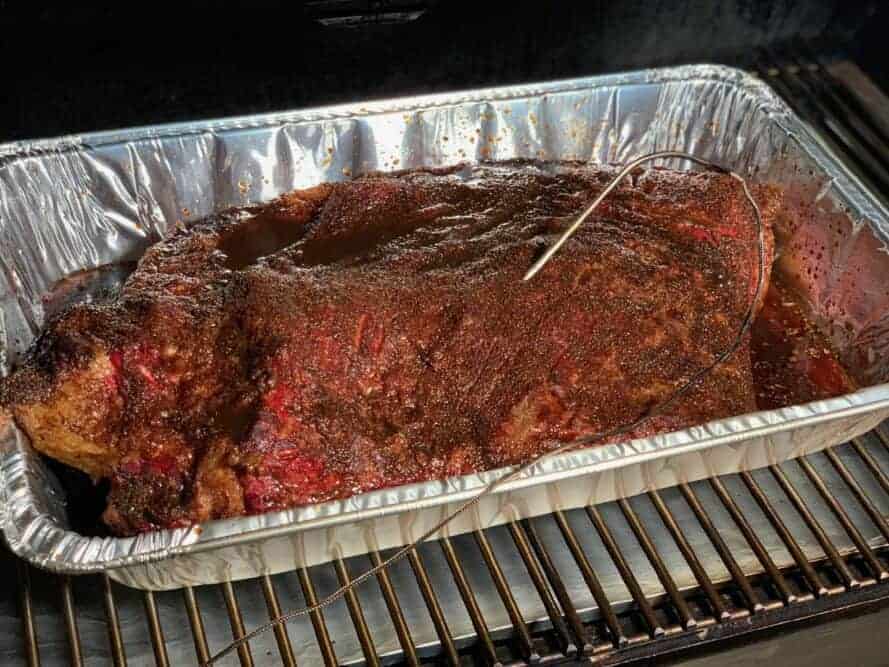
At 165°F (74°C), place another equally sized pan upside down on top of the one the brisket is in or cover the top of the pan with foil to lock in the color and help power the brisket through the stall*.
This is also a great time to insert a thermometer so you'll know when you need to check the brisket for perfect tenderness. The ThermoWorks Smoke is usually my thermometer of choice for things like this.
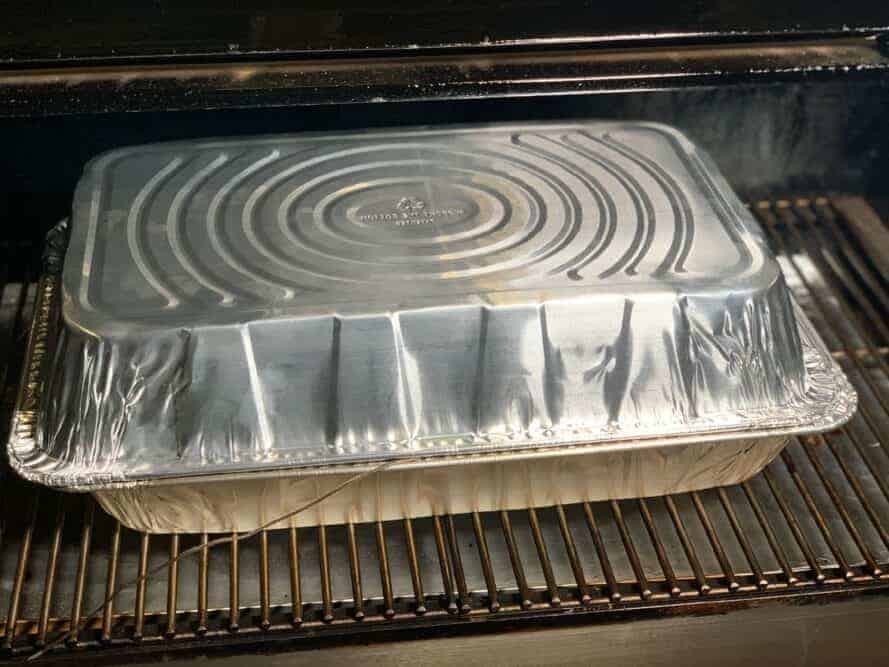
After covering the brisket, let it continue to cook until it reaches around 197°F (92°C) at which point you'll want to start probing it in the flat and in the point to check for tenderness. The magic number is usually right at 200°F (93°C) but it can be either side of that by 2 or 3 points so keep a close eye.
When it's ready, the probe will go into the meat with no resistance like it's going into room temperature butter.
In case you're wondering, stick a toothpick in a pad of room temperature butter to get the feel for how perfectly tender brisket feels. Absolutely no resistance.
Use the probe of your thermometer or something similar to perform this tenderness check.
It is absolutely essential that you use a thermometer to let you know when you are close but then use the feel of the probe going into the meat to tell you when it's time to remove it from the heat.
As you can see, most of the fat from the fat cap has rendered and filled up the pan with delicious brisket juice.
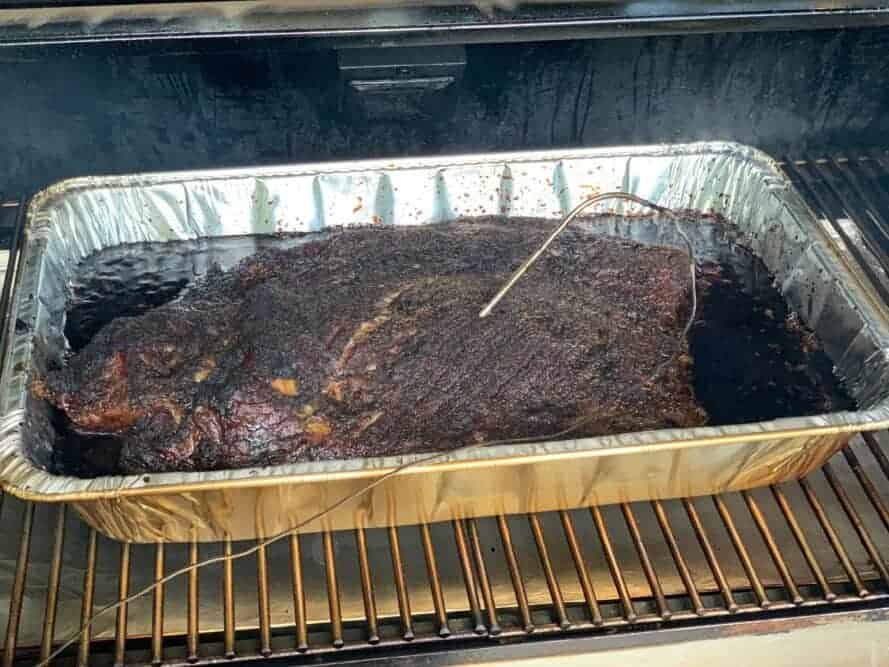
Remove the smoked brisket from the pan or the grate into a sturdy cookie sheet or pan for bringing it into the house.
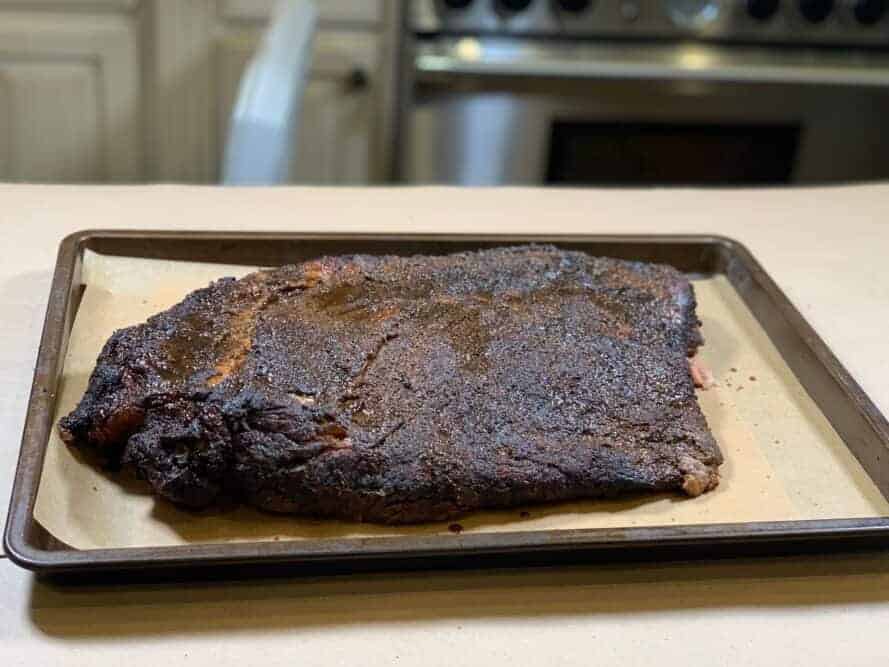
Once inside, you'll want to wrap it in plain uncoated butcher paper or foil and let it rest for 2 to 4 hours. More is usually better in this case.
There is no right or wrong way to wrap a brisket.. I use a couple of layers of 18 or 24-inch wide unlined butcher paper or heavy duty foil.
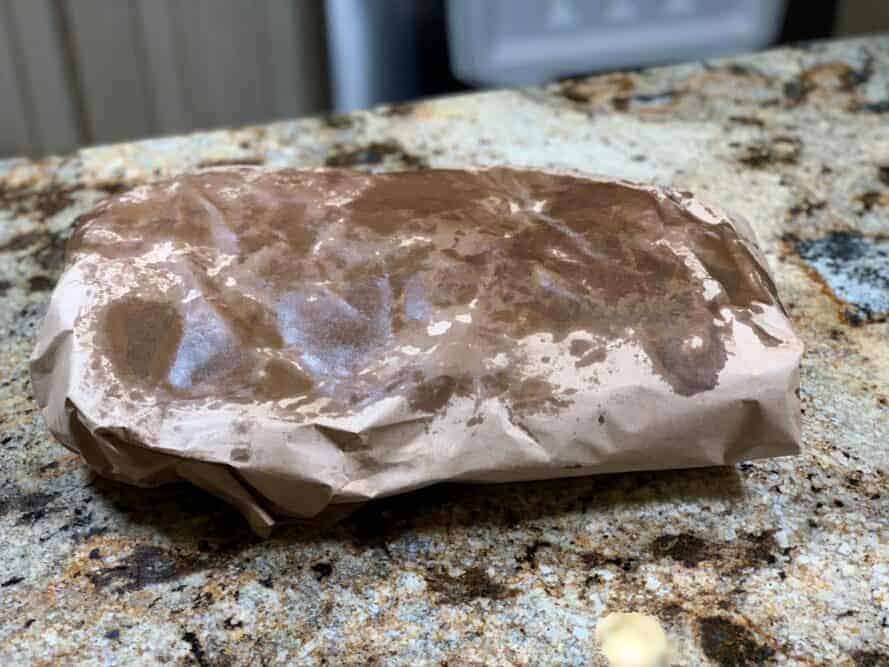
Line the bottom of an empty cooler with foil to aid in cleanup and lay the wrapped brisket in the cooler.
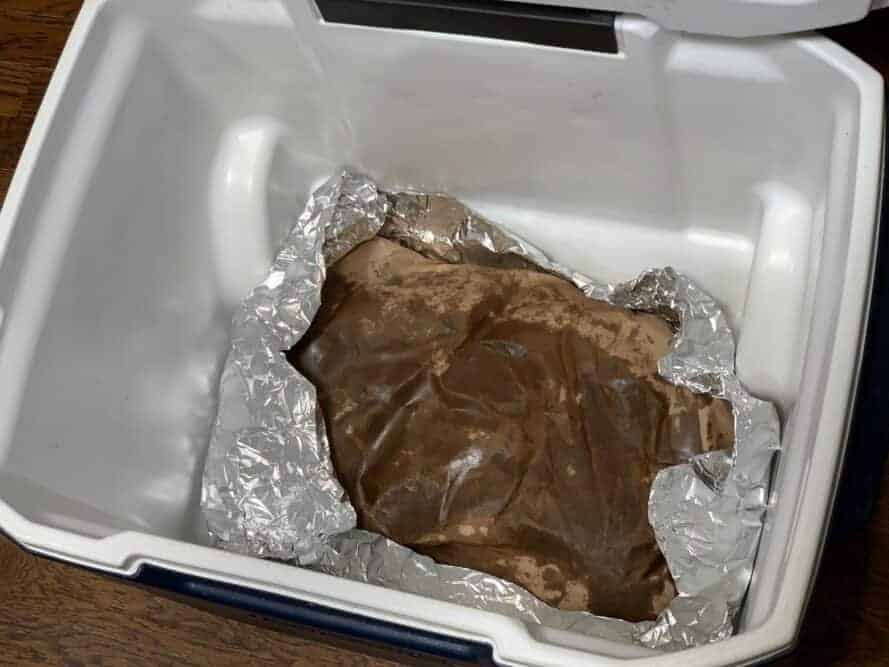
Fill in any remaining space with extra paper to insulate it and close the lid.
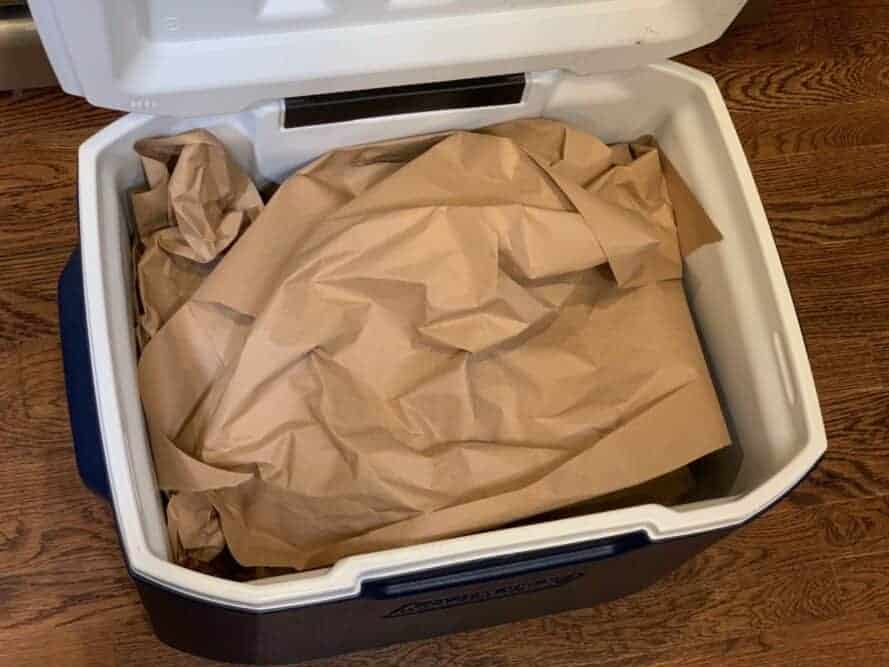
Keep the lid closed until you are ready to slice it. This setup will keep the brisket hot for up to 4 hours.
Remove the brisket from the cooler and unwrap it from it's cocoon onto a large cutting board.
Slice the brisket flat ¼-inch thick across the grain using a very sharp knife.
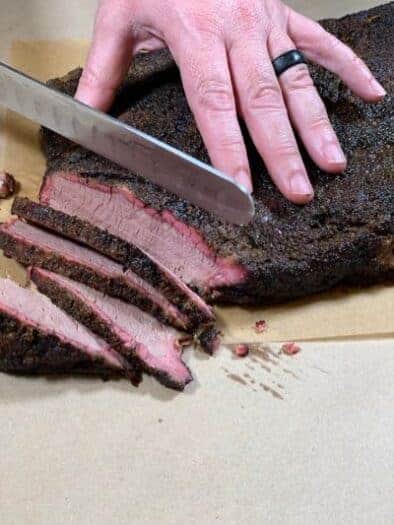
Once you start getting into the larger, fattier part of the brisket you can continue slicing or cube it up for burnt ends.
Enjoy the heck out of your homemade smoked “Wooster” brisket
- If you prefer, you can remove the brisket from the pan when you are ready to cook and place it fat side down directly on the smoker grate OR you can use a shallow pan. Either of these methods work great.
- When it's time to wrap the brisket at 165°F (74°C), you can wrap it in paper or even foil if you prefer. Often this is in the middle of the night, and for that reason, it's usually much easier to just set another pan on top.
*What's a stall? In large pieces of meat like briskets, pork butts, etc. there is a period of time at around 160°F (71°C), give or take 10 degrees, where the evaporation of liquid on top of the brisket cools the meat at about the same rate that it is being heated and for this reason, the temperature will stall out and stay at the same temperature for several hours.
To solve this problem, simply wrap/cover it with foil or butcher paper.
Is there a formula to figure the cook time based on the weight of the brisket? No. How long it takes to cook a brisket is mostly dependent on how thick it is and how long it takes for the heat to reach the center and raise it to 200°F (93°C) but it's also related to a few other factors such as how tough the brisket is, how much fat is involved, and the temperature of the brisket when it goes into the smoker.
Some people still figure the cook time of briskets and pork butts at 1.5 hours per pound but, in my opinion, this doesn't work most of the time. If I had cut this 18 lb brisket in half separating the flat from the point, it would have cut the weight in half approximately but not the cooking time. With briskets, figure on somewhere between 12 and 18 hours and you'll be very close most of the time.
The Wooster Brisket
Ingredients
- 1 whole packer brisket
- 2 bottles Worcestershire sauce
- Jeff's Texas style rub
- 2 foil pans (large)
- brown or pink butcher paper
- heavy duty foil
Instructions
- Trim the fat cap to 1/4 inch and remove any hard fat on the brisket.
- Score the fat cap in a crosshatch pattern at 1-inch intervals.
- Place the brisket in a large foil pan fat cap up.
- Douse the top with Worcestershire sauce and apply Jeff's Texas style rub generously.
- Flip the brisket to fat side down
- Douse the new top side with Worcestershire sauce and apply Jeff's Texas style rub generously.
- Cover with foil and place the pan of brisket in the fridge overnight.
- Setup the smoker for cooking at 225°F (107°C) using indirect heat.
- When ready, place the pan of brisket on the smoker and let it cook for 6-7 hours or until it reaches 165°F (74°C).
- Douse the brisket with Worcestershire every 90 minutes until it reaches 165°F (74°C).
- At 165°F (74°C), place another equally sized pan upside down on top of the pan with the brisket sealing the meat inside. You can also just cover with foil if desired.
- Continue cooking the brisket until it reaches ~200°F (93°C) and a probe inserted in the meat shows no resistance.
- Remove the brisket from heat and wrap in unlined/uncoated butcher paper or foil. Place in a empty cooler to rest for 4 hours.
- After resting, remove brisket from cooler and slice 1/4 inch thick across the grain.


I tried it, we didn’t like it — way too strong worcestershire. it overpowered everything — I like to spray with beer during the smoke, so may try once more using worcestershire for the rub and beer to keep it moist.
I have done this with one exception. Instead of covering the brisket half way through with a pan, I put the brisket in a turkey cooking bag then into the pan leaving the bag open. When it is time to cover it, I simply close the bag leaving my temp probe in the meat and tie the bag closed. It comes out quite tender.
Bad , way to much Worchester sauce . I tryed it ,nobody liked it.
Jeff, how long do you keep the smoke on it?
I kept the smoke flowing for the first 6-7 hours or until I covered it up. If you’re using a smoker that requires you to add chips or chunks, you can stop adding wood at that point and just finish with heat.
Does the 2-4 hour rest count towards the ~15 hour cook time? Just planning
No, the rest time is separate and very flexible. I recommend a good long rest but it’s not the end of the world if you end up having to slice it right away. Rest as long as you can, up to about 4-6 hours and it will be even better.
Good to see that there are still good ol” stick-burner recipes out there. As depicted above, I am one who has attempted many times to slow smoke a brisket via an offset, charcoal/wood burning smoker, made of oilfield 3/8″ steel casing. And have turned out edible, but not tender and moist brisket. Thanks for sharing your recipe, technique and expertise! I’m going to try again using your Wooster method.
Best,
Mike
CANT WAIT TO TRY THIS VERSION OF COOKING A BRISKET.
I HAVE NEVER USED WORCHESTERSIRE SAUCE IN THIS MANNER BUT I DO USE A LOT OF WORCHESTERSIRE POWDER IN MY OTHER COOKING.
THANKS FOR KEEPING UP INFORMED WITH ALL YOUR IDEAS.
BOB BINGHAM
Great idea with the Wooster I have been injecting my Brisket with Johnny’s Au ju do you think adding the Wooster to the outside would be over kill or a additional compliment?
This is the 2nd time I’ve made this recipe. A 13lb (trimmed to 11 lbs) brisket is now resting for about 4 hours. I have a premonition that it is going to be as good as the last one. Kind of an interesting note is that the Costco tag above shows the brisket cost $3.95/lb. Costco no longer carries prime brisket. The meat market’s price was $9.95/lb. Quite a difference!
Richard, at our Costco here in Tulsa, the briskets still run around the $4/lb mark. Sometimes they are prime, other times not. I have heard from countless others that Costco is no longer carrying prime briskets in their stores so they may be discontinuing this across the board. Fingers crossed it will continue and the price does not go up for a while.
Ive done this recipe trice now and I’m sitting here at 10:30 pm staring my third. Best brisket I’ve ever had/made. I’ll let you know how this one turns out!
Meh, it’s ok. Spg, 235, 203 pull and that’s all there is.
FYI: Since June 2022 the only briskets at my local Costco are choice grade.
Cooked a brisket today. It’s dry and terrible. Glad I wasted over $60 for cat food.
Jeff, what was the finish temperature? Did you wrap it at some point in the cook? Tell us a little about what you did so I or someone can help you out.
What’s the best way to reheat the leftover meat
I skim the fat from the pan juices, and taste it to make sure it hasn’t gotten too salty. I then dilute with low sodium beef broth/stock if needed. Then i heat the juice (au juice?) in a fry pan to a simmer and add the sliced brisket to reheat, and re moisturize about 2 minutes per side.
Just tried this method using half Wooster and half beef broth on a 20lb chuck roll. Turned out great!
I’m curious if you still get a smoke ring by cooking in a pan ?
I get record breaking smoke rings while cooking in a pan.. the smoke and gases from cooking with wood/charcoal is able to get down into the pan and create the same smoke ring effect as it would if you were cooking directly on the grate.
Just finished cooking a Wooster brisket and learned how much time can be shaved off by the braising and smoking of the meat. The braising reduced total smoking time from about 18 hours to 11.5 hours. Meat was delicious and quite juicy, and since it was fat side down but in liquid, no problem. The only question I have is what do others do with the left over liquid and fat. I have added small amounts to the pulled beef but I am looking for other suggestions. Thanks. J
Use a de-fatting cup to remove the fat and then add a little BBQ rub and you have the best Au-Jui ever. Put your burnt ends in it BAM !!
Used the defatting cup to produce a magnificent broth for the burnt ends. I added an equal amount of Kansas City BBQ sauce which I read was the original sauce for the original burnt ends and half that amount of brown sugar. Basted and added the sauce to cut up point. One hour lo smoke on the Camp Chef and increased temp to 250 for two hours. It was heaven!!!! Best basting sauce for burnt ends. Thanks Joe for the suggestion. J
Well we have brisket and noodles
My wife always said if I save it she will make me homemade noodles and the stock will last in the freezer until she is ready to make them
Just add leftover brisket after the noodles are done
No really y’all need to try brisket and noodles
BTW I don’t use Wooster sauce either I too use Texas rub it’s awesome
Beef broth is a great alternative to the “Wooster” to keep the meat moist and help it turn out amazing.
Sounds good to me, Scot!😀
Is there something I can use in the place of Worcestershire sauce? My wife hates the taste of it.
Vinegar and water, apple juice, wine sprays can be tried as well as different rubs. Sorry, Jeff.
Gene, use the Texas style rub or similar low-salt beef rub on the brisket then use beef broth instead of the “Wooster” sauce.
I am not a big fan of burnt ends. The point is my favorite part of any briskit.
Love your recipes but I am terrified of doing a brisket. What time do you start smoking? When/how do you sleep?
It just seems like a lot of money and time to risk.
I hear this question a lot in our church smoking group. I always tell guys to work out the basics on a thicker-cut chuck roast. They cook almost the same as a brisket, just faster & cheaper. Delicious too!
I don’t see where anyone else mentioned it yet, but those fat trimmings are free gold. I smoke them in another tray and render them down into tallow. Just strain the liquid fat thru a coffee filter into a glass jar & store it in the fridge. I drizzle some over the meat when I wrap, to help wet the paper. Tallow has a very high smoke point, and the smoky flavor makes great eggs the next morning. Don’t tell your cardiologist I told you so… ;)
I usually put a tooth pick in my brisket so I know which way to cut it, maybe the pros skip this tip. lol
Looks Mighty Tasty, Jeff!!
And Thanks for another Great Step by Step!!
I’m glad you explained the name “Wooster” Brisket.
I thought you were going to say You got it from “Charlie Wooster”.
Bear
🤣😉
Thanks Bear!
If you cover at 6-7 hours in the smoke, is it just as effective to finish the rest of the time in the oven?
Yes sir! No problem at all. Just make sure it’s in a pan or over a pan so the oven stays nice and clean.
I am looking for a recipe for smoking a Pork Brisket
I have made this twice now and LOVE IT!!! The leftovers make the best beef and noodles
Been using Jeff’s recipes and formulas for years and all I can say is amazing!
I’ve done a few briskets and I always have a huge disparity in the internal temp between the flat and the point. What am I doing wrong?
You aren’t doing anything wrong. There are two different cuts of meat, with the point stuck onto the end of the flat. If you separate them first, you can take the flat out when it’s done and let the point finish cooking.
There is a layer of fat between them that you can use as a guide to separating them. I always separate them and cook them to when each is ‘done’.
Also, after hitting the stall, you can finish it in your oven. Sleep away…
started with a 17 pound packer from Costco at 10:30 pm. Getting up every 90 minutes all night leaves a little to be desired. Finally hit 165 about 8 am. My Traeger runs hot (set at 225 occasionally topped out at 280 on my thermoworks smoke (the best suggestion ever)), so how long at a constant 225 is anyone’s guess. I was concerned about a lot of “juice” in the pan, over half the pan depth, and wondered if that was slowing cook time. Because Jeff’s photo didn’t show a lot, and did at the end, I elected to remove most before covering.
I finally removed the briskett at 3:30 pm, at 200 degrees, maybe a little before the perfect touch test, because I wanted the 2 hours rest before the scheduled dinner time. I was a little disappointed with the lack of Jeff’s really pretty smoke ring. Family loved the brisket. I enjoyed it most of the time, did not find it was consistently moist throughout.
Curious; if I wanted to plan this cook during the hours I am normally awake, how would you store and reheat later?
Let it rest in the ice chest wrapped in towels for 8 to 12 hours
My first Boston Butt came off the smoker at 2:00 am. Left it wrapped and also wrapped towels around it, put that baby in a cooler and left it until we ate the next evening…it was still warm. The steam made it all the more moist and tender.
5-Star all the way. Just finished eating and WOW that’s tender and flavorful!! I used the Texas rub and that’s good stuff let me tell ya 👍👍
Jeff, I did this brisket this weekend. Turned out wonderful! Start to finish about 19 hours, 15 on the smoker, removing at 204 and 4 hrs wrapped in paper in a cooler. It was perfect. I left it in the fridge after seasoning for 24 hours. My wife said it was the best tasting brisket she has had. I’ve been smoking for over 20 years and this one is a keeper!
Thanks,
Chris
What size of aluminium pan did you use? I cant seem to find anything that is large enough.
Jake, I get mine at Costco but you can also find them at Sam’s Club, Walmart, Amazon, etc. Look for “Full size pans” and the size will be around 20 inches long, 13 inches wide and 3 inches deep.
If you have a really large brisket, it may lop over the side a bit but as the brisket shrinks while it cooks, it will fit better by the time it starts rendering all of those juices.
You’ll get much better deals by purchasing them in larger quantities (25 or 50 packs).
This is almost exactly like I do mine. I’ve used just Worcestershire and my rub for years. I have tried using the foul pan and what I don’t like about it is that as the juices start to fill the pan they seem to cook the bottom half more quickly and I end up with and un even cook. Any suggestions to keep that from happening?
I also let mine sit for about 15-20 minutes before wrapping as it seems to prevent the meat from continuing to cook while wrapped. Still braises nicely and comes out just as hot when unwrapped but it almost seems to over cook if I wrap immediately. Does that sound right?
Just for clarification – after marinading the brisket, do leave any remaining wooster sauce in the pan when placing the pan in the smoker, or do you drain any excess liquid off?
Have used many of your recipies with great results, have your cook book and your rub recipie.
Don’t drain anything.. just place it right in the smoker.
This reads as if you smoke it with foil on, is that correct or do you remove foil after taking out of fridge overnight?
It goes into a foil pan with the top open and into the fridge overnight. The next morning it stays in the open foil pan and into the smoker. If you do cover the top of the pan with foil during its overnight stay in the fridge, just remove the foil the next morning before it goes into the smoker.
In the open pan, the top and sides get plenty of smoke and the juices along with the “Wooster” sauce stay in the pan and help to keep the brisket moist while it cooks.
At around 165°F (74°C), you can place another pan on top, cover with foil or even wrap in butcher paper if you are so inclined.
First let me say that I am a BIG fan of your site and that I have made several of your recipes with excellent results. This recipe left me with a dry brisket, a first for me. I usually wrap my brisket in aluminum foil and place it in a large sheet pan after it reaches 165. I followed your instructions to the letter and I was surprised to find that virtually no liquid accumulated in the sheet pan. Can you offer any ideas as to what went wrong? Thanks again for all of your contributions.
Did your brisket have a nice fat cap? Fat renders at about 180°F and up so you get most of the juices during the last stage of the cooking process but you definitely should have had some rendered fat. Also, there is a heavy vein of fat that runs between the flat and the point that usually renders and gives you more juice.
I assume you also covered it with foil or another pan once it got to 165°F?
A little inaccurate. Fat starts to render at about 140 degrees. That is about the temp that connective tissue starts to break down. Connective tissue is what makes brisket “chewy”. Brisket is a dance, but you can speed up that dance by getting the temp up faster. Instead of slowly moving the brisket temp up, start with a hotter smoke, get it up to the magical 165 degrees, set your bark. It cuts down on the cooking time dramatically.
I followed the directions to a T, using as big (5 lbs) a brisket as I could fit in my ELECTRIC smoker. Smoked it 10 hours at 225 until it reached 200 degrees internal temp and the toothpick felt right. Kept it in the cooler for 3 hours. It was very good, but still didn’t have the crumble in your mouth texture a good brisket should have. Can you achieve the perfect brisket in an electric smoker? What am I doing wrong?
Been spritzing my brisket with Worcestershire for 20 years!
Ever try using the Pit Barrel Cooker while adopting this method? The interior of the brisket stays quite tender and the vertical smoking assists with even temp and an exterior evenly charred.
Jeff, I have prepared brisket the traditional way in the oven for years . Of course in the oven I cook it in a roasting pan with lots of aromatic veggies, potatoes and some red wine and lots of spices. Cook at 300 for 4-hours and it’s always wonderful.And the best part is the natural gravy it yields.
I have never seen anyone smoke brisket in a roasting pan (foil pan) before, but I’ve always thought of it. I thought that perhaps the big boys didn’t do it because the smoke wouldn’t get to a lot of the meat. But looking at your photos of your wooster brisket it appears that plenty of smoke got to it.
Next brisket I buy will be a wooster brisket.
Larry L
I smoke most of my roasts on a roasting rack inside an aluminum disposable pan. Makes the smoker easier to clean and I dispose of the pan after the dogs clean it out.
I have never tried smoking a brisket in a pan, always on a rack. I definitely will try this method with my next brisket.