Brisket Smoking Tutorial for Dummies
Smoking-Meat.com is supported by its readers. We may earn an affiliate commission at no extra cost to you if you buy through a link on this page.
Read this article without ads
Maybe I'm the dummy, but I have to admit that I've not always turned out perfect briskets (some were barely edible) and with the cost of a whole packer brisket these days, who can afford to buy something that's just going to be another mistake.
I have learned a few things about brisket over the years that I wish someone had shared with me years ago when I first started, so today's your lucky day, and I'm in a mood to share ;-)
Allow me to input, however, that there is absolutely no substitute for practice.
Forget everything you thought you knew about preparing and smoking brisket, and let's jump right into it.
Brisket Smoking Tutorial for Dummies
This is probably the most comprehensive guide that I have written in a newsletter on a single type of meat so don't get blown away. You do not have to read all of it at once and, in fact, you might be able to digest the information better if you read it in several sessions and give yourself time to absorb the information slowly.
Preparation time: 30 minutes
Cook time: 16-20 hours
Smoker temperature: 240°F
Meat Finish temperature: 200°F
Recommended wood: Pecan, Hickory or Oak
I always tell folks, when purchasing meat, to buy the best thing you can afford. With current brisket prices, one feels as if they may have to take out a small loan, but often, you also get what you pay for where brisket is concerned.
If you purchase a low quality brisket, there's only so much you can do to make it turn out wonderful. Part of how it turns out has little to do with you and everything to do with the cow, how it was raised, what it ate, etc.
(Or at least that's how I console myself if I have a brisket failure)
Picking out the perfect brisket starts with making sure you buy a whole packer brisket in the 12-14 lb range. This is the range that has given me the best results.
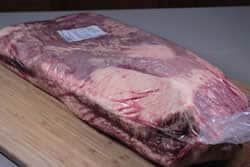
The brisket will have a fat cap on one side that is usually about ½ inch thick or more. If you can find a large one that has a thinner fat cap, then theoretically you are getting more meat for your money.
Less fat weight = more meat weight.
You need the fat cap, but since I usually recommend trimming it down to about ¼ inch, there's no sense in buying more than ¼ inch unless you have to.
Off colors like brown and grey can mean the meat is not as fresh as it should be.
Fat color matters as well, or so I am told by folks better versed in the subject than I am. White or cream-colored fat means the cows were fed corn and other cereals, and it is also likely that they were kept in a smaller area and not allowed to move around so much. Bad for the cow, but good for the consumer as less movement means more marbling of fat and meat that is not as tough.
I have always thought that a brisket that starts out tender will be more likely to end up tender after it is cooked. For this reason, I check the briskets for “bend” in the store before I buy them.
This is sometimes hampered by the tight cryovac packaging, but it helps to at least give you an idea. The briskets that are able to bend the best are considered to have the most potential for ending up tender.
Whether this is actually true or not is left to be determined by the food scientists of the world, but it seems to be a consistent indicator for me, so I continue to use this method faithfully.
Some folks do not trim their briskets at all, no matter what. I recommend leaving about ¼ inch of fat on the top. Any more than that just hinders the smoke and insulates it from the heat, so it is best removed in my opinion.
Use a very sharp knife and don't get too meticulous with it. If it's the first time you've ever trimmed the fat cap, it might look like the cat gnawed on it, and as you get better with practice, it will look more like it was done with a sharp knife in a purposeful fashion.
Sometimes there's a really thick chunk of hard fat between the point and the fat along the side. I usually try to remove a big portion of that if possible.
This is only relevant if you decide to cook the brisket with the fat cap in the UP position and I will talk about that on down the page a bit, but, for now, let's assume that you are.
Years ago when I first started doing briskets, the idea was to just put mustard and rub on the top, sides and bottom and call it good, but I noticed that the rub was getting carried off by the melting fat, and I knew that I either needed to just skip the rub on the fat cap or find a way to help it hold on a little better.
This is when I started scoring the fat cap to give the rub a place to cling to while the fat was melting.
To score the brisket, I simply made cuts in the fat cap all the way down to the meat in a crosshatch pattern with the cuts about ¾ to 1 inch apart. It worked great and the rest is history.
Once the brisket is finished smoking, you will want to slice it across the grain to make it a more tender bite. Remembering which way the grain runs once the rub has created a bark can be an issue if you don't plan ahead.
This is where a notch comes into play. Cut a piece of brisket from the corner that is exactly perpendicular to the grain of the flat side of the brisket. Once the brisket is done cooking, you'll know the direction to cut the slices.
You can still smoke the notch and then throw it into beans, soups, etc.
Some folks like to keep it really simple and just use salt and pepper, but there is so much more than you can do. Brisket is a big piece of meat and it can handle a lot of flavor. Not only can it handle a lot of flavor, it begs for it!
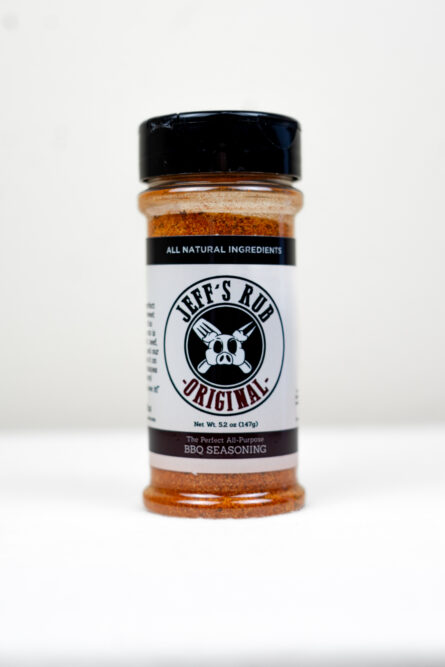
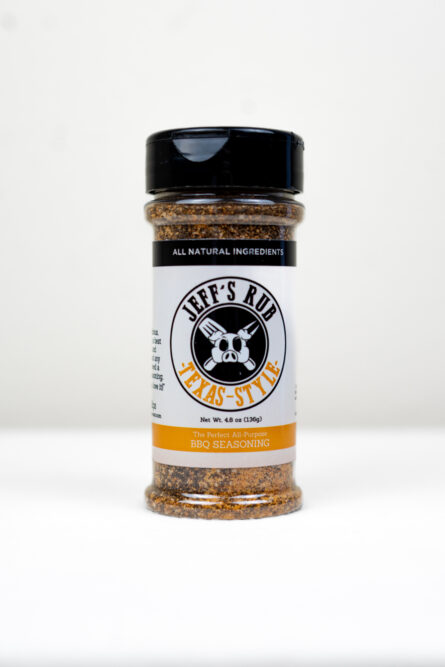
I use my original rub on brisket most of the time, but that's because I like the perfect balance of sweet and spicy, and I think it pairs really well with the beef. If you are a true Texan or just think like a Texan, you might prefer my Texas style rub.
When applying rub, you have two basic options.
- Pour the seasoning onto the meat and hope it sticks. Much of it will fall off when you move the brisket.
- Use something on the brisket that is sticky to help the rub adhere better.
I like option two with yellow mustard as it works really well, does not taste anything like mustard after it is cooked and it's inexpensive.
Apply a good layer of mustard.. get artsy with it if you are so inclined.
Apply the rub and watch it stick like glue.
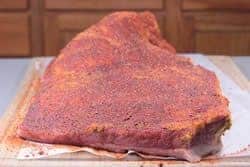
Note: I usually apply the rub on all sides, however, if I am cooking fat cap DOWN, I do not go to the trouble to place rub or mustard on the bottom of the brisket. It just seems unnecessary.
Everyone has an opinion about this and I'll just give you mine. I have cooked them both ways upon many occasions and I can't tell that it makes a huge difference in tenderness, flavor or juiciness. I do it both ways and I even have a method where I flip it back and forth while it cooks.
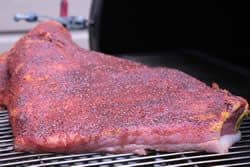
You should try it both ways and see what works best for you.
There's always a caveat, and here's one, if you are using a smoker where there is lots of radiant heat coming straight up from the bottom (think ugly drum smoker with no baffle) and onto whatever you are cooking, then fat cap down is the way to go since it will protect the brisket from the blast of heat and keep it from drying out so bad.
Use a thermometer to test the temperature of the brisket, and even though there is some “feel” involved with knowing exactly when a brisket is done, this is no replacement for knowing the exact temperature.
I highly recommend the thermometers made by Thermoworks as they are proven to be high quality, super durable and highly accurate. I have several of their products, and I have no doubt that I'll still be using all of them 10-20 years from now, probably longer. Buy a good one that's sure to last, and you'll be much happier in the long run.
The Thermoworks Smoke is my favorite dual probe, remote digital thermometer. The probes are left in the meat the entire time it's in the smoker, so you always know what the temperature is. There are (2) probes, so you can monitor two pieces of meat or a piece of meat such as this brisket, as well as monitor the pit temperature.
They also have a gateway that connects this thermometer to your wi-fi system. This, together with an app on your smart phone, allows you to monitor the dual probes even when you are not home. I love going to the store to get supplies and being able to see the temperature of my smoker and the meat I am cooking. That's REALLY sweet!
I won't spend a lot of time on this but I have many people ask me questions regarding how long to apply smoke and my standard answer is that I recommend you apply smoke for at least half of the estimated cook time. This does not apply to wood smokers, since those use wood for fuel and will be creating smoke by default whenever it is in use.
This does not mean that you absolutely have to stop the smoke at the halfway point. This is just what I have found and seems to be the minimum amount of smoke needed to create a good smoke ring and great flavor.
As long as you keep the smoke light, you can apply smoke to brisket for the entire time. You may find that you like only 30 minutes of smoke and that is fine too. You have to figure out some of these things by practicing your craft.
I like to use hickory, pecan or oak on briskets, although, I have also used cherry and even mesquite with excellent results.
In case you are wondering, it is perfectly fine to finish cooking the brisket in the oven at 225°F (107°C) once you are done applying smoke. Be sure to place it in a large foil pan to protect against any leakage issues.
Something happens when briskets hit about 160°F. The temperature just stops going up for a few hours and stalls out. We know that this is a result of liquids pooling on the top of the brisket and the evaporation begins to cool the brisket preventing it from rising in temperature for a while.
You can expect this to happen and most of the time it does. A great way to prevent this and/or to at least speed up the cooking process is to wrap the brisket in foil or butcher paper at about 160°F.
I like butcher paper better than foil as it keeps the brisket crust from getting soggy. This is only an issue if you prefer the crust to be, well, crusty and not soft.
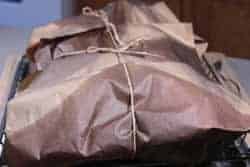
Many folks do not wrap the brisket at all. This is fine and you just have to prepare to be patient as the brisket does its thing. I can't say that foil/paper makes a brisket taste better, as I have not experienced this, but it does reduce some of that stall time.
This can depend on the brisket, and as I mentioned above, there is some “feel” to knowing when a brisket is done, but in my experience, for a super tender brisket, I recommend taking it all the way to at least 200°F (93°C).
When a brisket is done, the meat will not resist a semi-sharp object being pushed into it. I usually check the temperature with a Thermapen and the resistance with which the probe goes into the meat and then comes back out lets me know how close it is to being finished.
It should feel like a knife going into hot butter with almost no resistance at all.
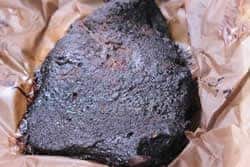
If you did not wrap the brisket while it was cooking, I highly recommend wrapping it and placing it in an insulated cooler for a couple of hours, once it's finished cooking.
I usually wrap in foil or butcher paper then in a couple of old towels and place it down in a insulated picnic cooler. Sometimes I will place more towels on top to help hold in the heat and close the lid. This is also great for traveling with the brisket as long as your are not going more than 3-4 hours away.
The meat will stay hot for 3-4 hours if you need it to. A couple of hours allows the juices to redistribute throughout the brisket.
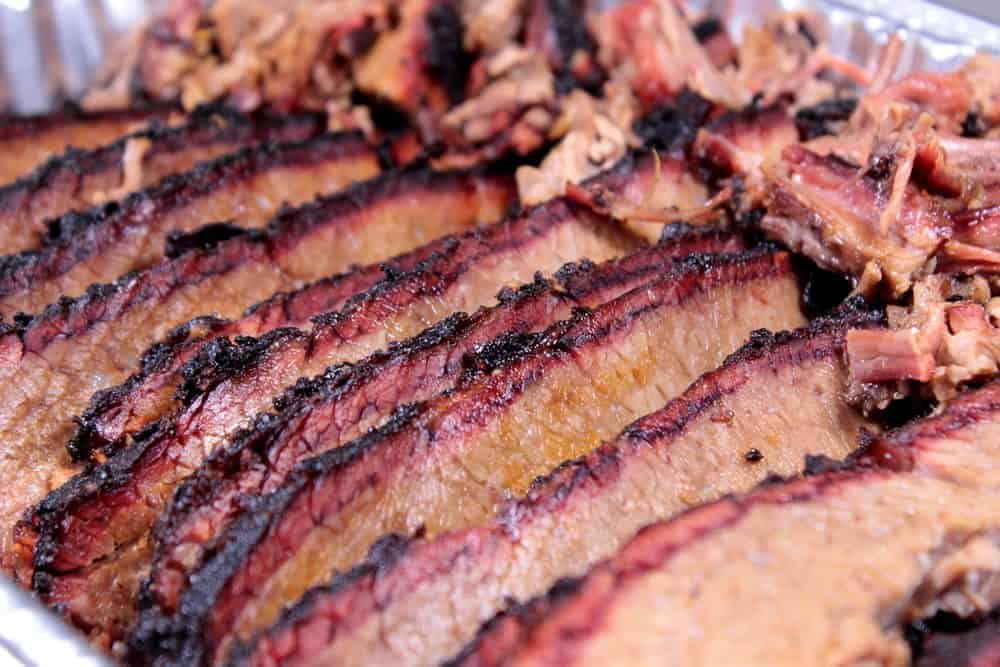
I love brisket almost any way, and this includes chopped as well as sliced. I love to serve chopped brisket if I am making sandwiches. Sliced brisket works great as an entree as well as on a sandwich.
To get ready to slice or chop the meat, I recommend separating the flat from the point. This is done by running a knife along the fat layer right in the center of the two parts. The thicker end (the point) contains a lot more fat and extends into the center of the flat.
I usually cut off the point from the flat, right down through it with it sitting flat on the cutting board. This allows me to see the fat in the center and I can run my knife through it.
The point can then be cubed up, placed back into a pan with added rub and sauce for making burnt ends (I love these). Put the cubes back into the smoker for about 2-3 hours, stirring them around occasionally until they get really nice and caramelized.
The flat should be sliced about ¼ inch thick across the grain. Remember that notch we made earlier so we could tell which way the grain runs? Now you realize how good of an idea that is.
If you have to make a brisket ahead of time and you plan to eat it later, I recommend no more than a couple of days. Go ahead and slice or chop it when it's done and place it in a foil pan with foil over the top.
This way it's ready to heat up in the oven.
Catch some of the brisket juices if possible and pour that over the brisket slices and down into the pan.When it' s time to reheat it, preheat the oven to about 275°F (135°C), and then place the pan with the brisket into the oven.
Total reheat time will be 45-60 minutes most likely but this depends greatly on how cold the brisket is, how much brisket is in the pan, and how tightly it's packed, etc.
You'll have to lift the foil a little and reach in there to feel it when you think it's almost ready or you can check with a thermometer.
With it being in the pan with brisket juices, it will steam and maintain most of its moisture during the reheat. It's also a good idea to reserve some of the brisket juices aside to pour over the brisket just before serving.


First time smoking a brisket. Hesitant on buying a 12lb or greater brisket as my wife does not eat beef and I alone with so much meat. Bought a Morton’s 3.7lb pre seasoned brisket at Aldi. Directions say 2 hours open cook then wrap in foil and cook 4 more hours until a 160 temp is reached and let sit for 30 minutes then serve. Want to create a cardboard platform as read in The Brisket Chronicles and continue to cook it as you have laid out in this tutorial. Why so many variations on the process? Wrap it in butcher paper at 160 and continue cooking or after the stall and wrap at 165 and continue cooking until 200 is reached then put in cooler and let rest for a couple of hours? Using a vertical propane smoker. Before I get a whole packer brisket and ruin it, I thought I would try on a smaller piece of meat for practice. I apologize for the novice question but you have to start somewhere to reach the desired competency you want to achieve.
Everyone has their preferred process but ultimately, that brisket is not going to be tender until it reaches approximately 200°F (93°C) internal temperature. Also the long hours in the smoker serve to break down the tough fibers in the meat.
Wrapping is not required but it does help to hold in the moisture so it doesn’t dry out as much while it cooks.
A smaller brisket will likely be a portion of the flat part of the brisket, which is fairly lean considering its brisket. I would definitely wrap it in butcher paper or foil when it reaches approximately 160°F (71°C) internal temperature. Then continue cooking it until a probe or similar sharp object inserted in the meat gives no resistance. This usually happens at around 200°F (93°C) internal temperature.
Butcher paper and foil are both great for wrapping, however the butcher paper tends to allow the brisket to breathe a little more, and helps to form a better bark while still holding in most of the moisture.
Make sure the butcher paper is unlined, unwaxed and has no coating on it.
Alex,
I think you are confused with the “stall” process and when to wrap as I was when I started thinking you have to watch temp of meat go up and then back down “stall” and then when it hits 160 – 165 again, then wrap. I live in MI and doing this in the winter when temps are 20F is not convenient. I just wrapped when the temperature read 160 and I believe the “stall” occurred while the meat was wrapped. Took meat out at 200 as Jeff indicates and left in cooler for 1.5 hours then sliced and ate. Not sure it is the way it is suppose to be done but it turned out pretty darned good I must admit. Hope that helps and best of luck!
Jeff, I ordered your rub and sauce recipe a few years back and use the rub frequently.
Could I get the recipe for the Texas style rub? Also, I haven’t been able to find your BBQ recipe for quite some time. Could I get another copy of that too?
Have you ever posted about smoking spices? I was given a gift of smoked seasonings from a place called “Up North” and they are located in Minnetonka, MN. I have tried to duplicate it but haven’t had very good results.
Jeff, I bought a Cookshacksmoker about 6 years ago. I found you before my first smoke. Brisket of course. Ordered your rub recipe and away I went. Your helpful hints and step by step instructions are almost fool proof. Thanks for helping my provide amazing smoked meat no matter what’s on the menu! I’m not afraid to try anything new thanks to you. Appreciate you buddy and SMOKE ON!
I have a 19 lb brisket my girlfriend picked up from the butcher by accident instead of a 14-16 lb brisket. I could use some advice on time and temperature for smoking this. I’m using the Masterbuilt 800 gravity smoker. Advice on either trimming or time to cook would be much appreciated. I made my ribs based off your recipe on here and they turned out amazing.
Jeremy, how long it takes to cook a brisket is more about the thickness and less about the weight. We can assume a 19lb brisket is thicker than a 14 pounder but it may not be. It could just be wider/longer.
All in all, most briskets will take about 18 hours if you run a consistent 240°F (116°C) or close to that but they can also get done much sooner than that for no apparent reason.
My Wooster Brisket was a little over 18 pounds and the method I used for that one got it done in around 15 hours.
I have had smaller ones take as much as 18 hours or more.
You can see all of my brisket recipes at: All Brisket Recipes
Super helpful. Since the brisket is different thickness and will cook to different temps, do you cook the thinner section to 200 degrees? I seem to dry out the thinner section if i cook the other side to much.
Thanks
There’s a couple of different ways to handle this.. you can always separate the flat (thinner area) from the point (thicker area on the end) before cooking it. This allows you to cook each part to its perfect done temp from the git-go.
Another way to do it is to cook the brisket to 200°F (93°C) then bring it in and remove the flat from the point. Wrap the flat in foil and let it rest for an hour. The point can be placed directly back onto the smoker until a lot more of the fat has rendered.
You can also make delicious burnt ends by cubing the point into 1-inch pieces and placing them down into a foil pan. Add barbecue sauce and rub and stir them together to coat all sides. Place them back on the smoker for 2-3 hours or until they are fall apart tender and nice and crusty on the outside.
Jeff, I have been following your face book posts for a few years and find them to be absolutely the most important part of learning the art of smoking meat. I have discovered one thing, when stirring up the basic rub. Use Chipotle powder rather than red pepper. It gives the rub a little of the smoke flavor.
Thanks,
Chuck Taylor
Great tip, Chuck! Thank you!
Rookie question. What part of the brisket to you put your temp probe?
Gabe, I usually insert the probe in that transition area between the flat and the point. This gives me an average temperature between the 2 areas, theoretically.
I also take Thermapen readings in the flat and the point a few times during the cook to see how the temps are matching up.
You can insert the. probe top down into the brisket so the end of the probe sits in the relative center or you can push it in from the side so the tip of the probe is in the relative center.
The side probe position gives you the option to flip the brisket over, if desired, without removing the probe.
Jeff,
Your website and rubs are instrumental to my BBQ success. Thank you.
I am prepping to cook my first beef brisket point (6.6#) this weekend.
Question. I worked in an old fashion meat market. We used butcher paper that has a wax type finish on one side that went toward the meat when we wrapped the customers purchase. Is this type of paper appropriate to wrap brisket (great bark) while cooking about 275 deg F to decrease stall time and later while letting the meat rest? Or is there an another brown paper type that is used!
Keep up the great work.
Thank you for the kind words–
The brown paper that is used to wrap briskets while they cook must be free of wax or any coating in order to let it breathe through the paper while still holding in some of that steam. It just produces a better finish on the meat and keeps the bark from getting soft and mushy. The stuff you need can be found at https://www.smoking-meat.com/peach-paper-24 or something similar to that.
Just bought your book and your recipe. I love it so far. I tried my first brisket this past weekend and everything was great but it was dry. When I sliced it, all of the juices came out. I let it rest in foil for 1.5 hours. I noticed in some articles you recommend setting in a cooler for 3-4 hours and then in your book you slice it after it has rest for 30 minutes. What’s is the difference in the two methods? How does each affect the meat? Thank you!
Letting it sit in a cooler for 3-4 hours will further tenderize it however, the main reason for allowing it to rest is to allow the juices to settle down. When the brisket first gets finished, it is near boiling and the juices are under a lot of pressure. During the rest, the meat and juices cool and redistribute throughout the brisket. This way when you cut into it, most of the juices stay in the brisket instead of just draining out quickly.
Usually a 30 minute rest is sufficient but it never hurts to let it rest longer.
Truth of the matter is, some briskets just don’t have enough fat marbling within the meat to keep it moist. For this reason, I usually recommend catching some of the fat juices that render so you can pour that over the meat just before serving.
Thank you so much for the helpful feedback! I will be sure to try it. I am going to make a few more of your recipes this weekend! I really enjoy this book! Thanks again!
Just used this recipe, including placing the brisket wrapped in a cooler after it reached 200 degrees. Served with horseradish sauce, there was none left! Thanks for all the tips
Cooked 5 lb brisket flat for 10hrs. Put in foil after 7. Prepped with an injection of Worcestershire sauce garlic powder and onion powder. Then used your rub and made the BBQ sauce. The sauce had great kick to it. Best brisket ever. Family loved it and great way to start the new year!!
Do you guys/gals spray the brisket with a liquid such as apple juice/cider vinegar during the cooking/smoking process? Also should the water bath be flavored liquids or just plain water, thanks!
Some do and some don’t.. I usually don’t but I have nothing against it. If you spray on something that has a little sugar content to it, it can help create a nice crust over the long cook time.
I use plain water in the pan.
Hi Jeff – love the website and recipes! Question: are your rub and sauce recipes included in your book?
The (2) recipes that I sell on the website and in the newsletter are not included in the book. We have opted to keep them separate since so many people have purchased them prior to the book being published.
I do offer a coupon to book owners for $4 off the purchase of both recipes. Simply send me proof of purchase (amazon invoice, picture of you holding the book, etc.) and I will send you the coupon code.
Marbling of beef comes from genetics , not so much what you feed the animal, nor whether it moves around a lot.
Genetics also plays a part in tenderness of the meat,as well as how young animal is when they are finished.
Young animals have white fat, as they get older the fat will yellow.
Grain fed animals will have finish at a younger age, younger animals will be more tender.
Most beef cattle in Canada and the USA are finished under thirty months of age. Grass -fed cattle will tend to be older when finished.
I don’t know anything about smoking meat, I rely on websites like this. But, I do know abit about cattle.
I have been smoking briskets for the last 4 yrs for my son’s restaurant (he makes a smoked brisket pizza). I take the fat cap off leaving about 1/2 inch of fat on the brisket and then oil and season with a rub I have been working on for several years wrapping in cellophane wrap for 24 to 36 hrs. After allowing the meat to come close to an ambient temp I place in my smoker using hickory logs and plain charcoal with a water bath the whole time. I smoke the meat at 225 to 275 temp for 4 hrs. After that I wrap the meat in
foil and place in a 225 oven (heaven forbid, not going to waste good charcoal on foil) for another 4 hrs with water bath. Do not use a thermometer. My method is to pick up one side of the brisket, if it breaks in half its done, end of story. I do this with 80 to 100 lbs
of brisket at a time. It seems to be a hit because people continue to ask for it.
I’m just a beginner so I’m not sure what you mean by “water bath”. Please elaborate.
Water bath is keeping a pot of water over the coals adding moisture for the full 4 hrs. Watch it close because it will dry up
before you know it. Water should be coming out of the drain hole in the pit along with oils and such.
I’ve cooked many, many briskets and even with my long experience they sometimes are not a s good as my best was.
All the tips above are solid and on point but I cant stress enough three things- don’t over trim, fat is our friend but do trim the hard fat. Its doesn’t render and just gets in the way. Also take it out as soon as it hits 198-200F and let it rest for at least an hour or two.